KINPASS Partner Handbook
Mobile app · phone & iPad

How to use the KINPASS Partner app, one task at a time.

Each topic below is a single task, laid out in the order you'd actually do it. Every step pairs a screenshot with a short instruction — the button or field to tap is boxed in red.

First time here

How to sign in

Sign in with your partner account

Open the app and type the email and password KINPASS set up for your business.

Forgot your password? Tap “Forgot password?” below the Sign in button. It opens a page in your browser to reset it.
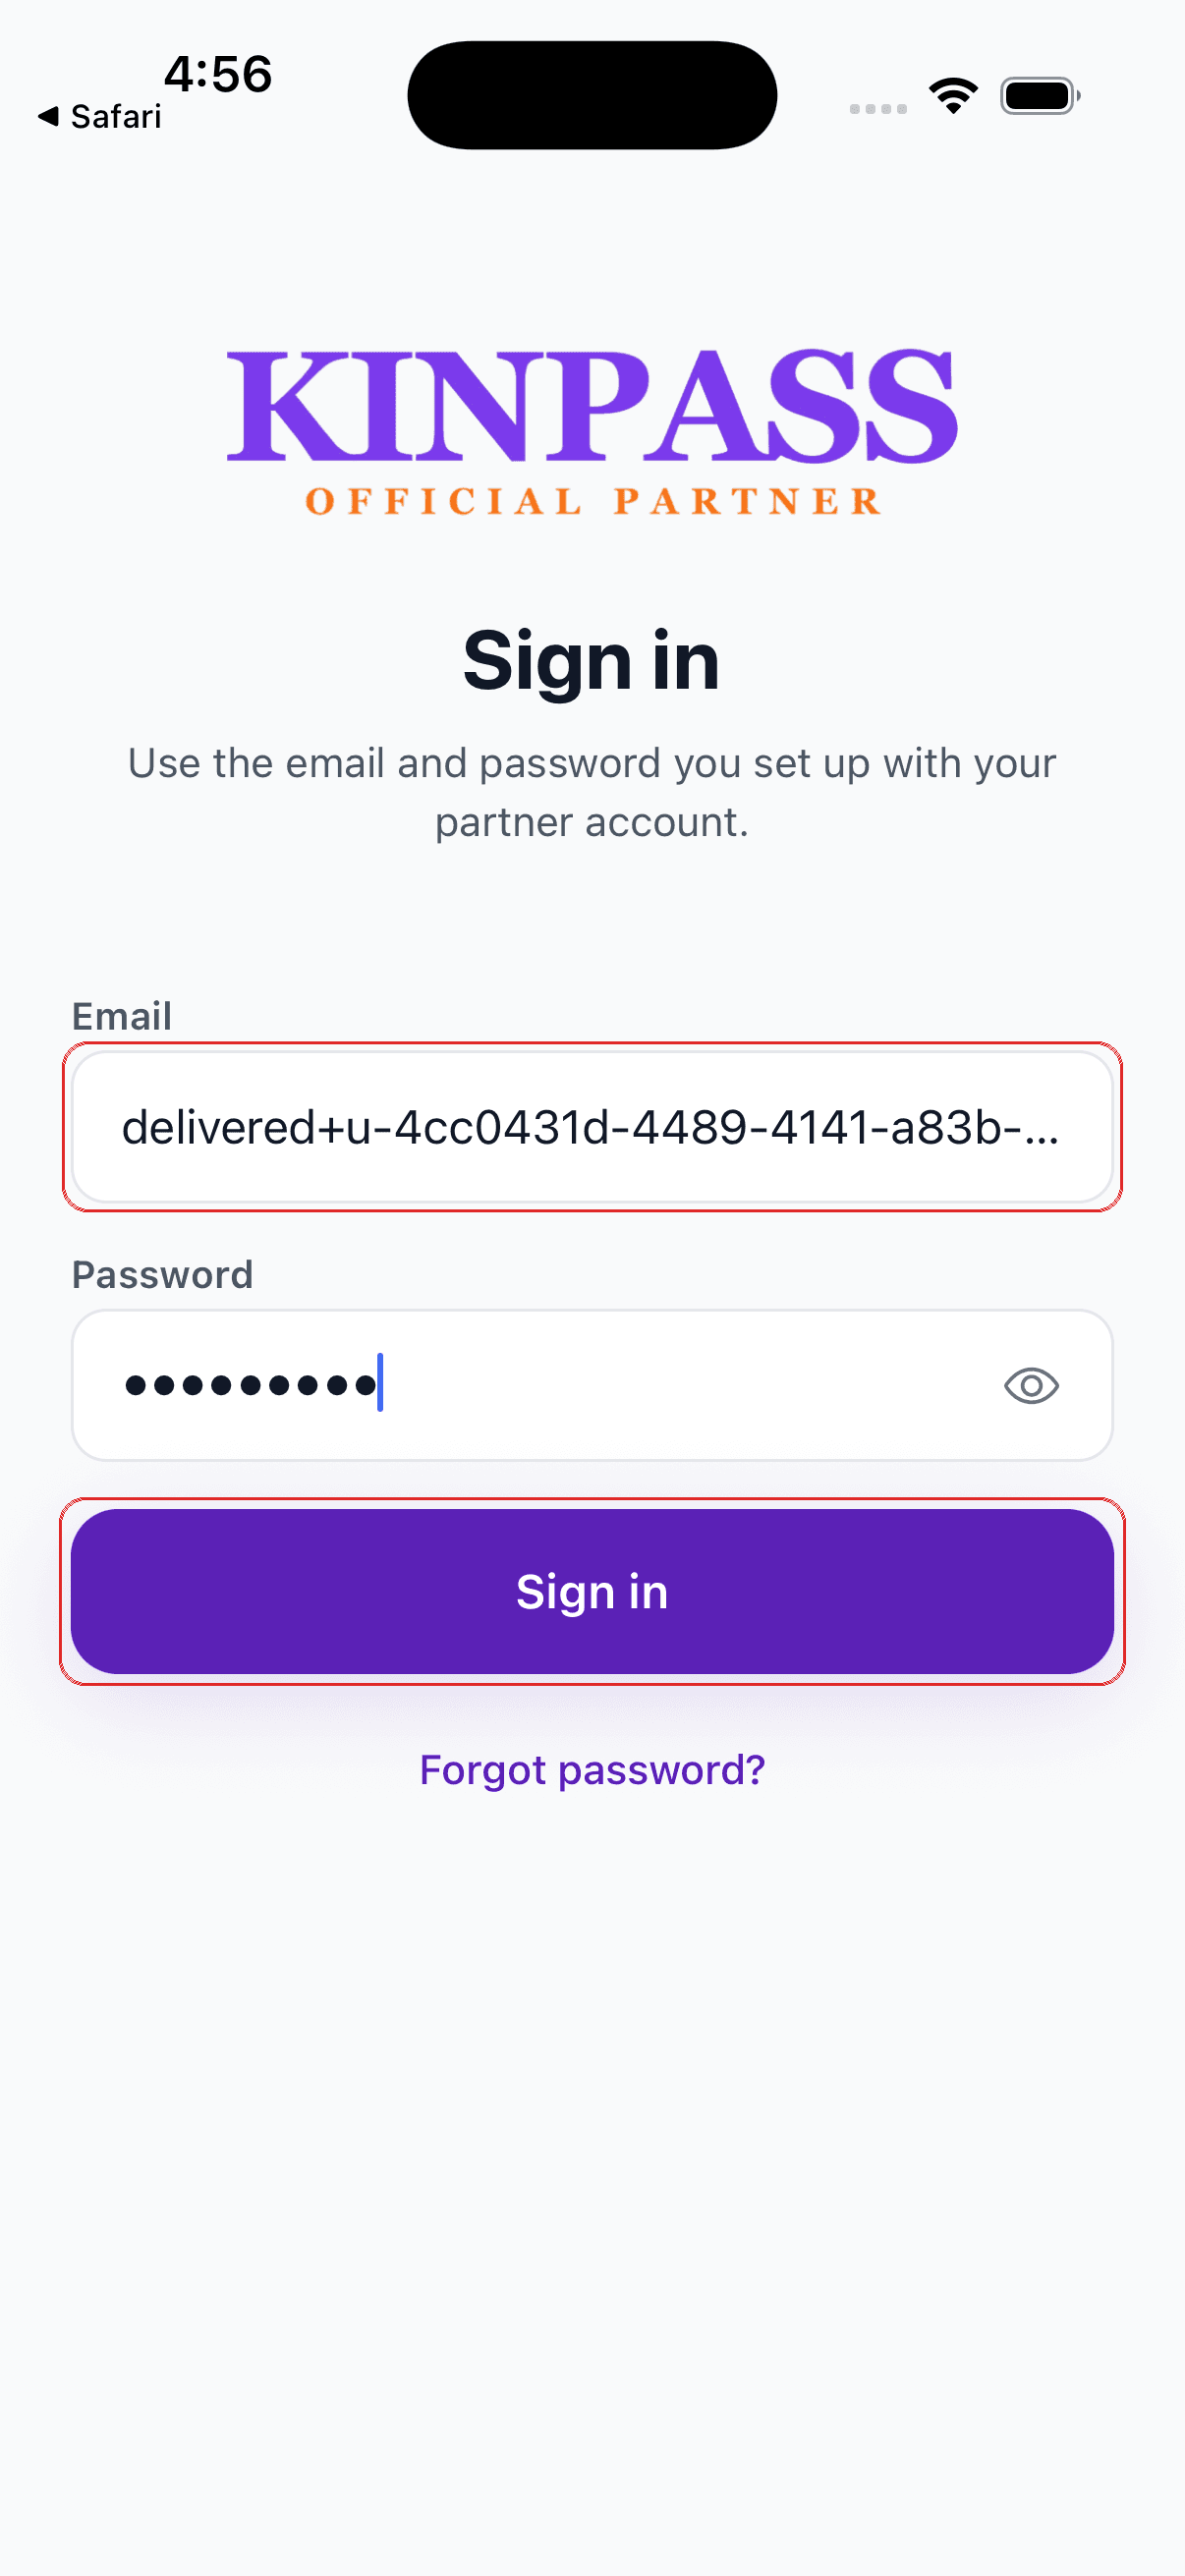
Boxed in red: type your email, then your password, then press Sign in.
Sign in screen with email and password fields and the Sign in button boxed in red
How to find your way around

Everything lives in five tabs

  • Home is today's classes.
  • Schedule is the week and month ahead.
  • Scan checks people in with the camera.
  • Notification is anything needing your attention.
  • Profile holds branches, reviews, and earnings.

You can reach every task below from one of those five.
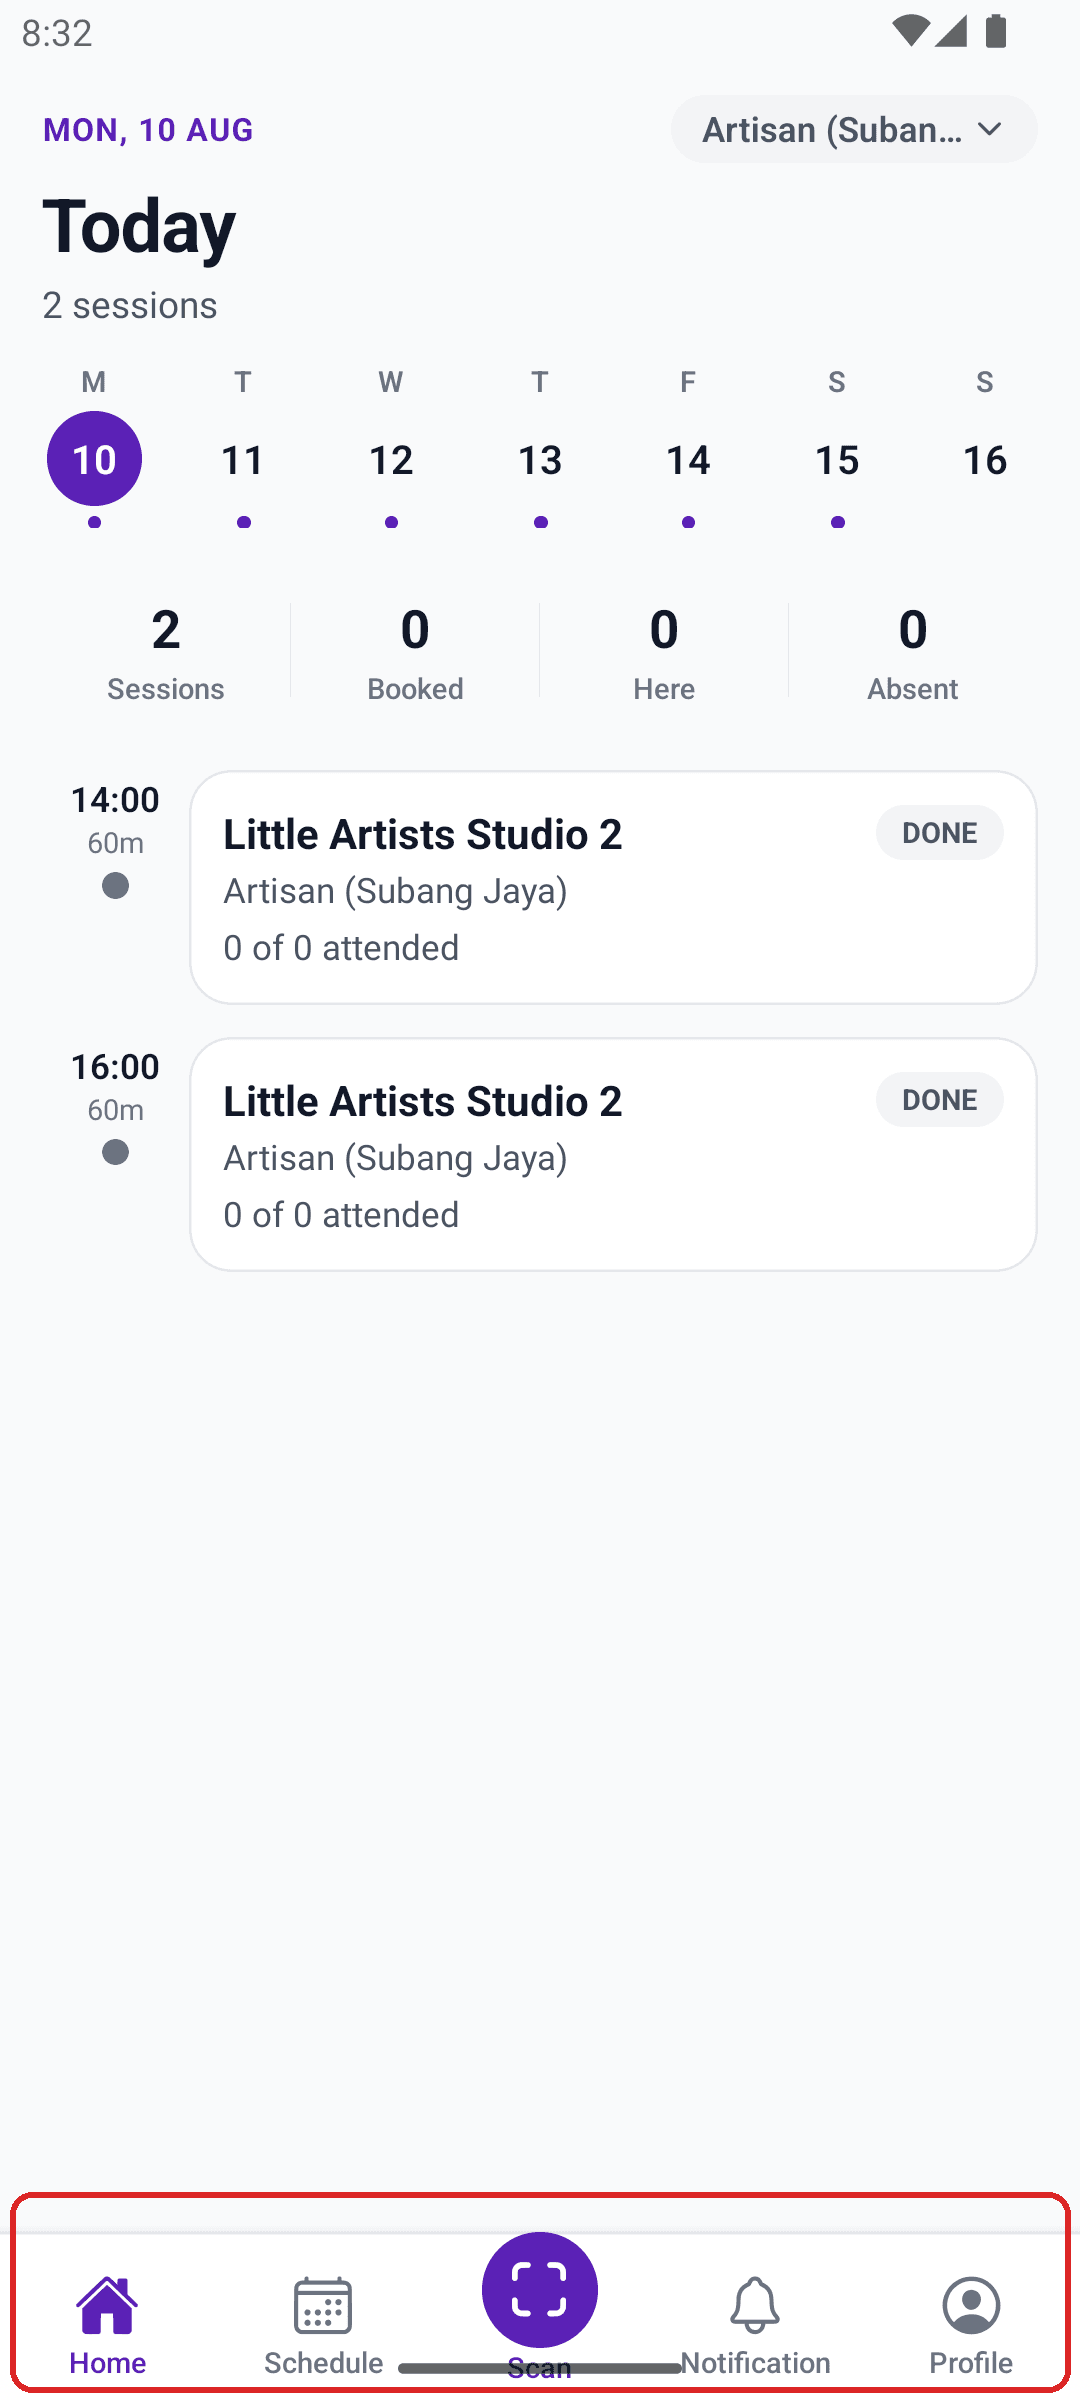
Boxed in red: the bar at the bottom of every screen — Home, Schedule, Scan, Notification, Profile.
Today screen with the five-tab bottom bar boxed in red

Every class

How to check today's classes

See what's running today

Tap Home. You land on Today: every class happening today, how many kids are booked, and how many have checked in.

The row of numbers under the dates is your day at a glance — sessions, booked, here, absent.
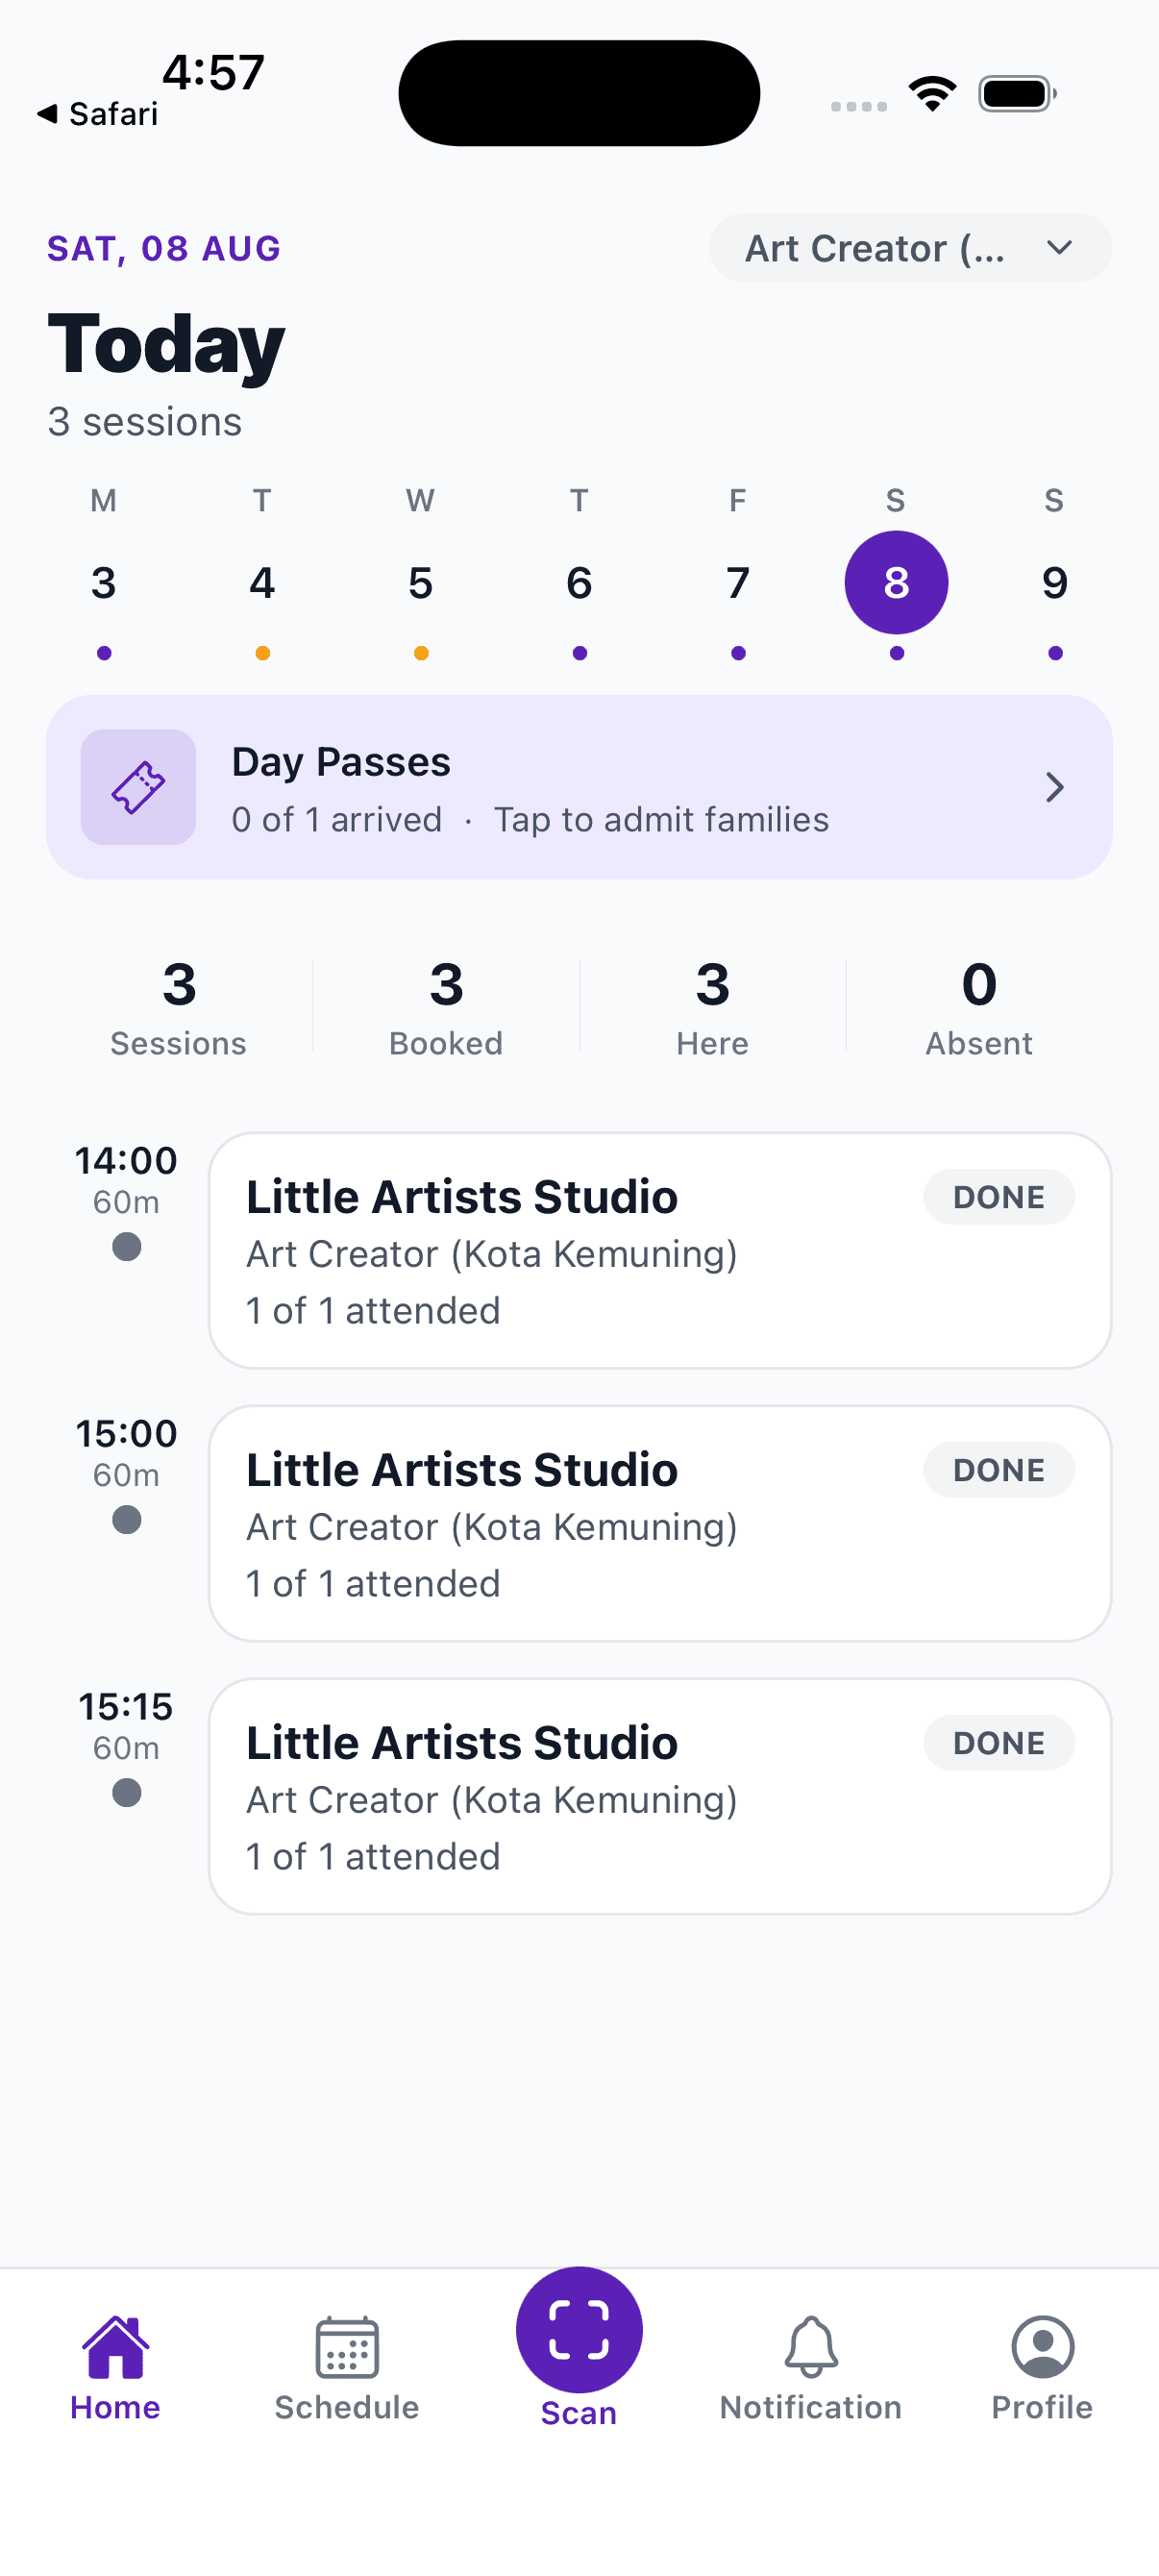
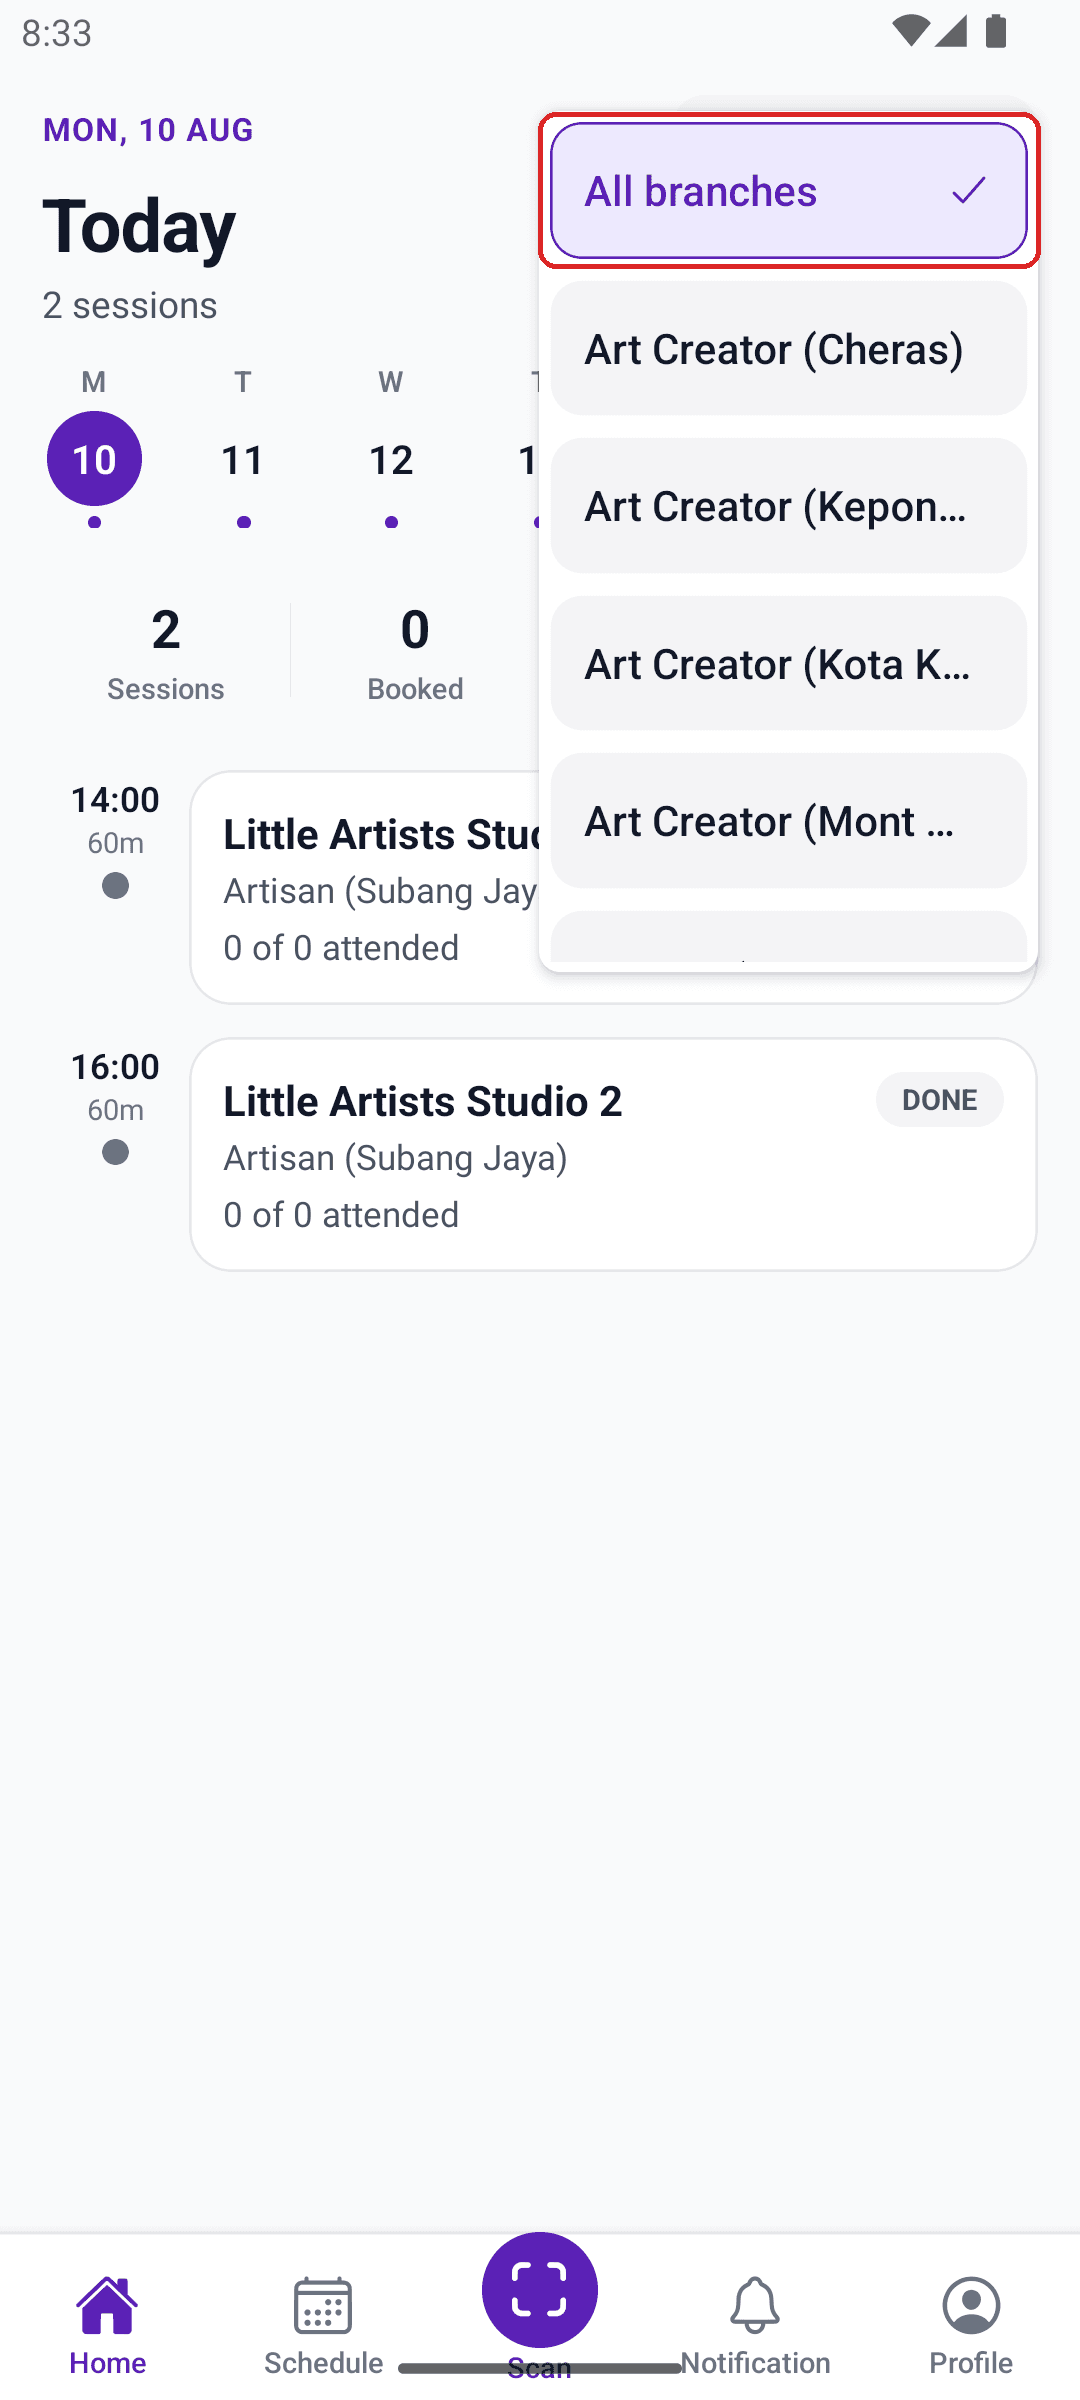
Boxed in red: “All branches” shows every location at once — pick a single branch to narrow the list. This also filters Schedule, so switch back if a class goes missing.
Today screen showing the Day Passes card and the day's classes listed underneath
Home opens on Today — every class, in time order.
Branch picker dropdown open on the Today screen with All branches boxed in red
More than one branch? Switch with the pill at the top right.
How to open a class

Tap a class to see who's booked

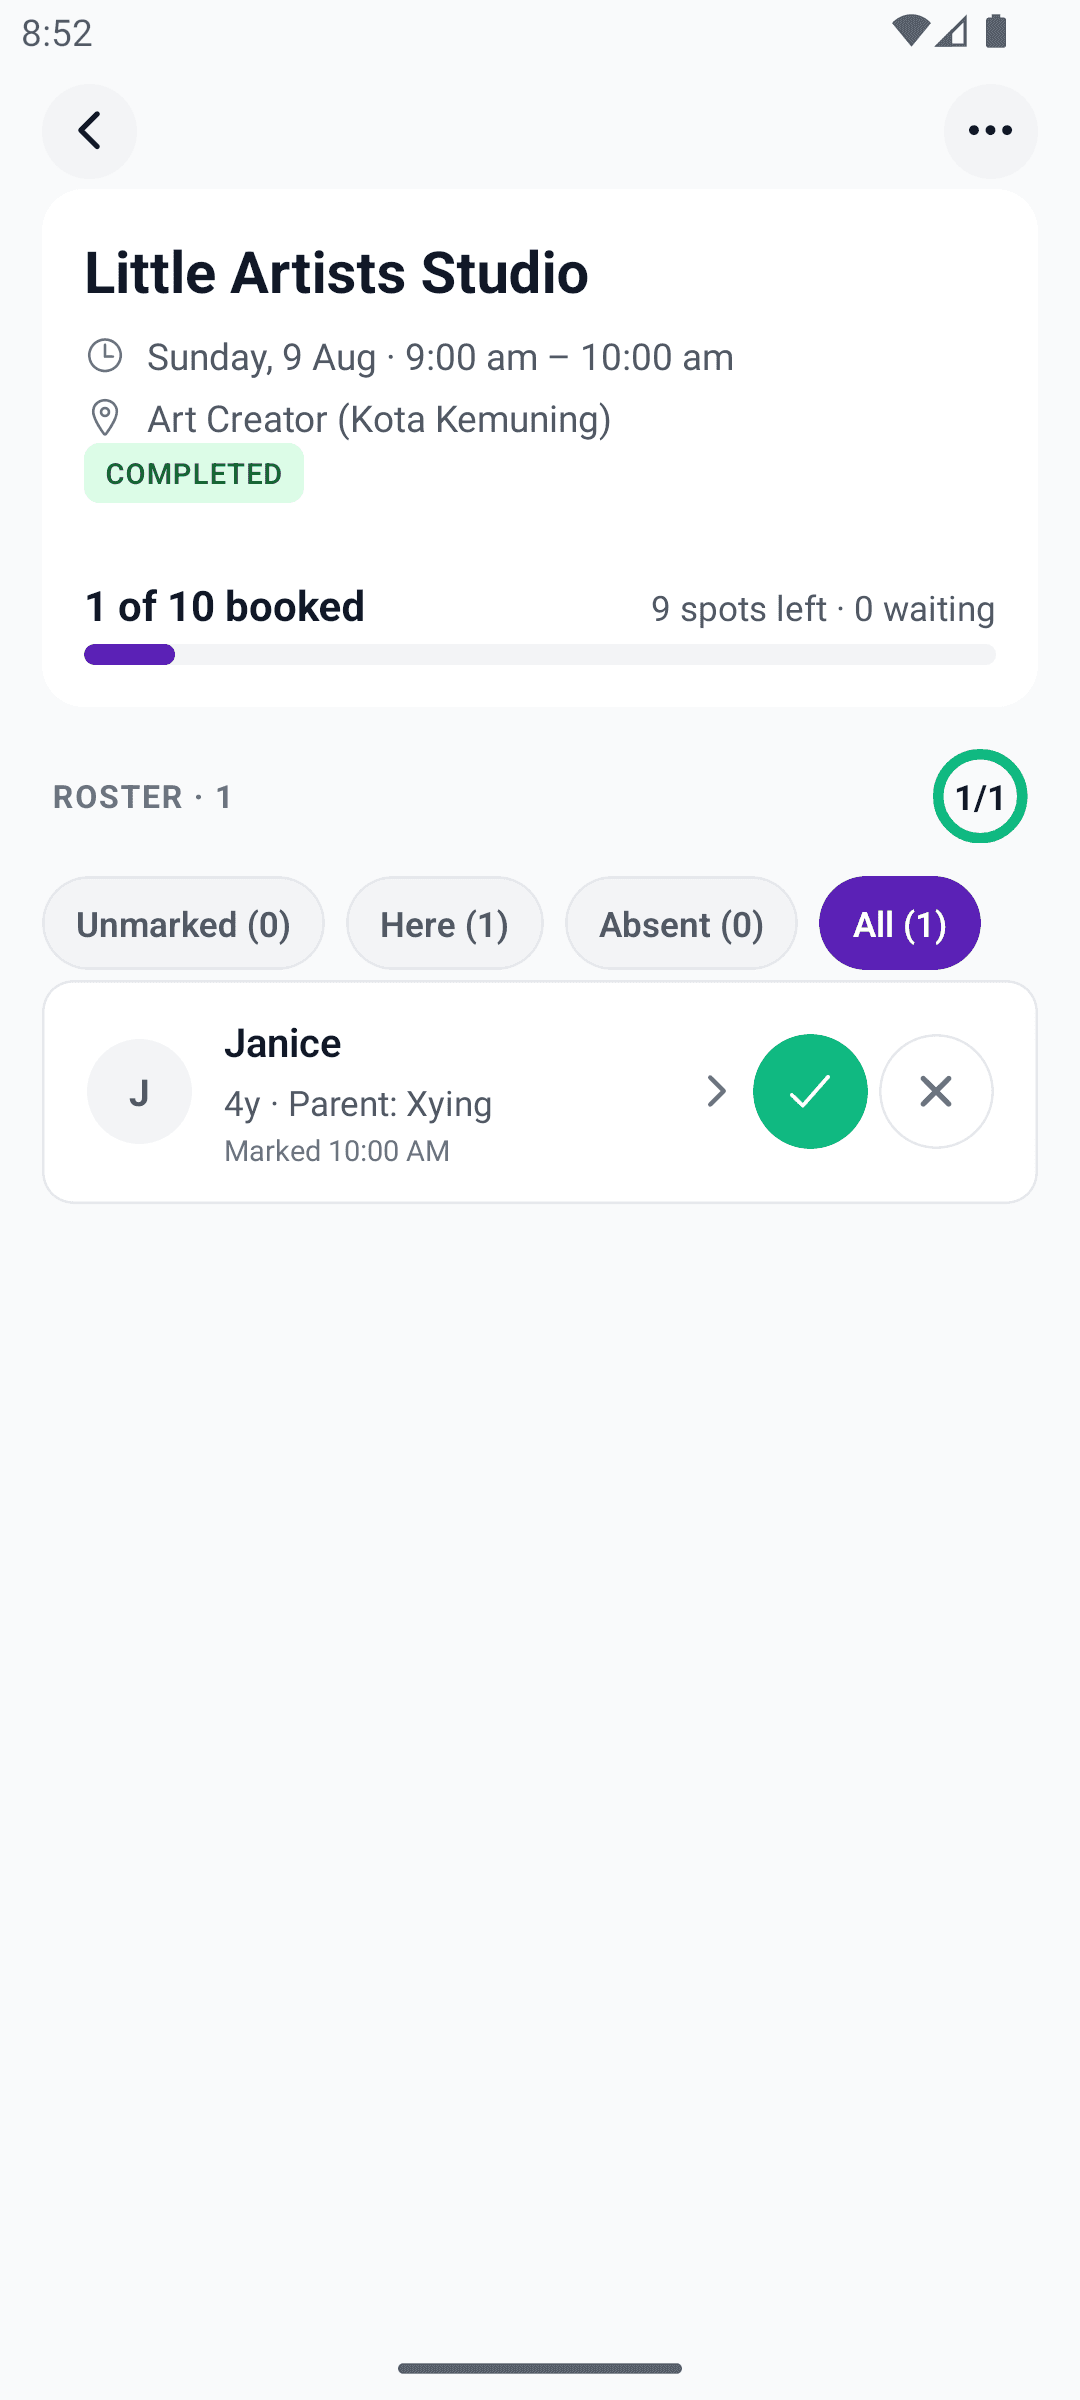
The class screen shows the time, branch, how many spots are booked, and every child on the roster.

This is your starting point for marking attendance, checking a child's emergency contact, and flagging an issue.
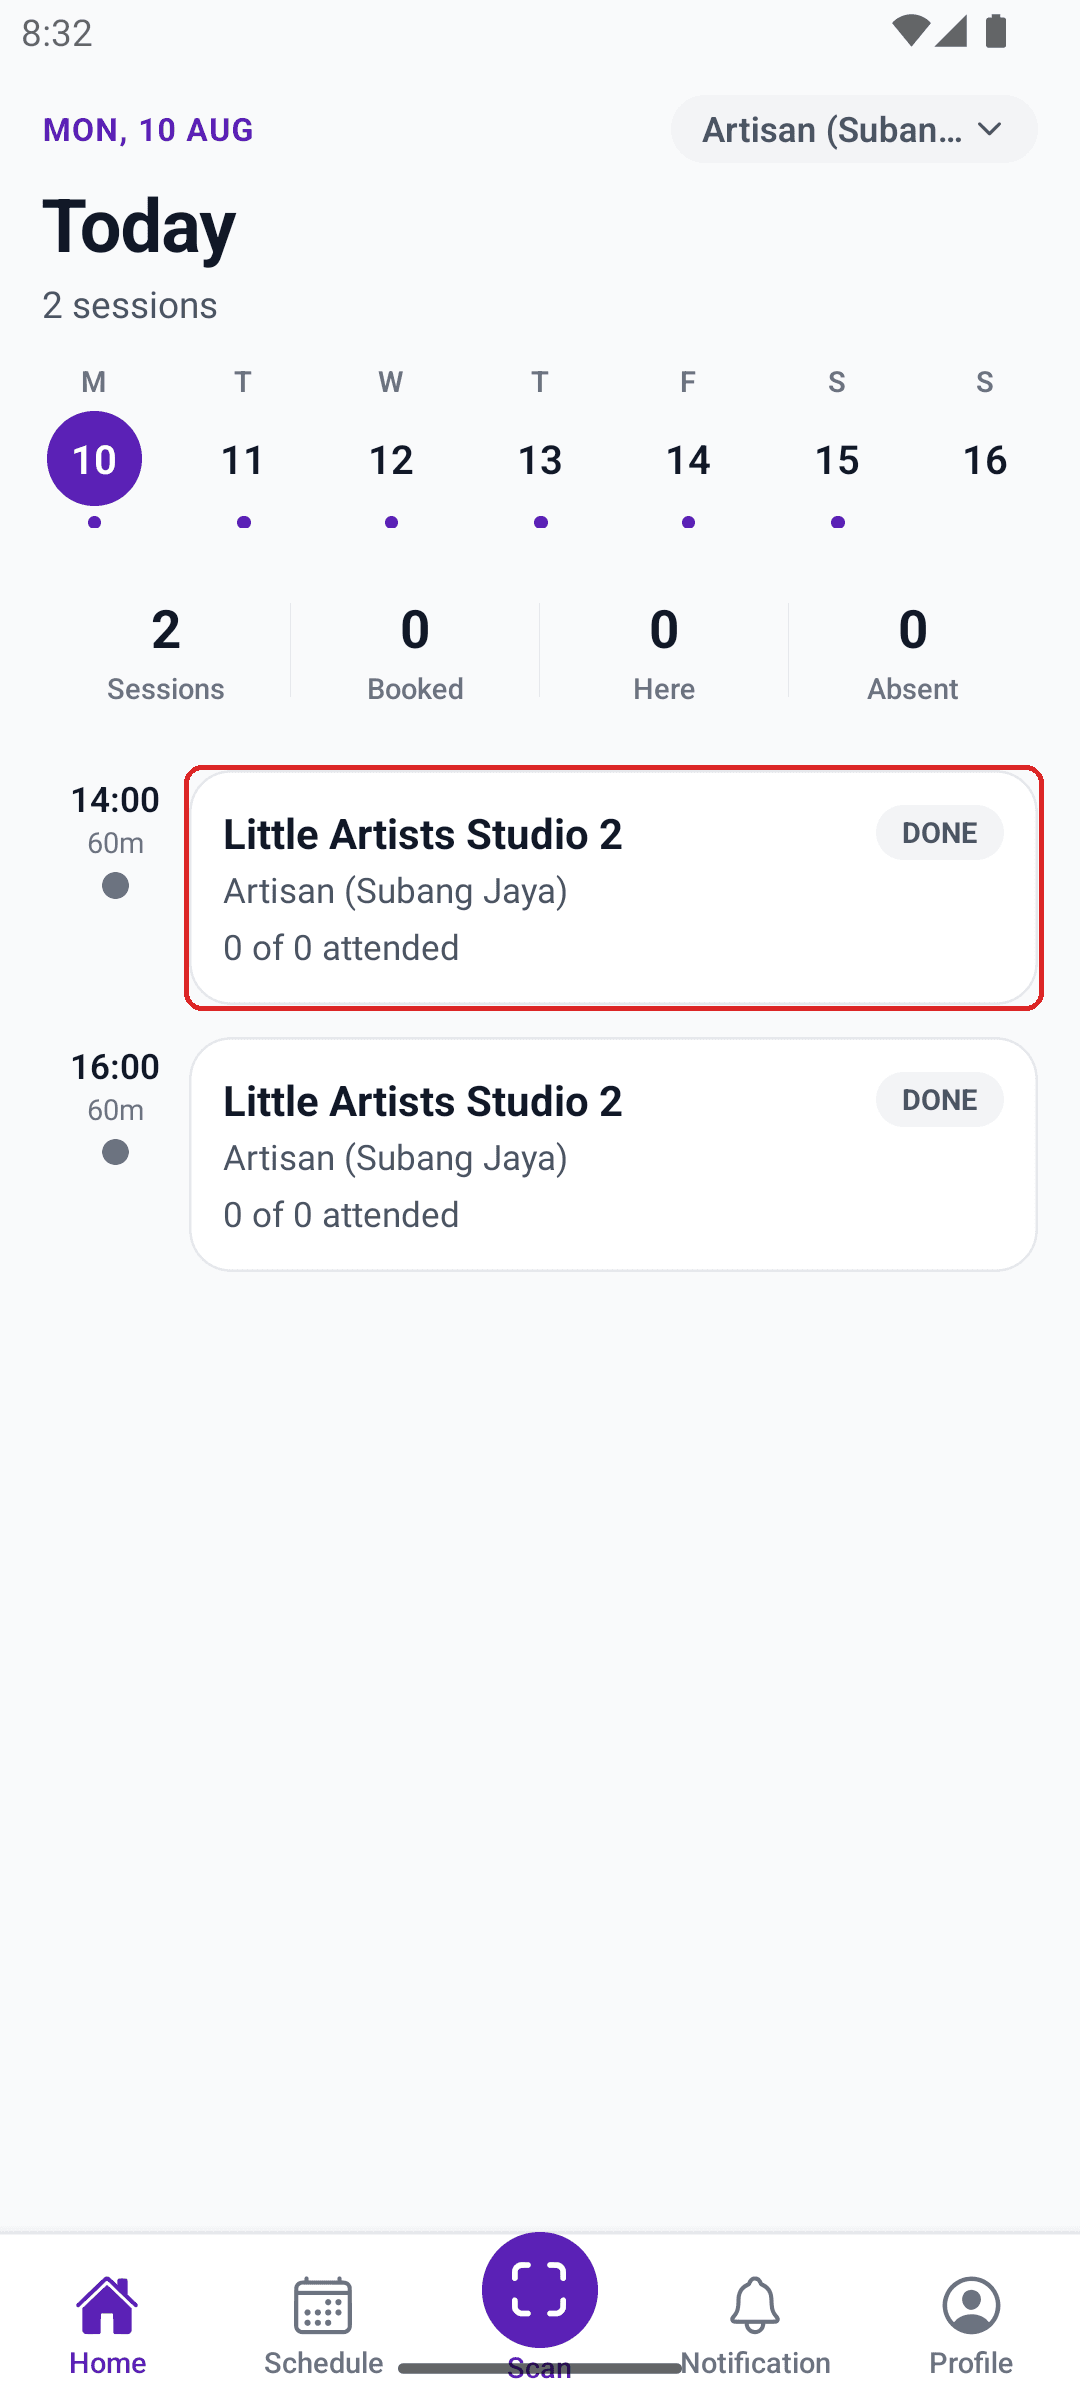
Boxed in red: tap anywhere on the class card. It works the same from Today or from Schedule.
Today screen with a class card boxed in red
1. Tap the class card on Today or Schedule.
Session detail screen showing time, branch, spots booked, and the roster of children
2. The class opens with its roster underneath.

Mark attendance — three ways

Same job, three routes. Tick the roster if you have the class list in front of you. Scan if the parent has their phone out. Type the code if the camera won't cooperate.

How to mark attendance — A. Tick the roster

Tap the tick or the cross next to each name

Open today's class, find the child in the roster, then tap the green tick if they came or the cross if they didn't.

Attendance only opens shortly before the class starts — if the buttons look grey, it's too early to mark them yet.
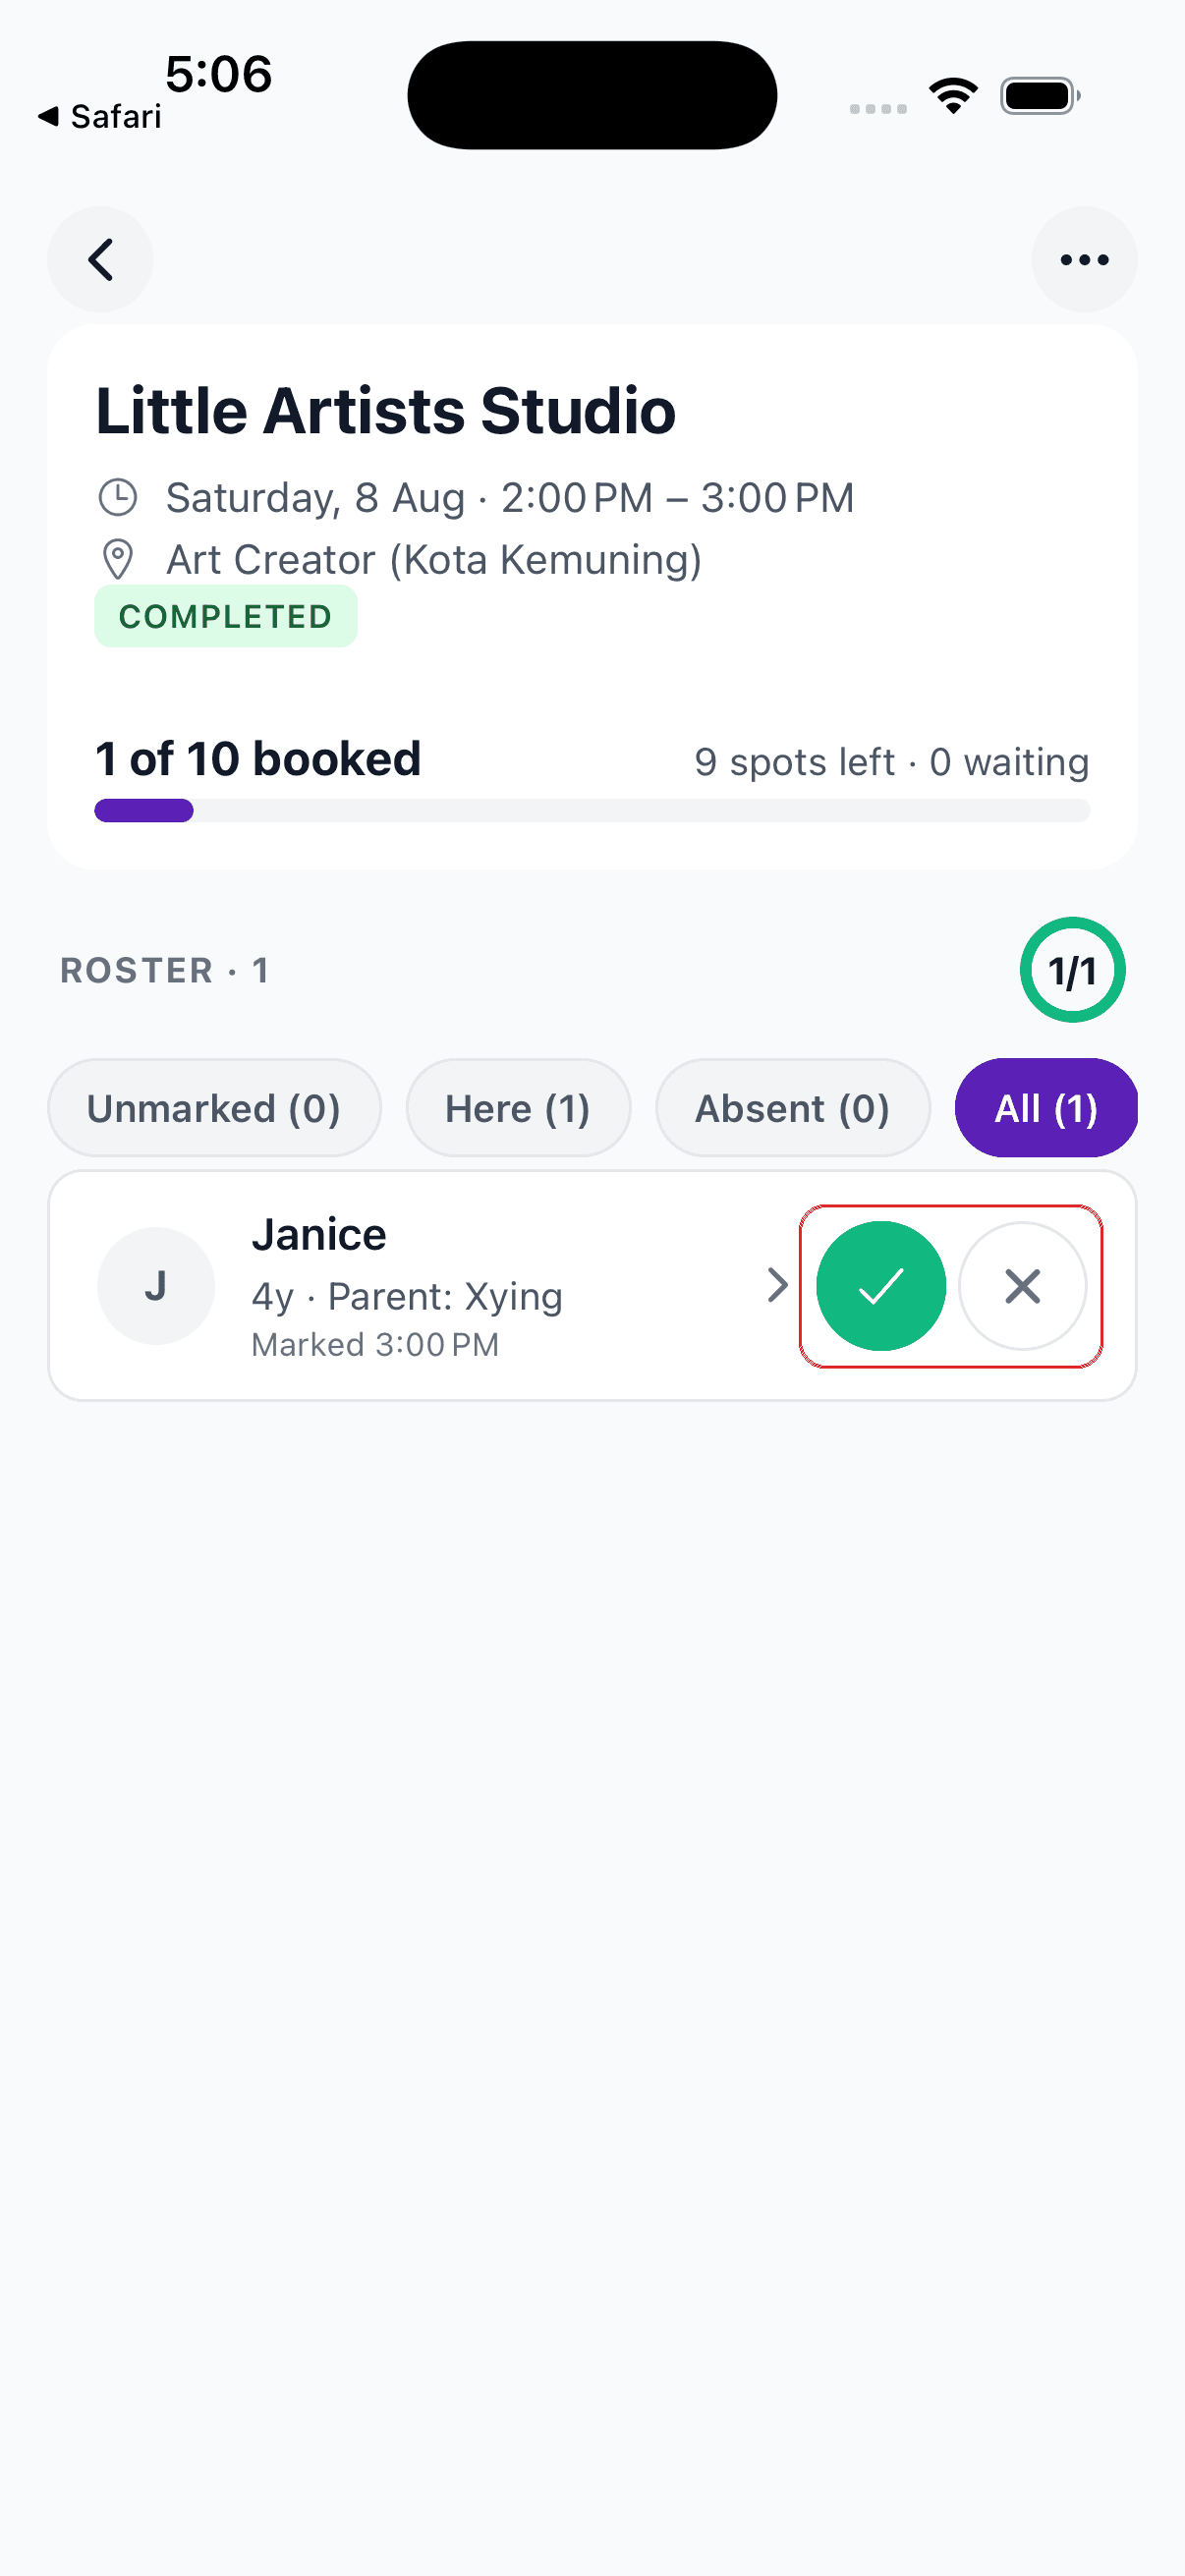
Boxed in red: these two buttons decide if the family gets charged for the class — double-check the name before tapping.
Class roster with a child's name and the attendance tick and cross buttons boxed in red
How to mark attendance — B. Scan a QR code

Scan the code on the parent's phone

Tap Scan in the middle of the bottom bar, then hold the camera over the QR code on the parent's phone.

For a day pass, one scan checks in the whole group — parents and kids together. For a class booking, scanning checks in just the child.
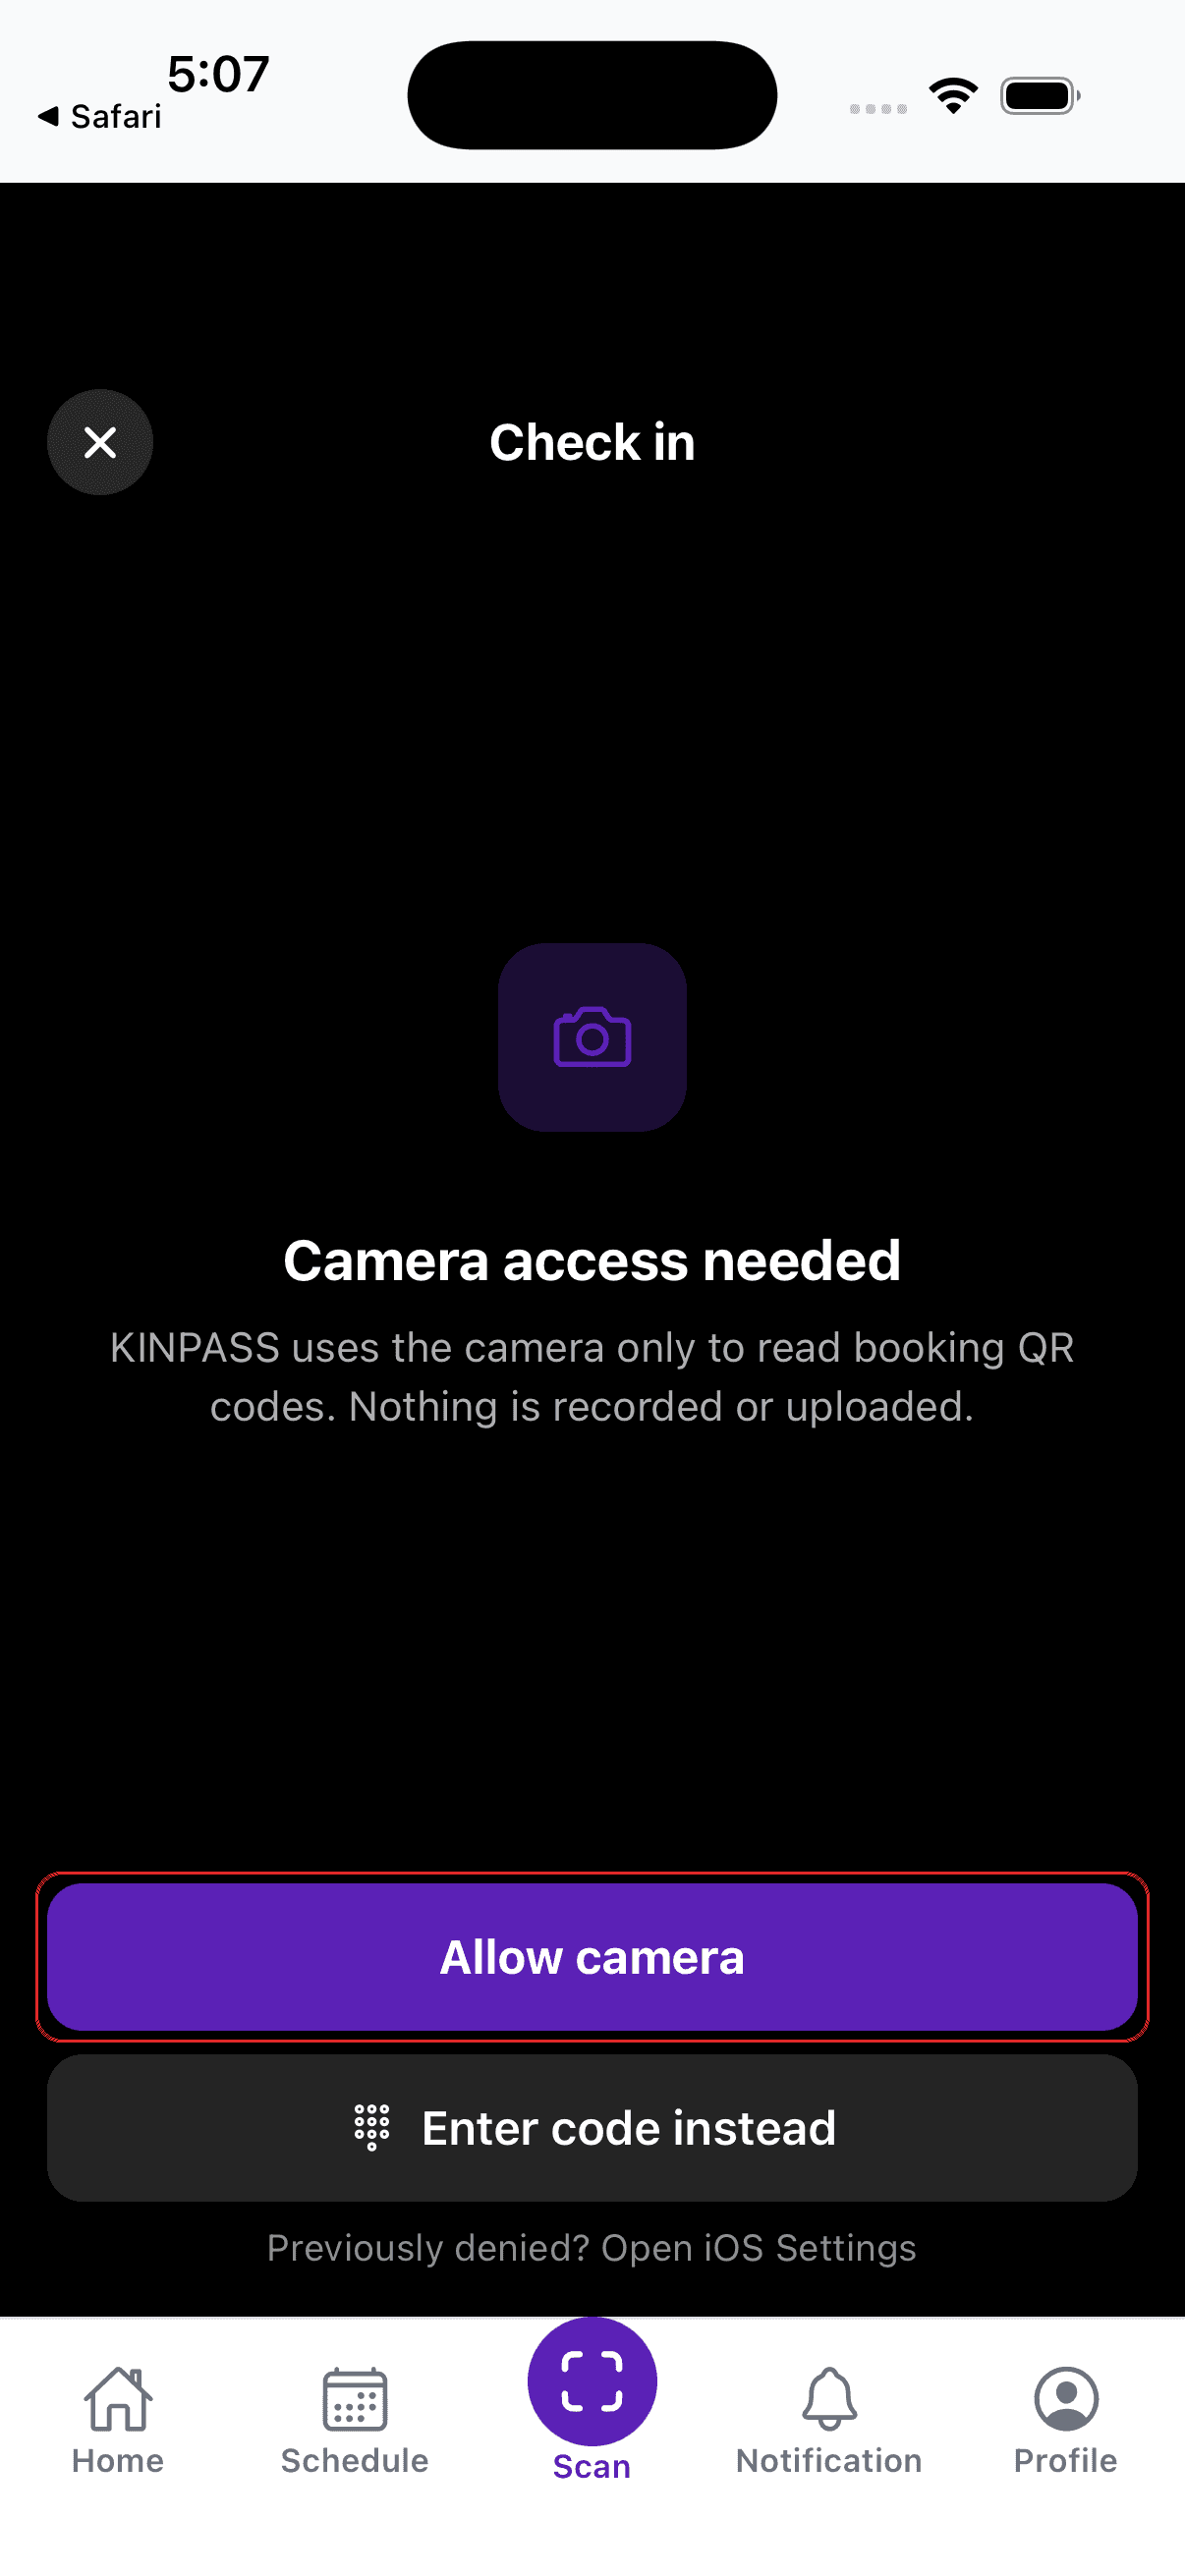
Notes: KINPASS only uses the camera to read booking QR codes — nothing is recorded or uploaded.
Scan tab asking for camera access, with the Allow camera button boxed in red
The first time only — tap Allow camera.
How to mark attendance — C. Type a code

No camera? Type the check-in code

Use this when the camera won't focus, the light is bad, or the parent can only read the code out to you.

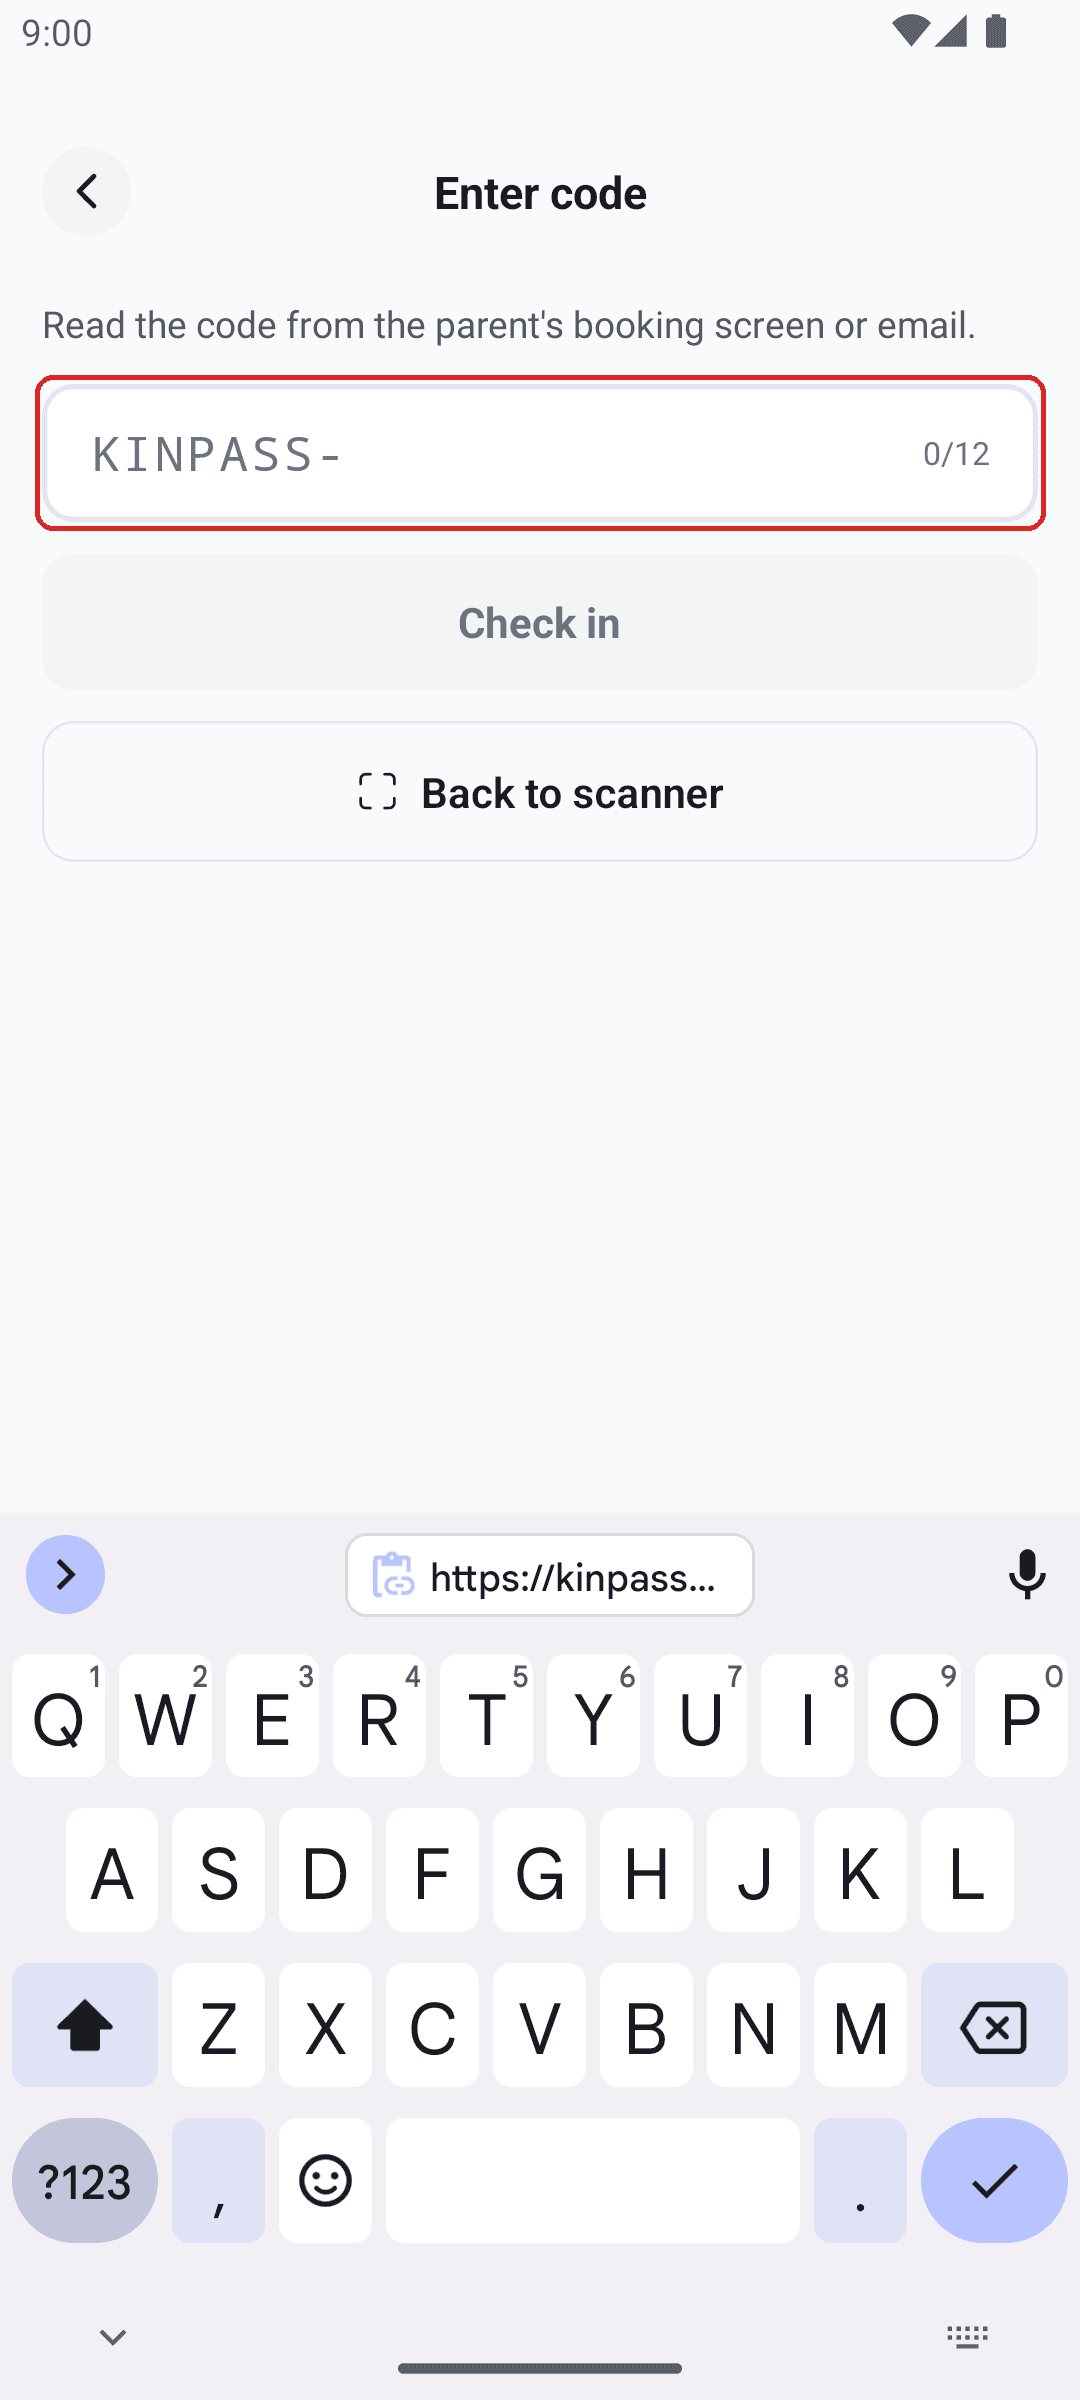
Every code starts with KINPASS- and is 12 characters long.
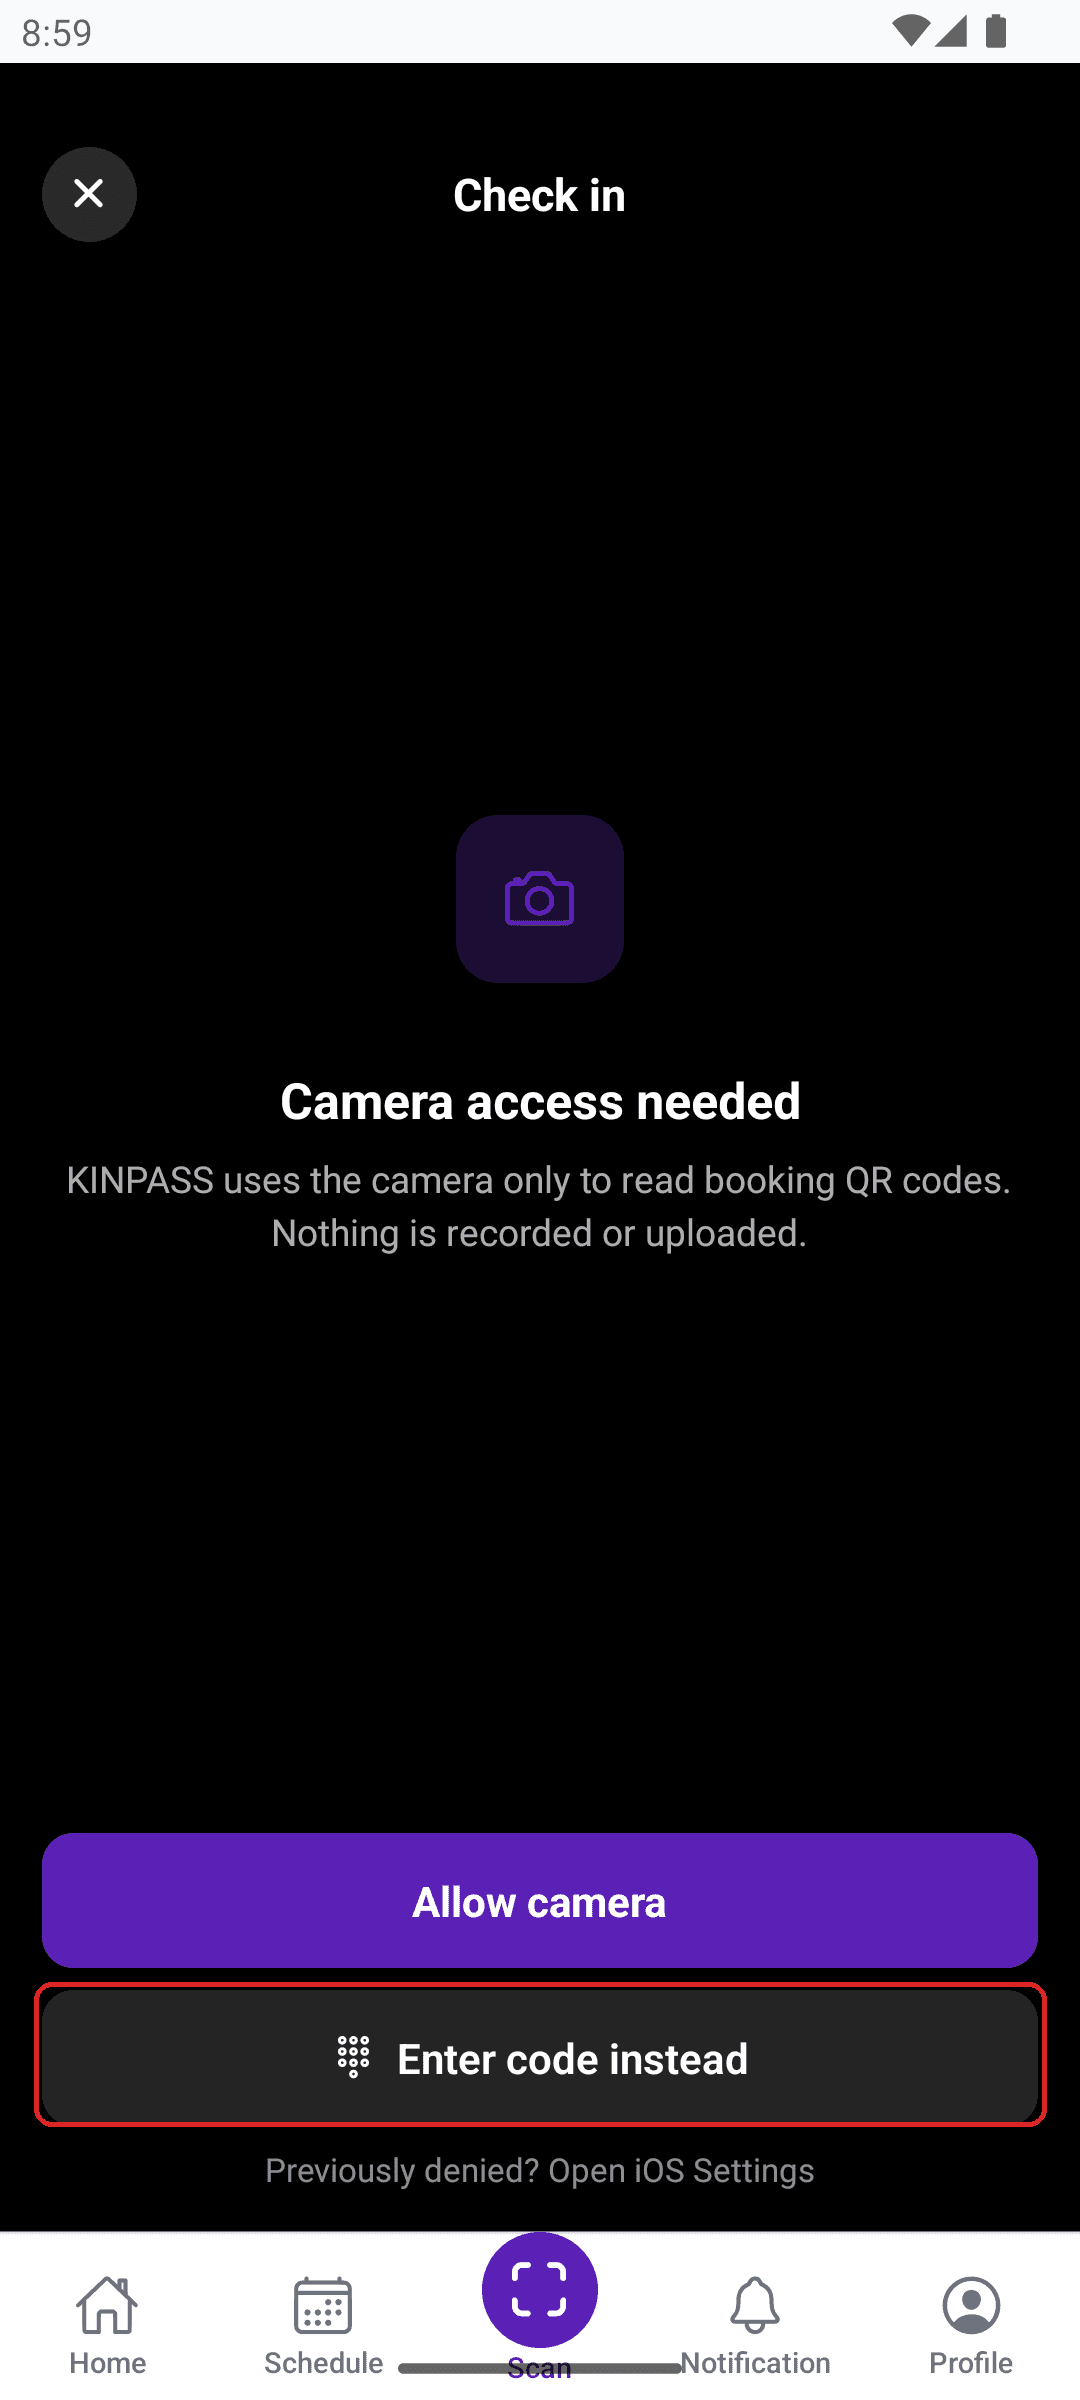
Boxed in red: type or paste the code the parent reads out from their booking screen, then tap Check in.
Camera screen with the Enter code instead button boxed in red
1. Tap “Enter code instead” on the camera screen.
Enter code screen with the KINPASS code field boxed in red
2. Type the code, then tap Check in.

When something comes up

How to look up a child's emergency contact

Tap a name for their safety details

Their card shows age, emergency contact, parent contact, and how many classes they've attended with you.
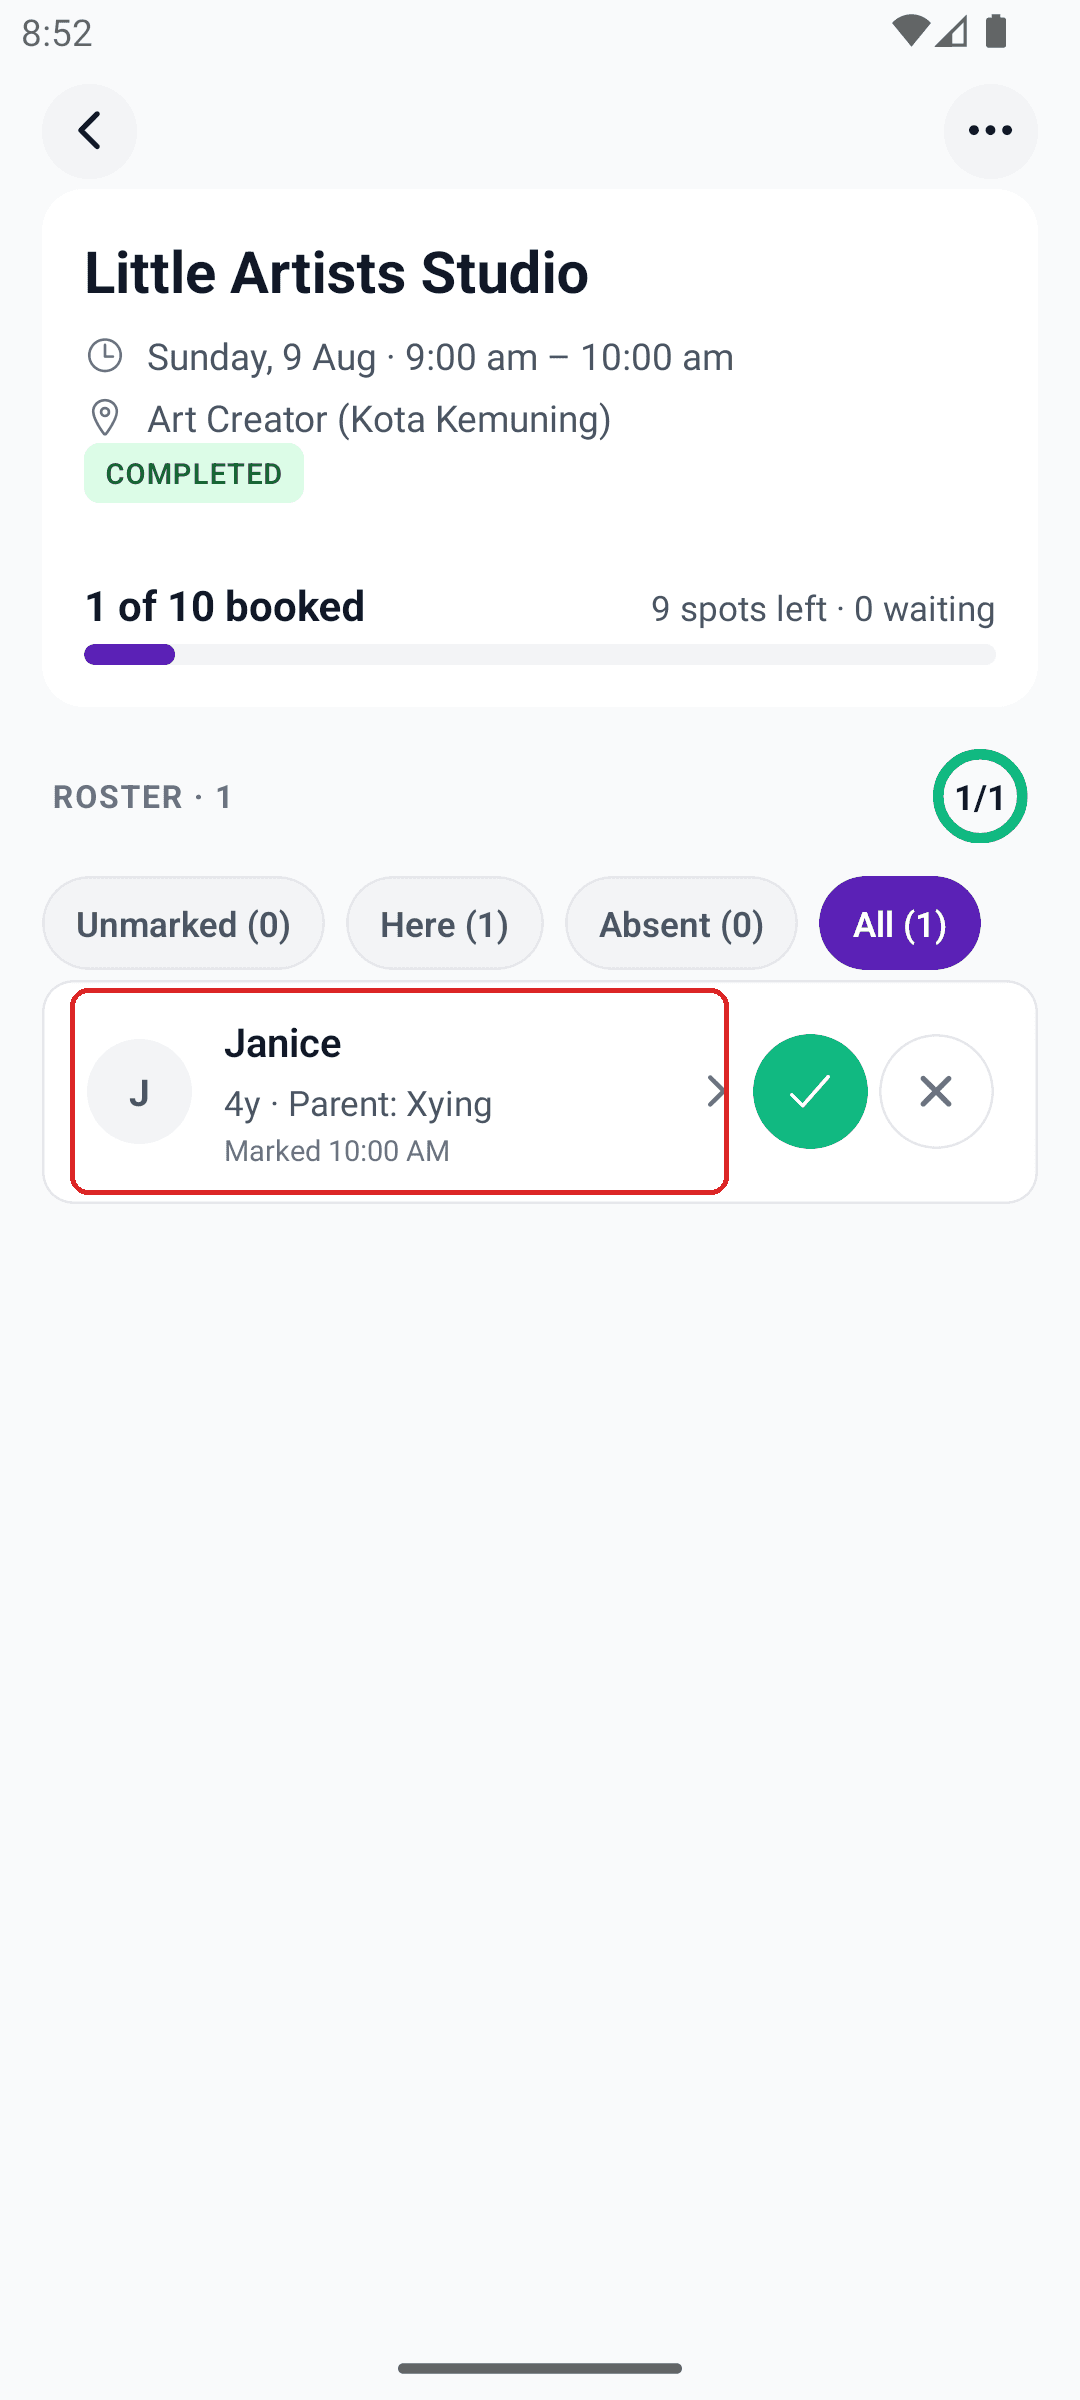
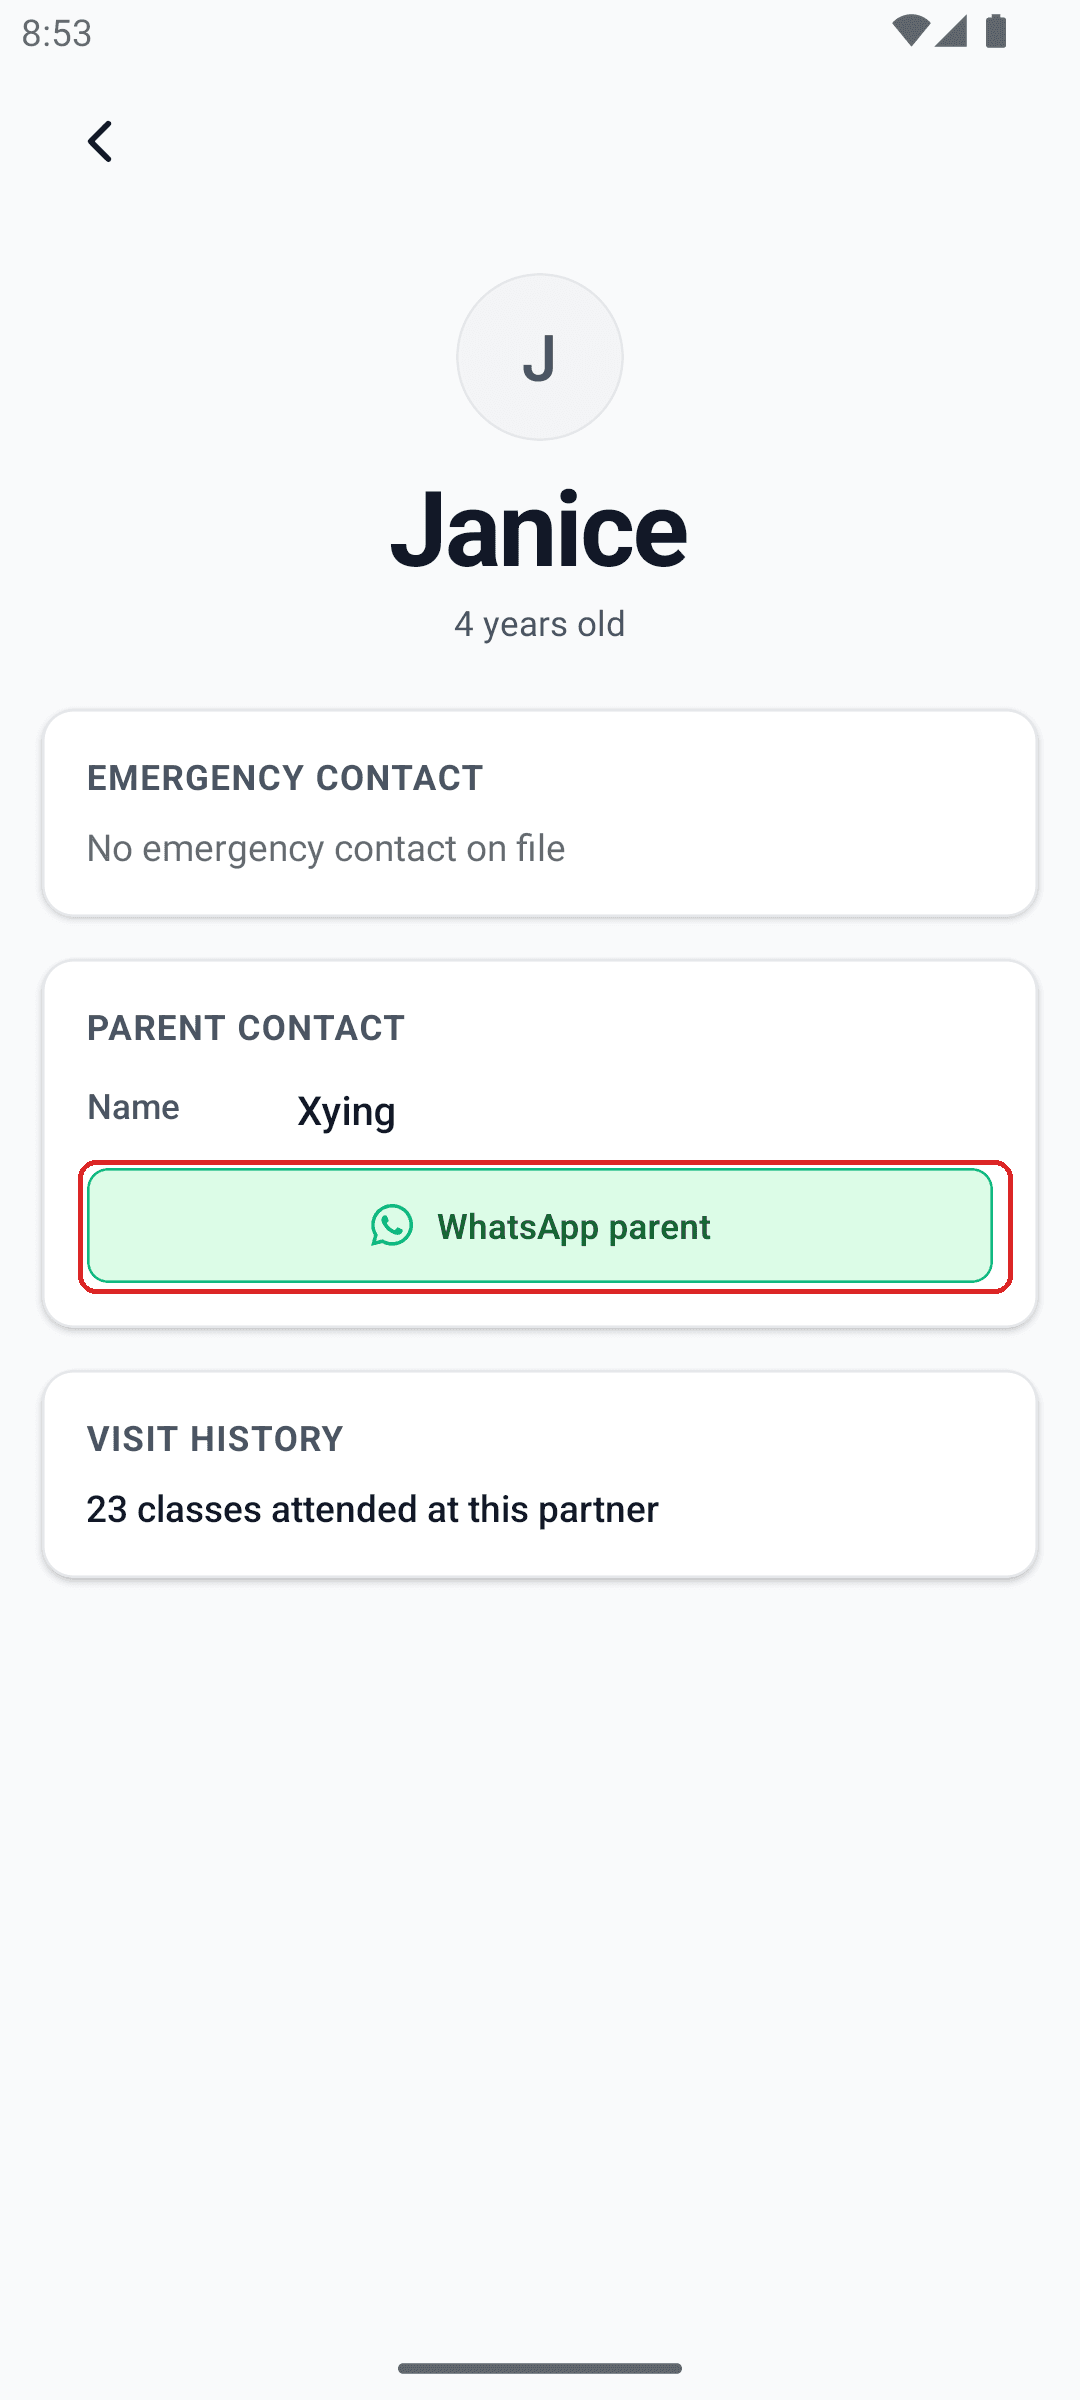
Boxed in red: tap the child's name to open their card, then WhatsApp parent to message them directly.
Class roster with a child's name and details boxed in red, separate from the attendance tick and cross buttons
1. Tap the child's name, not the tick or cross.
Child detail screen showing emergency contact, parent contact, and the WhatsApp parent button boxed in red
2. Their card opens — tap WhatsApp parent to message.
How to flag an issue

Report an injury, incident, or concern

Flagging from inside the class fills in the class details for you. You can also start one from Profile → Flag Issue.

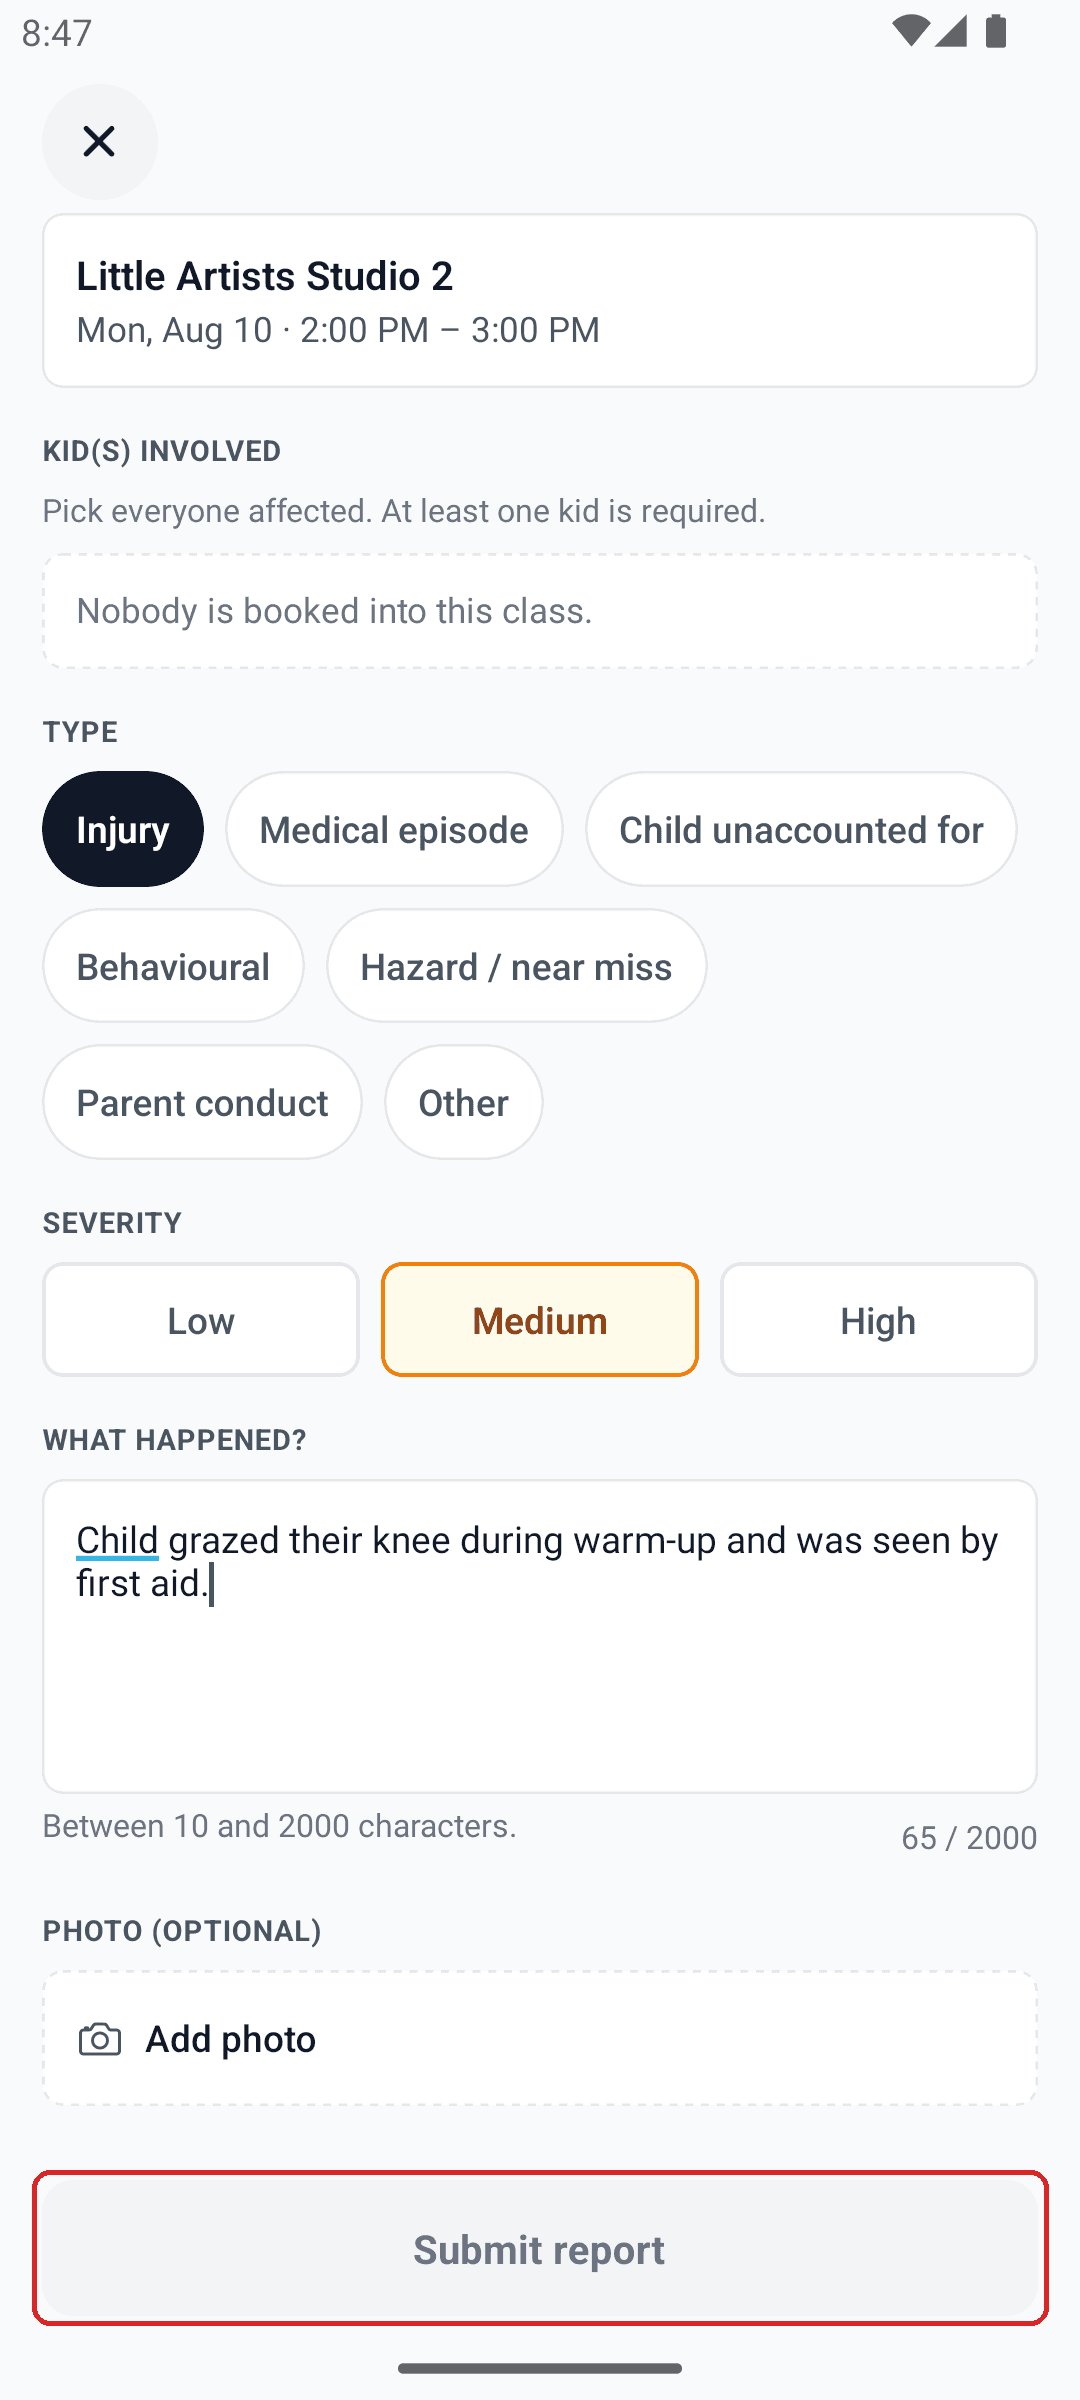
Pick who was involved, the type, and how serious it is. Describe what happened — what, when, who, and what you did. Add a photo if it helps.

KINPASS and your insurer rely on this report, so be specific.
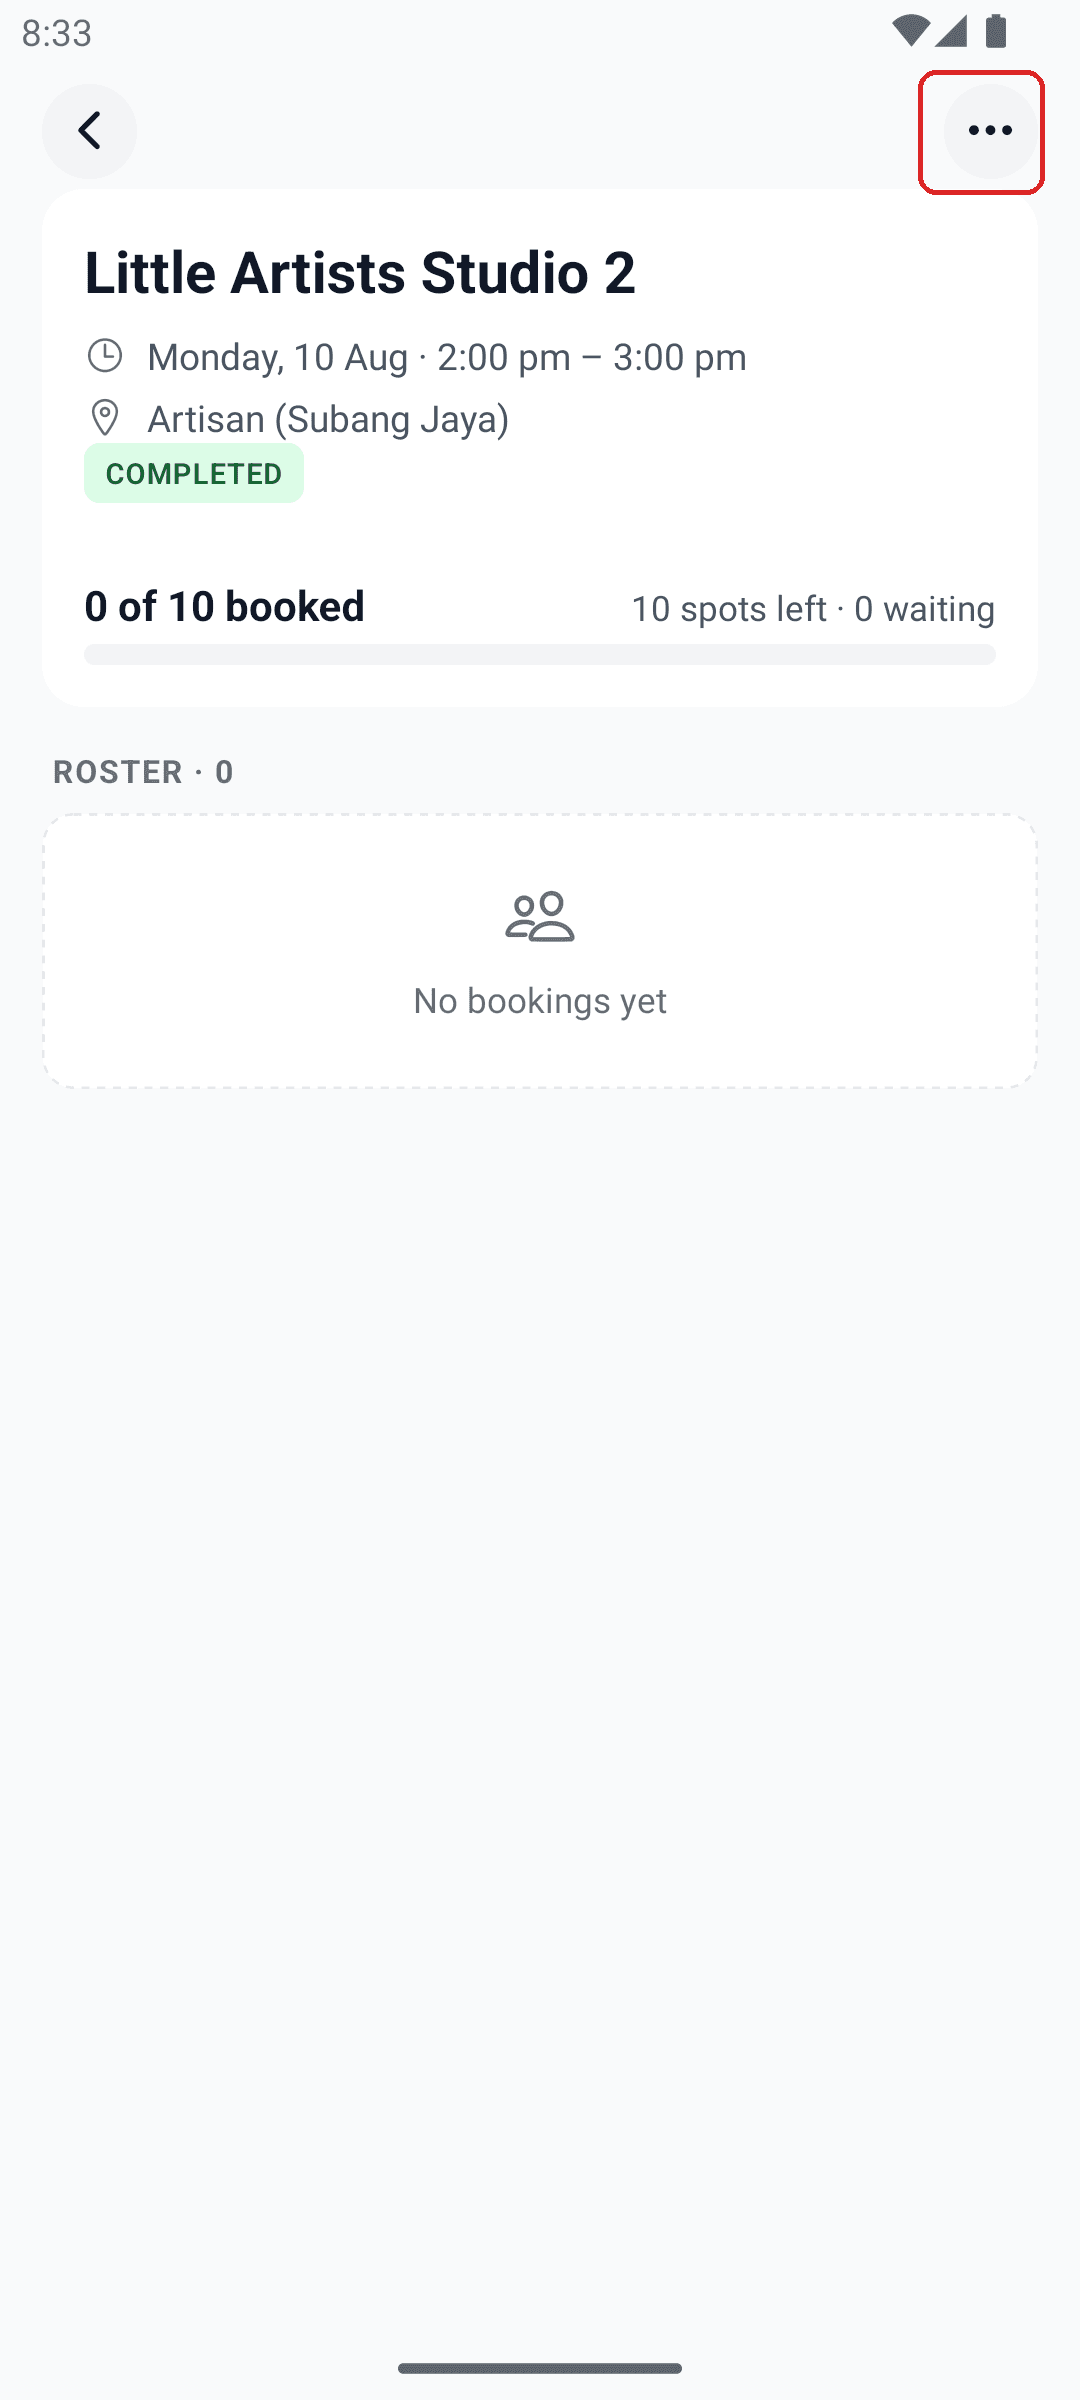
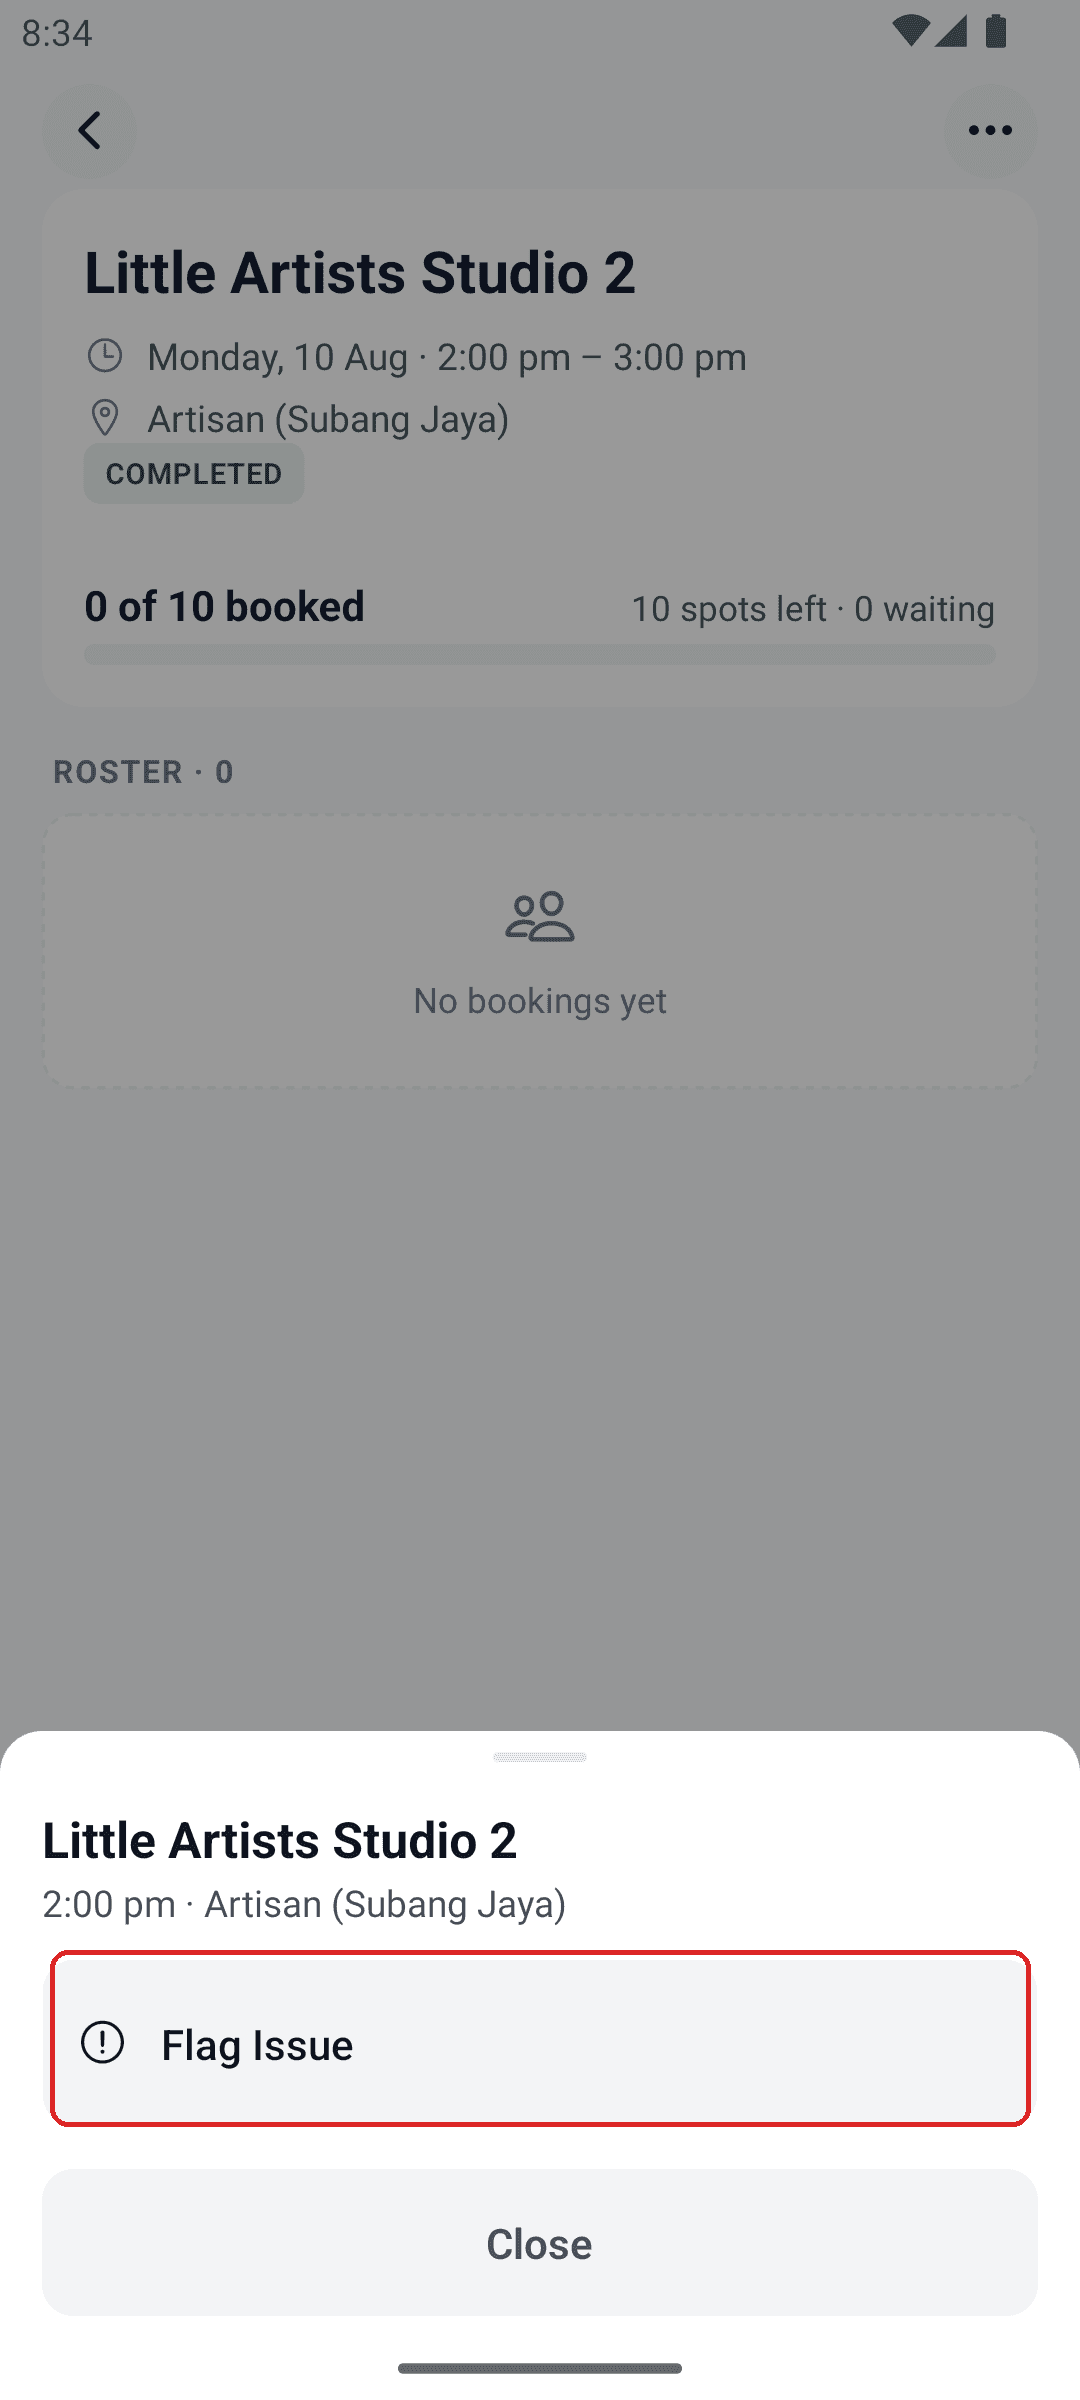
Boxed in red: tap , then Flag Issue. Once every required field is filled in, Submit report sends it straight to the KINPASS team.
Session detail screen with the ⋯ menu button in the top-right corner boxed in red
1. On the open class, tap ⋯ in the top-right corner.
Session detail action menu open with the Flag Issue row boxed in red
2. Tap Flag Issue in the menu that slides up.
Flag Issue form filled out with type, severity, and description, and the Submit report button boxed in red
3. Fill it in, then tap Submit report.

Staying on top of things

How to check your schedule

See the week, or the whole month

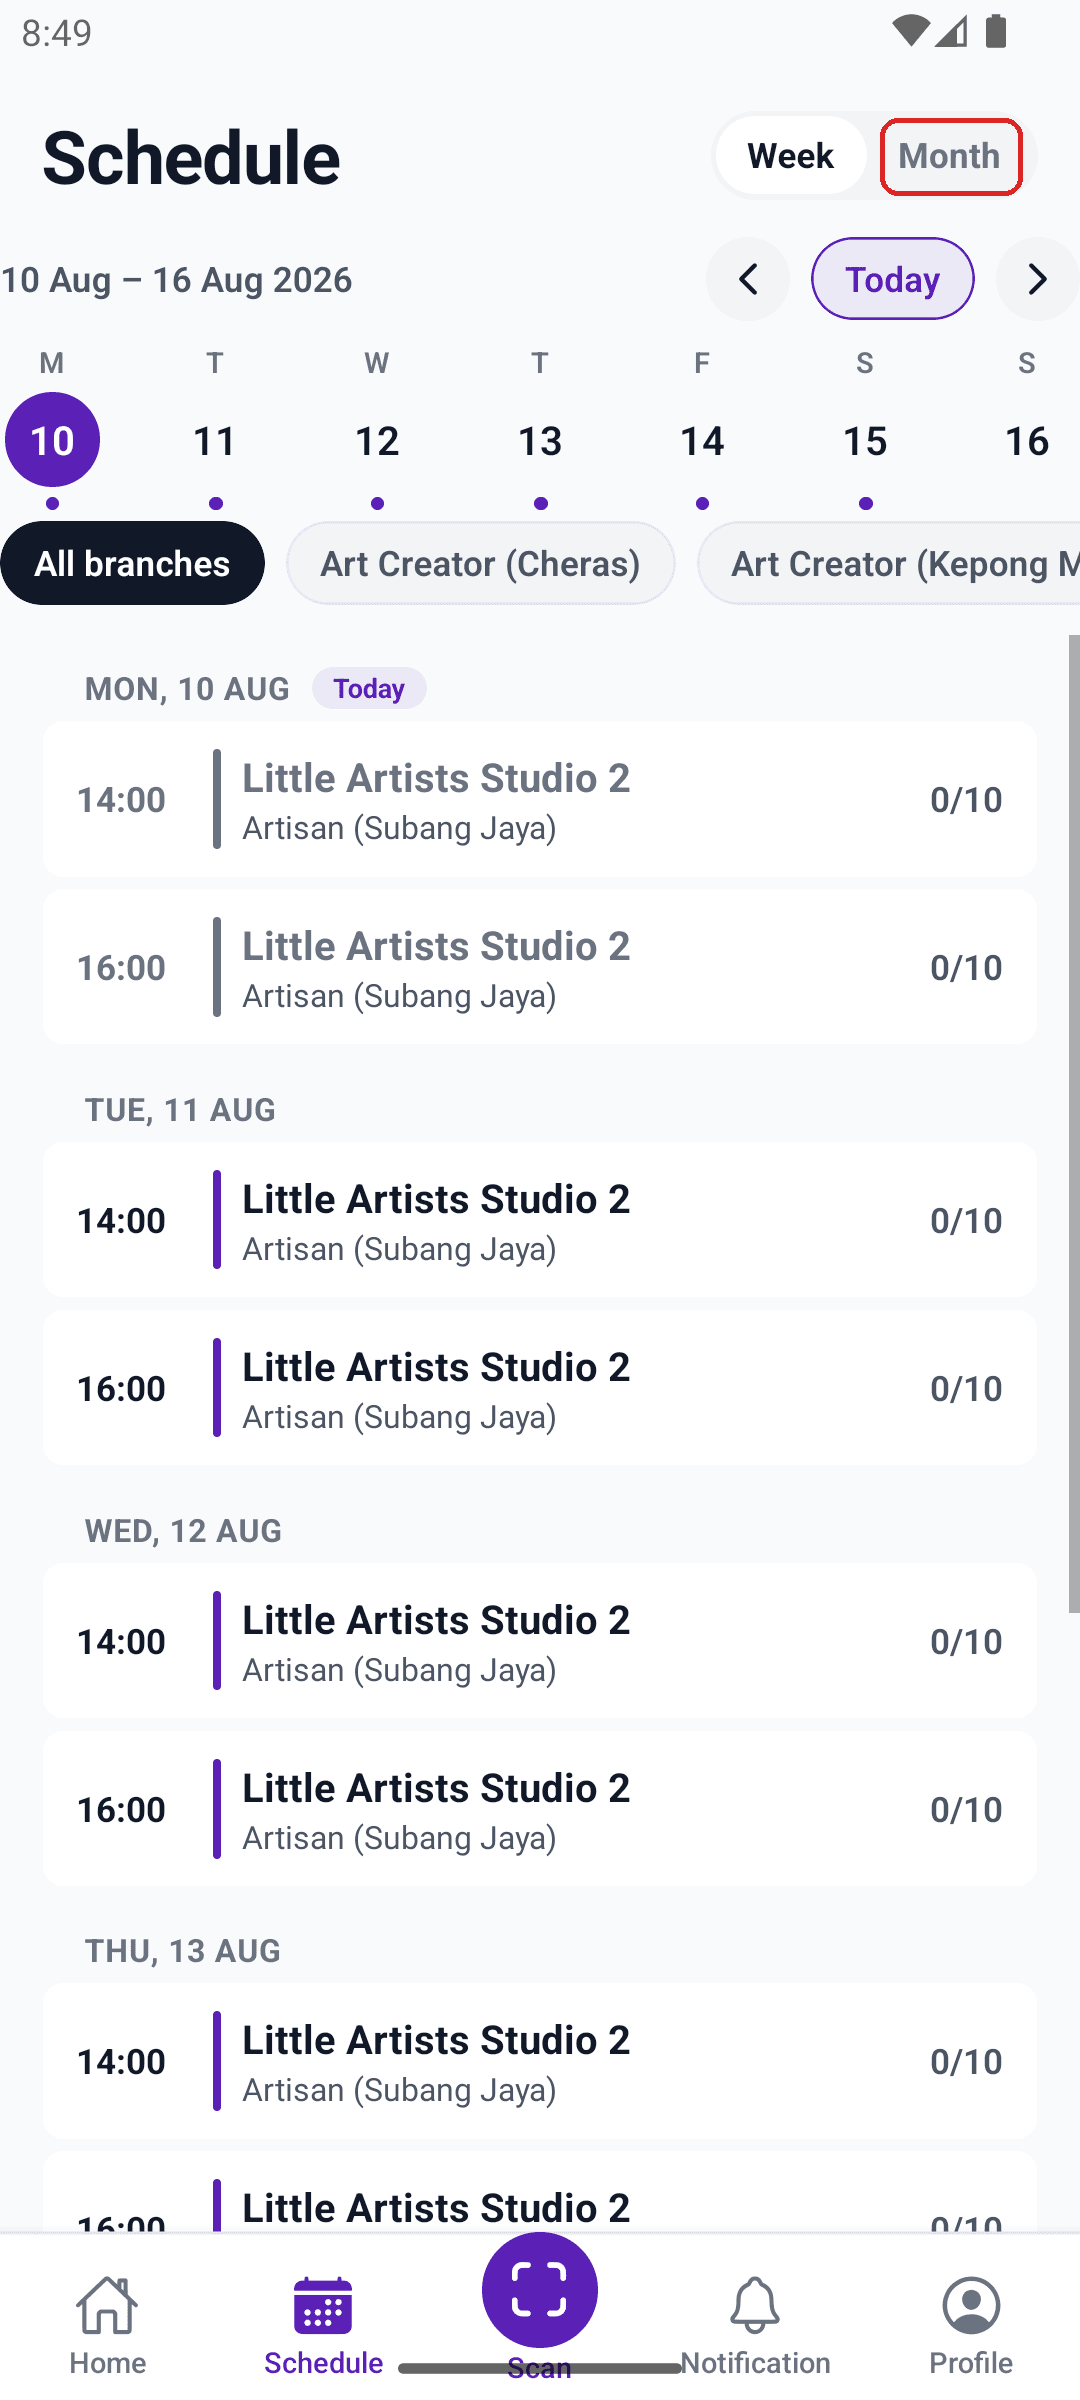
Tap Schedule for every class in the week ahead, with how many slots are booked out of the total.

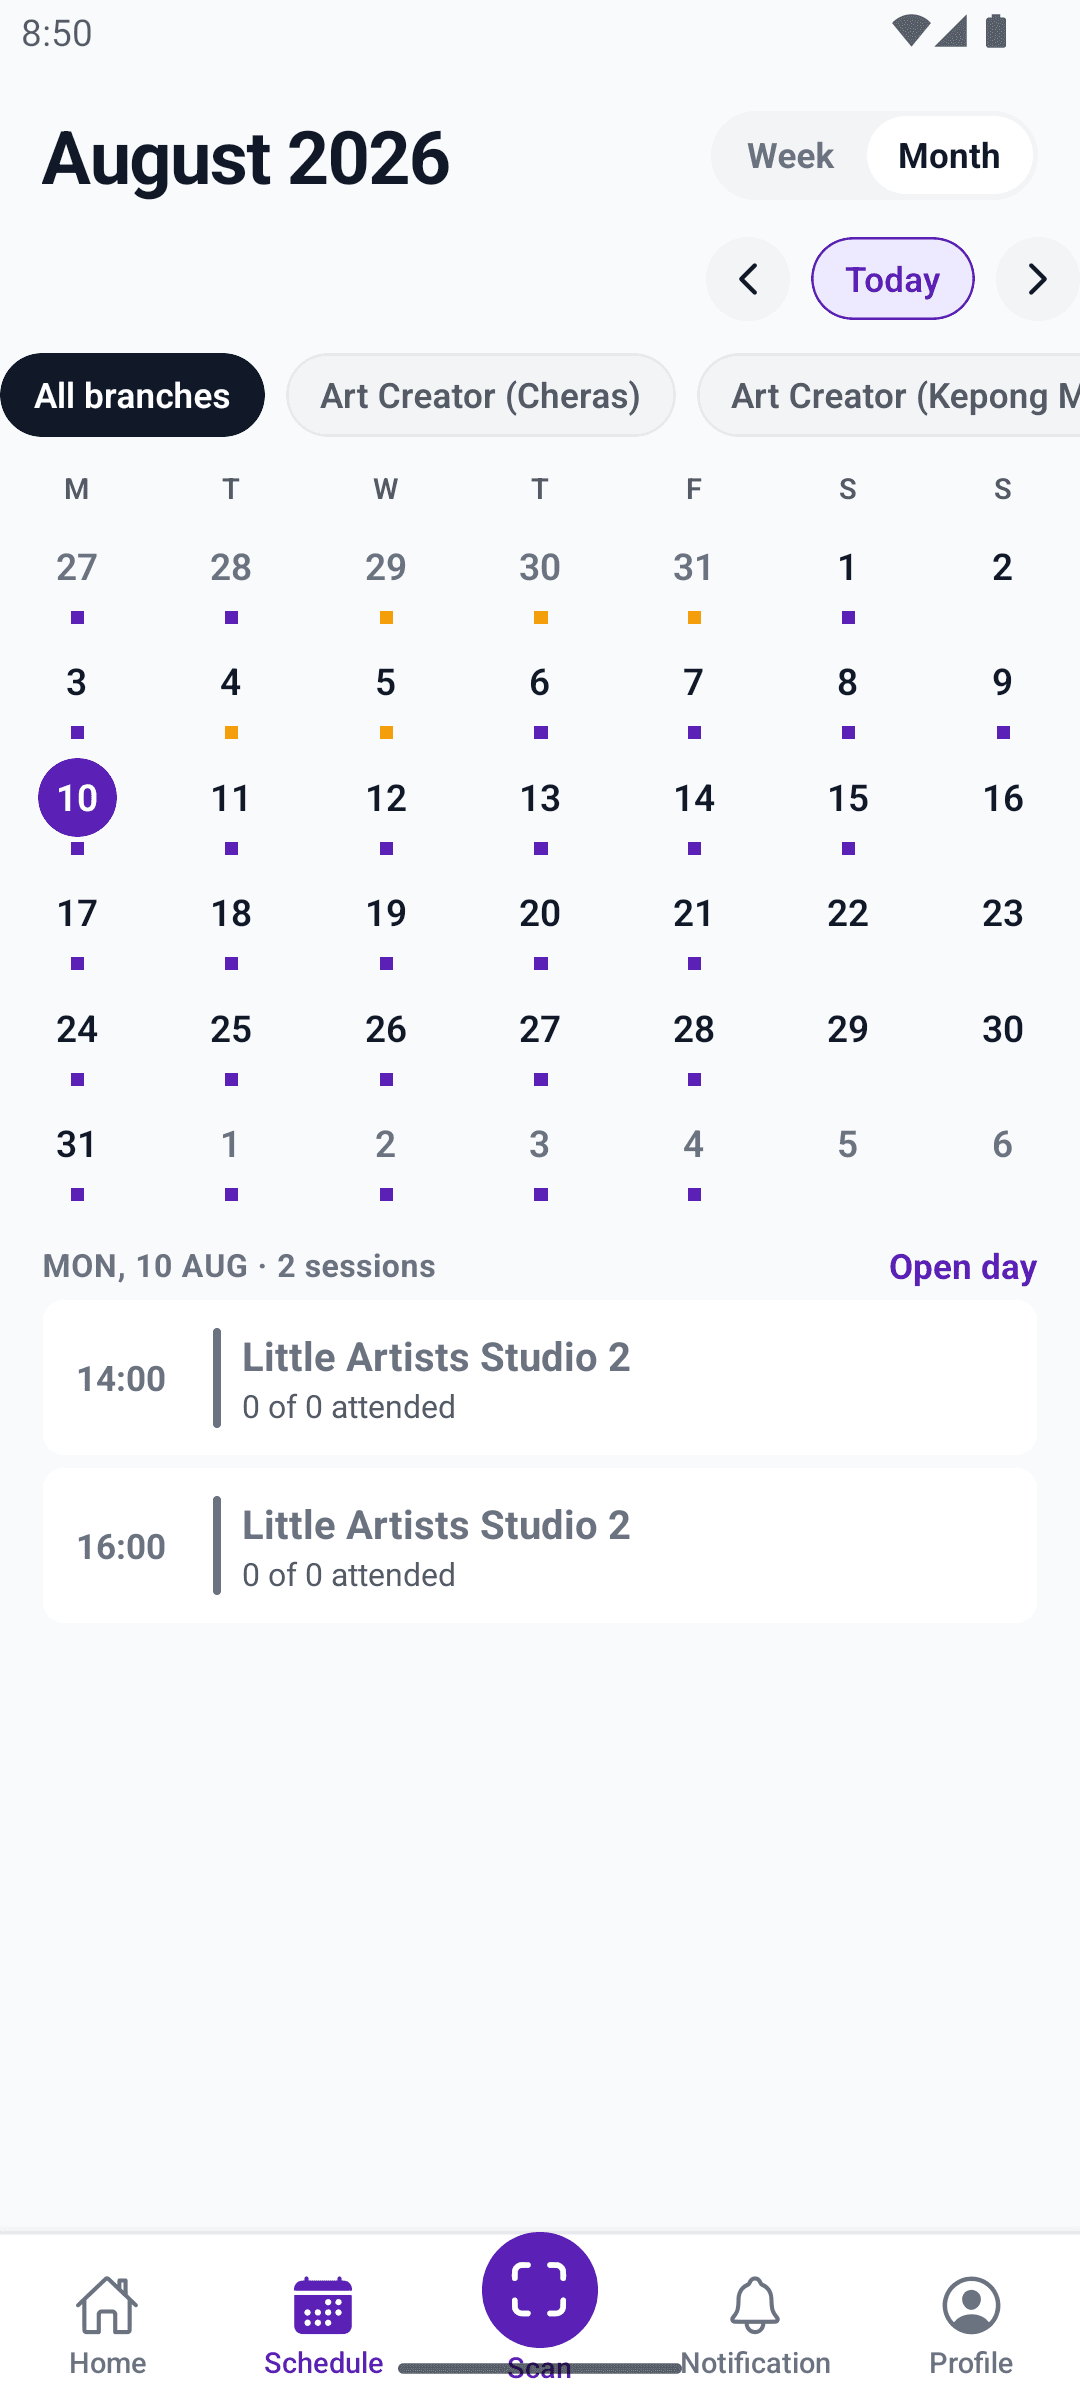
Month view is for planning further out — spotting gaps or busy stretches before they arrive.
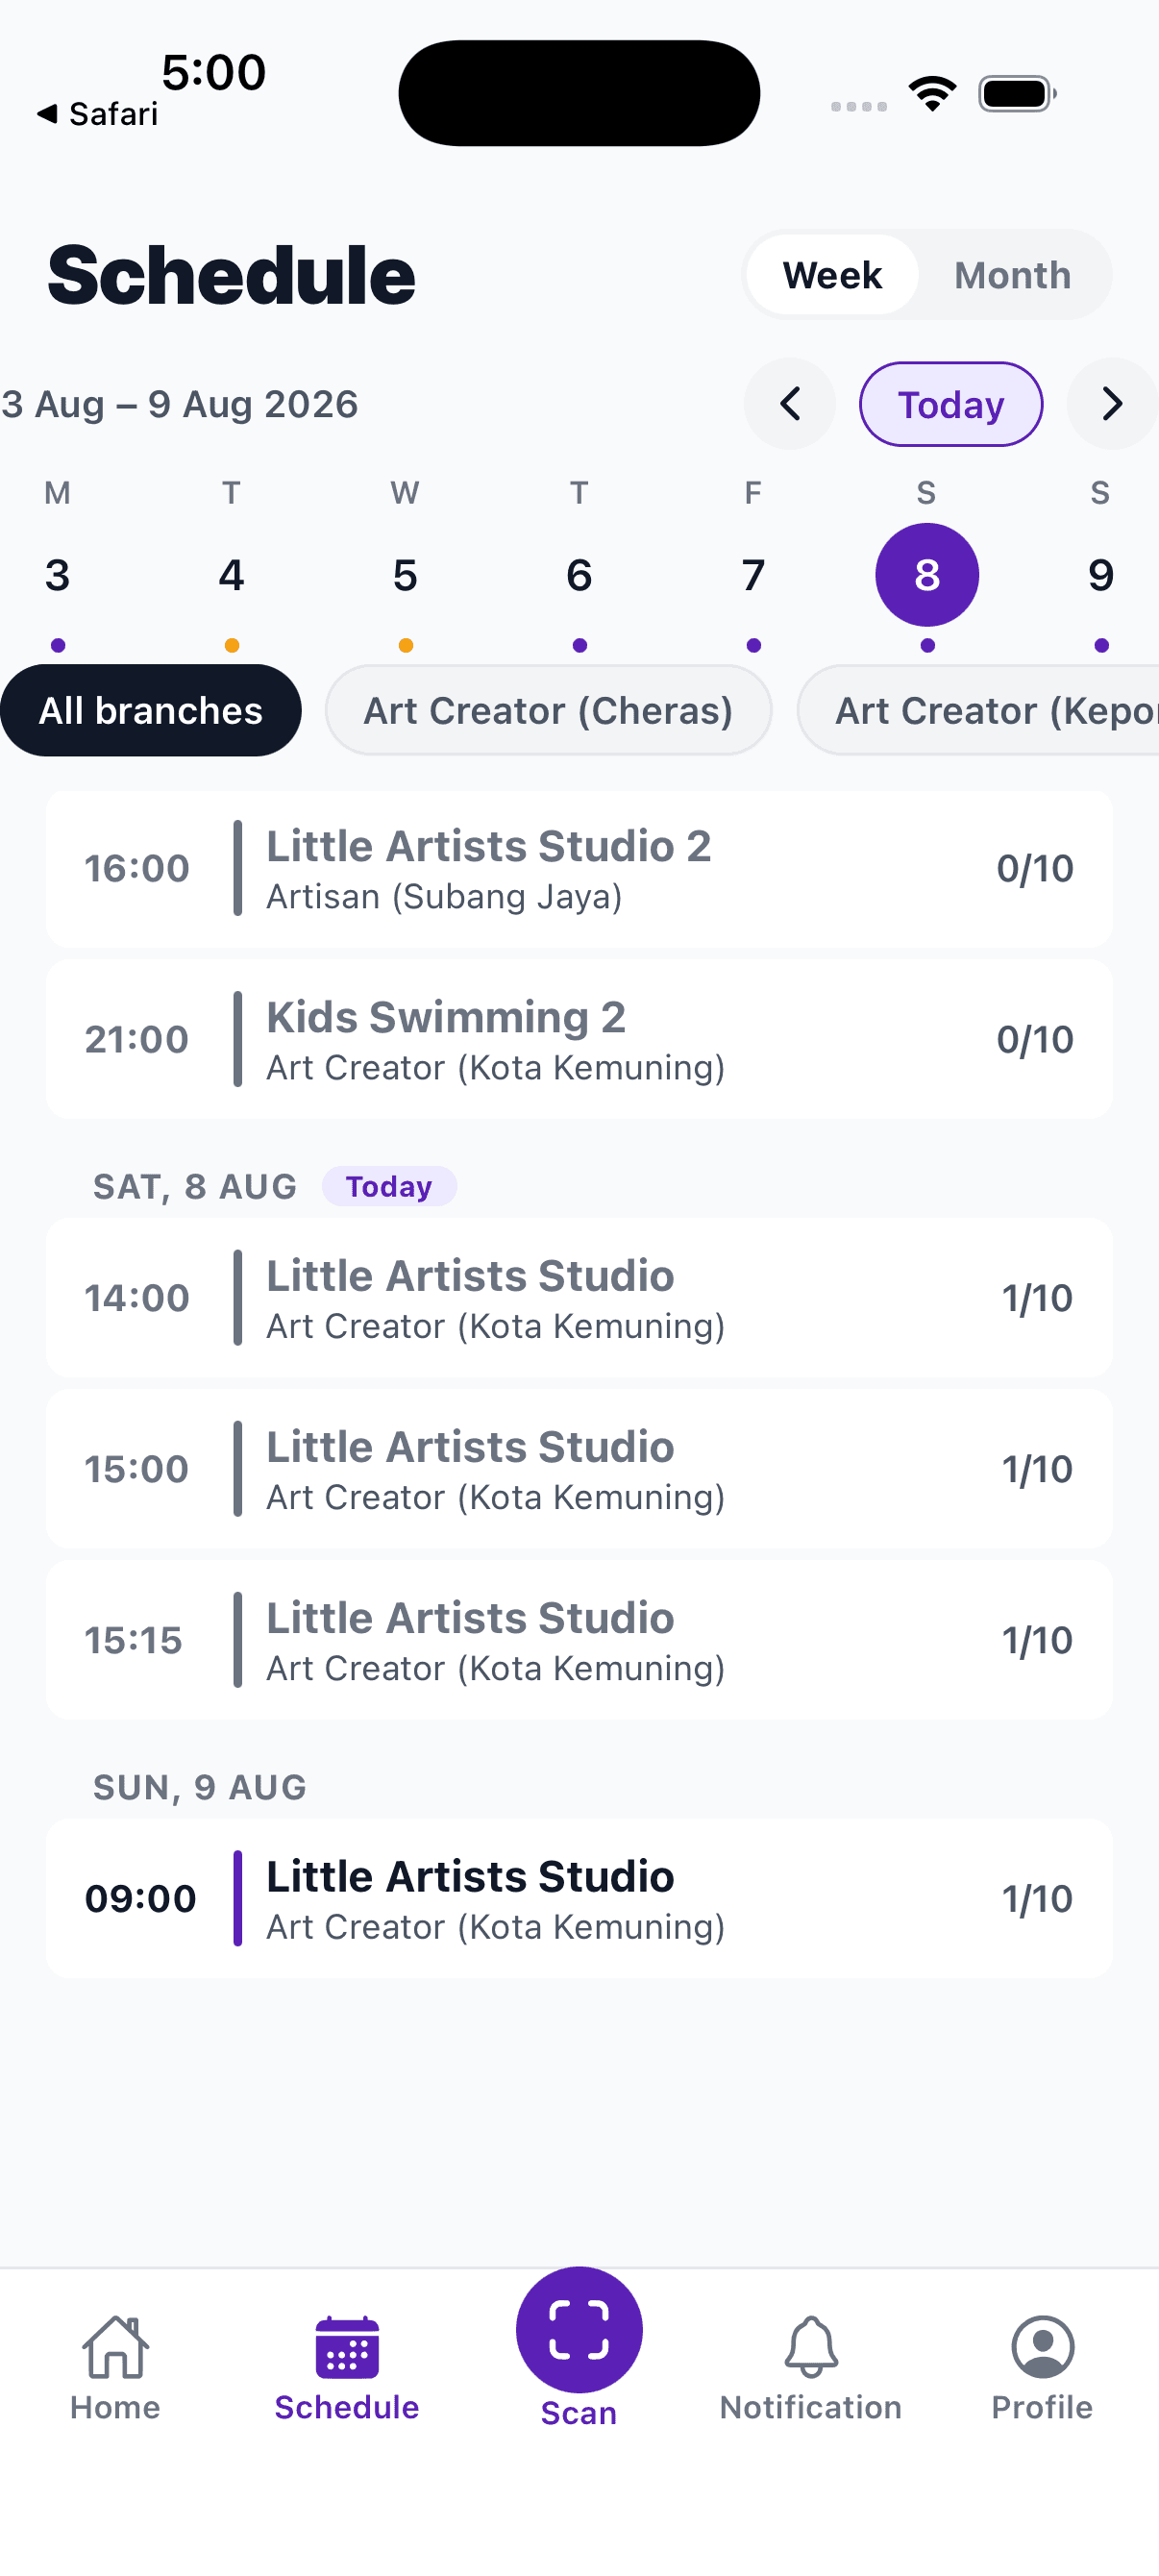
Boxed in red: tap Month to swap the week list for a full calendar grid. Tap any date to list that day's sessions underneath.
Schedule screen showing a week of classes grouped by day
1. Schedule opens on the week, grouped by day.
Schedule week view with the Month toggle boxed in red
2. Tap Month to switch views.
Schedule month view showing a calendar grid with dots marking days that have sessions
3. A dot means at least one session that day.
How to check notifications

Don't miss a cancellation deadline

Tap Notification for anything needing your attention — most often a reminder that a cancellation window is closing on one of today's classes.

Tap “Mark all read” at the top once you've been through them.
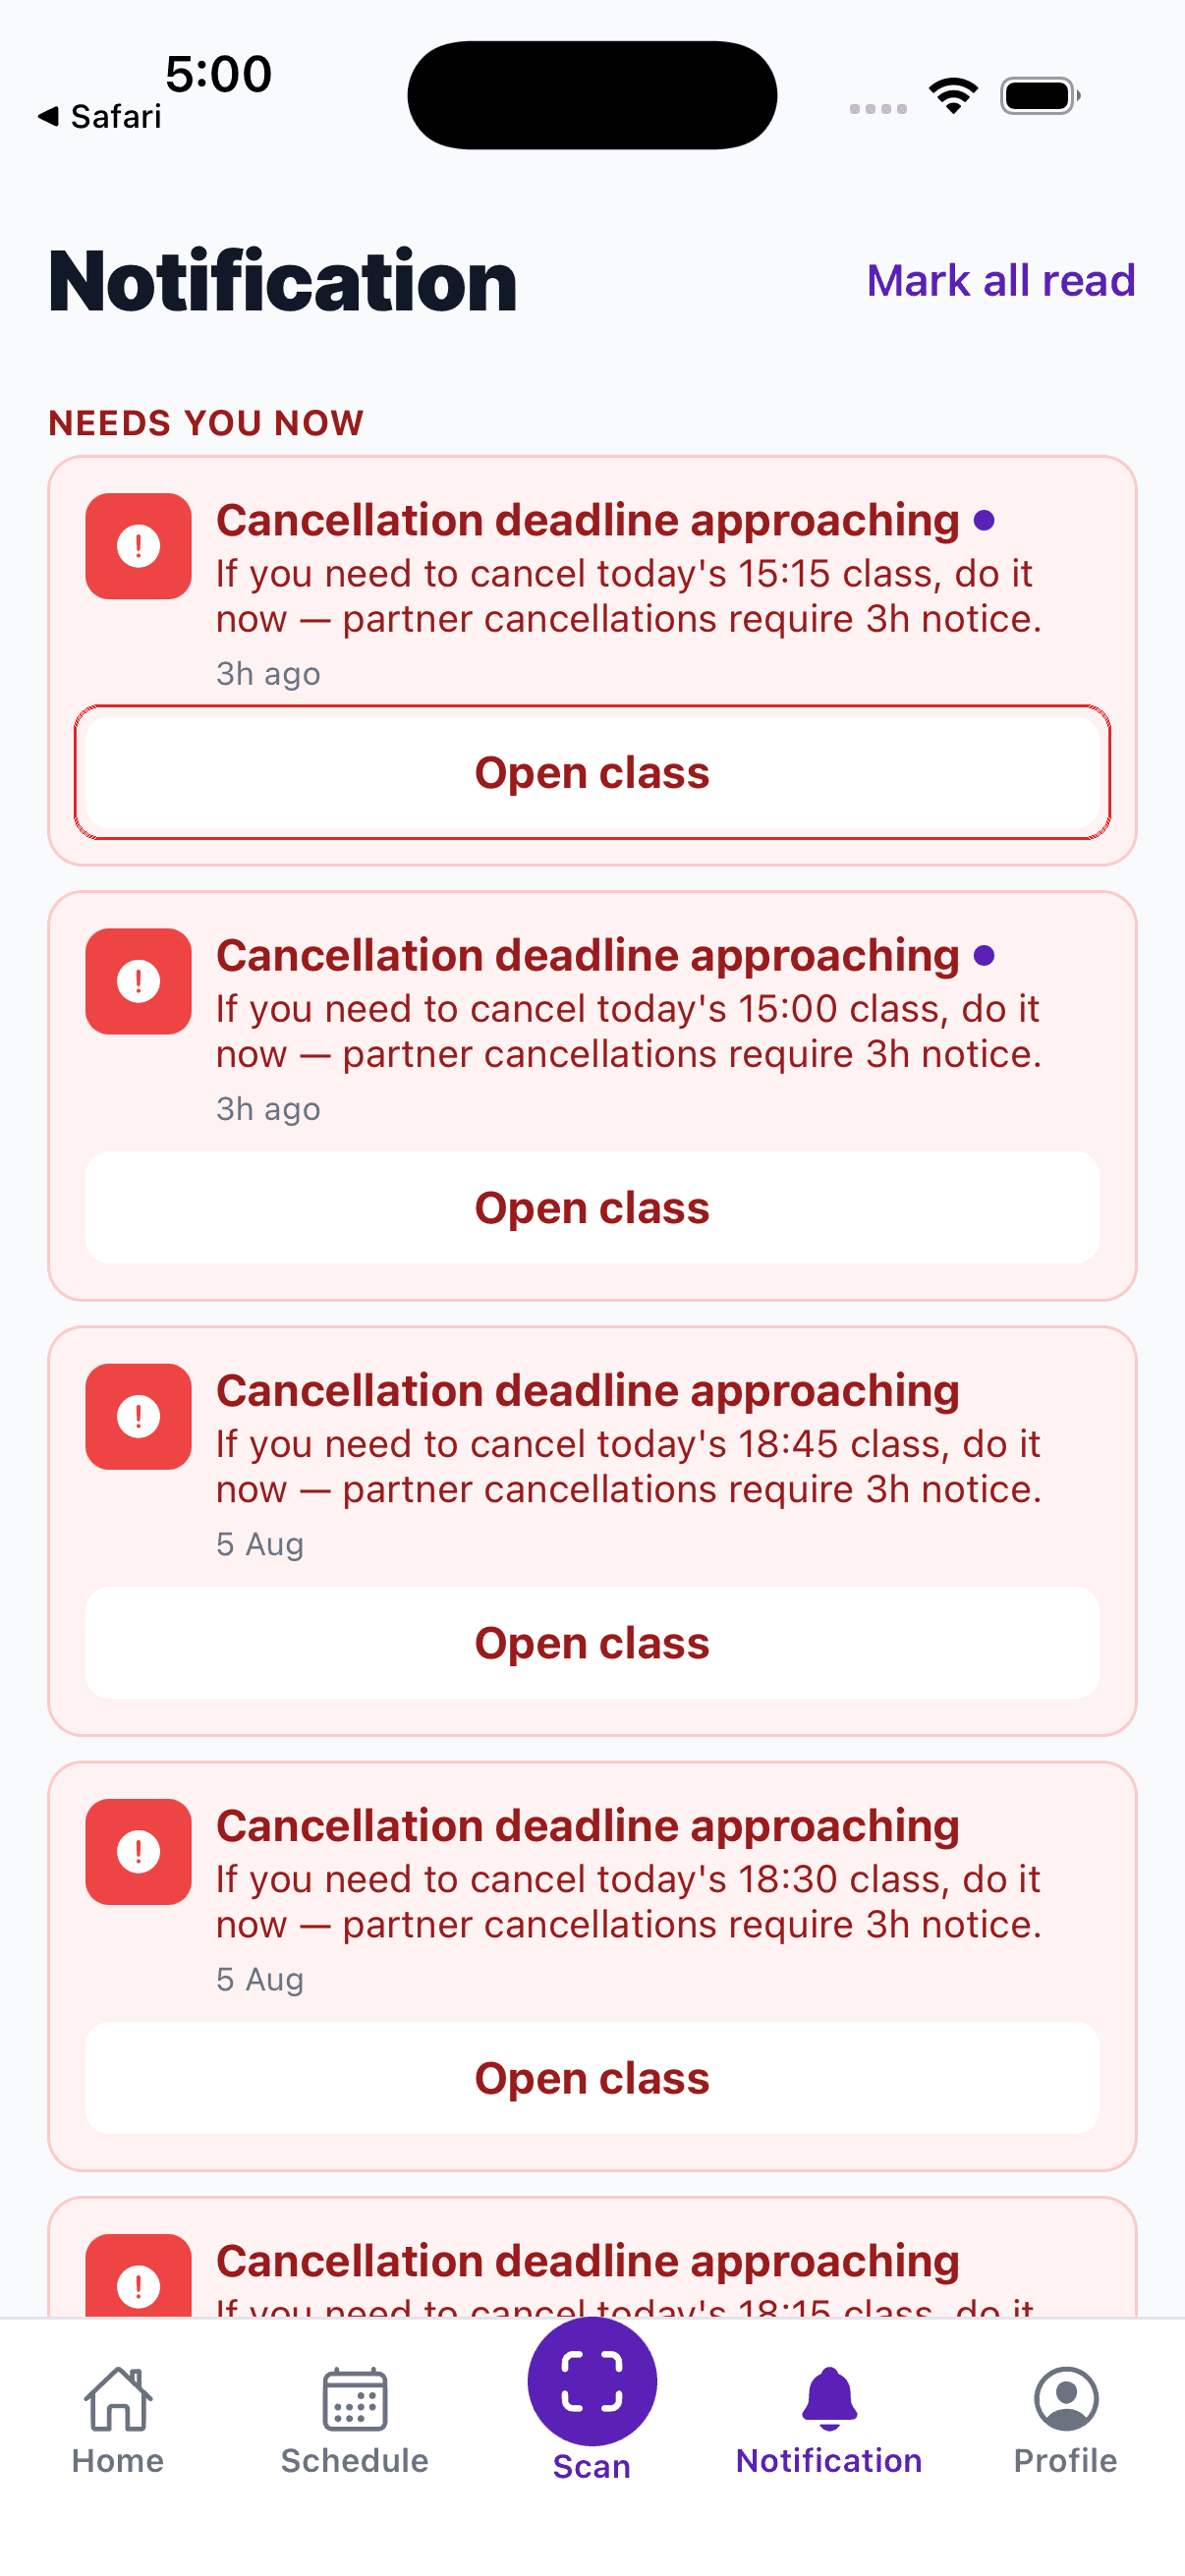
Boxed in red: tap Open class to jump straight to that class and deal with it.
Notifications screen with a cancellation deadline alert and the Open class button boxed in red
How to reply to a review

See what parents said, and respond

Profile → Reviews shows your overall rating and every review across your branches.

Replies appear under the parent's review on your venue page, so keep the tone warm and professional even for tricky feedback.
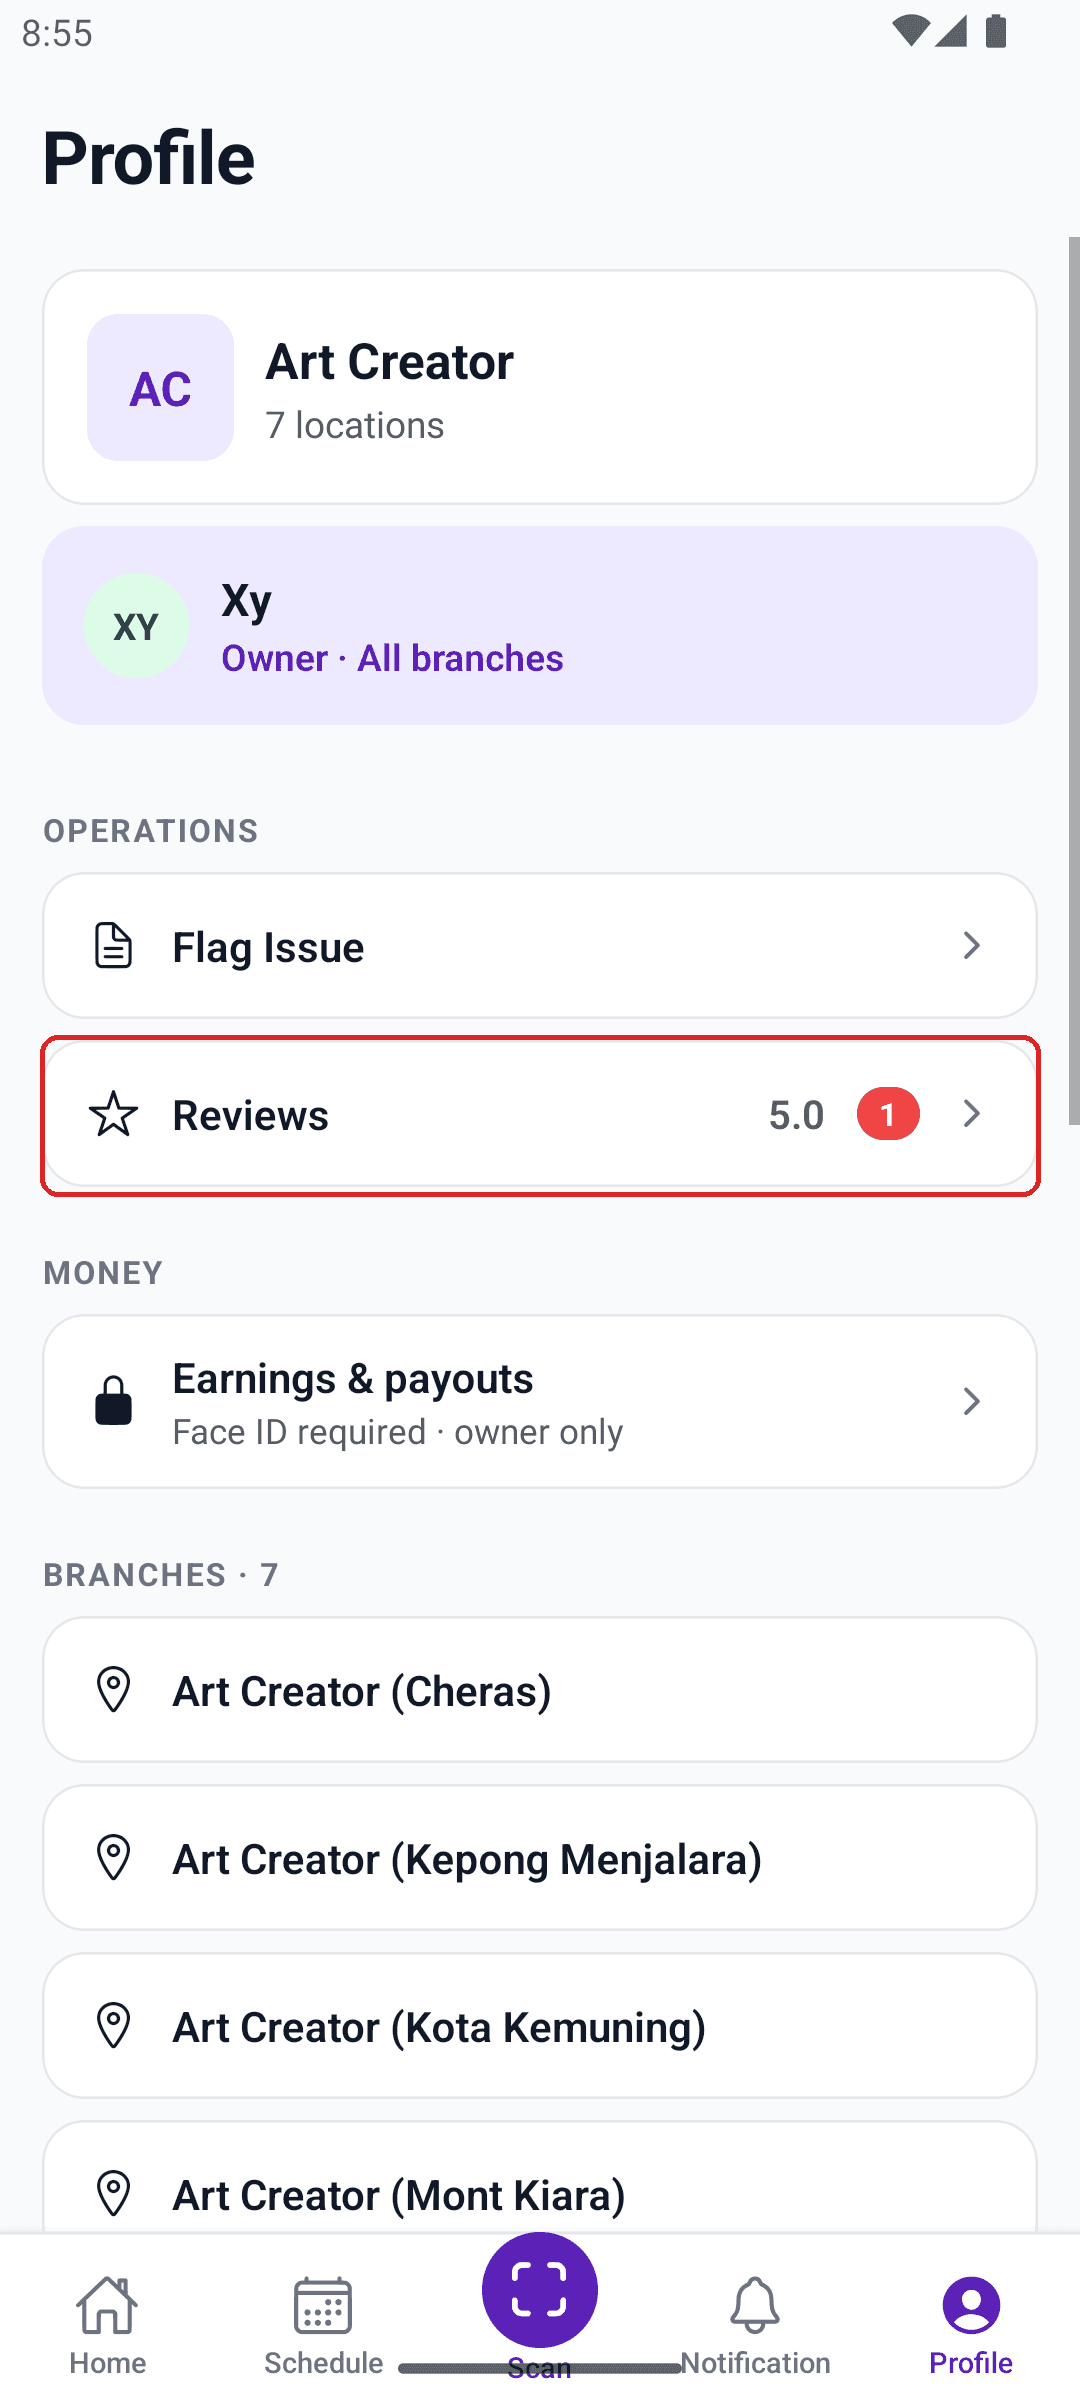
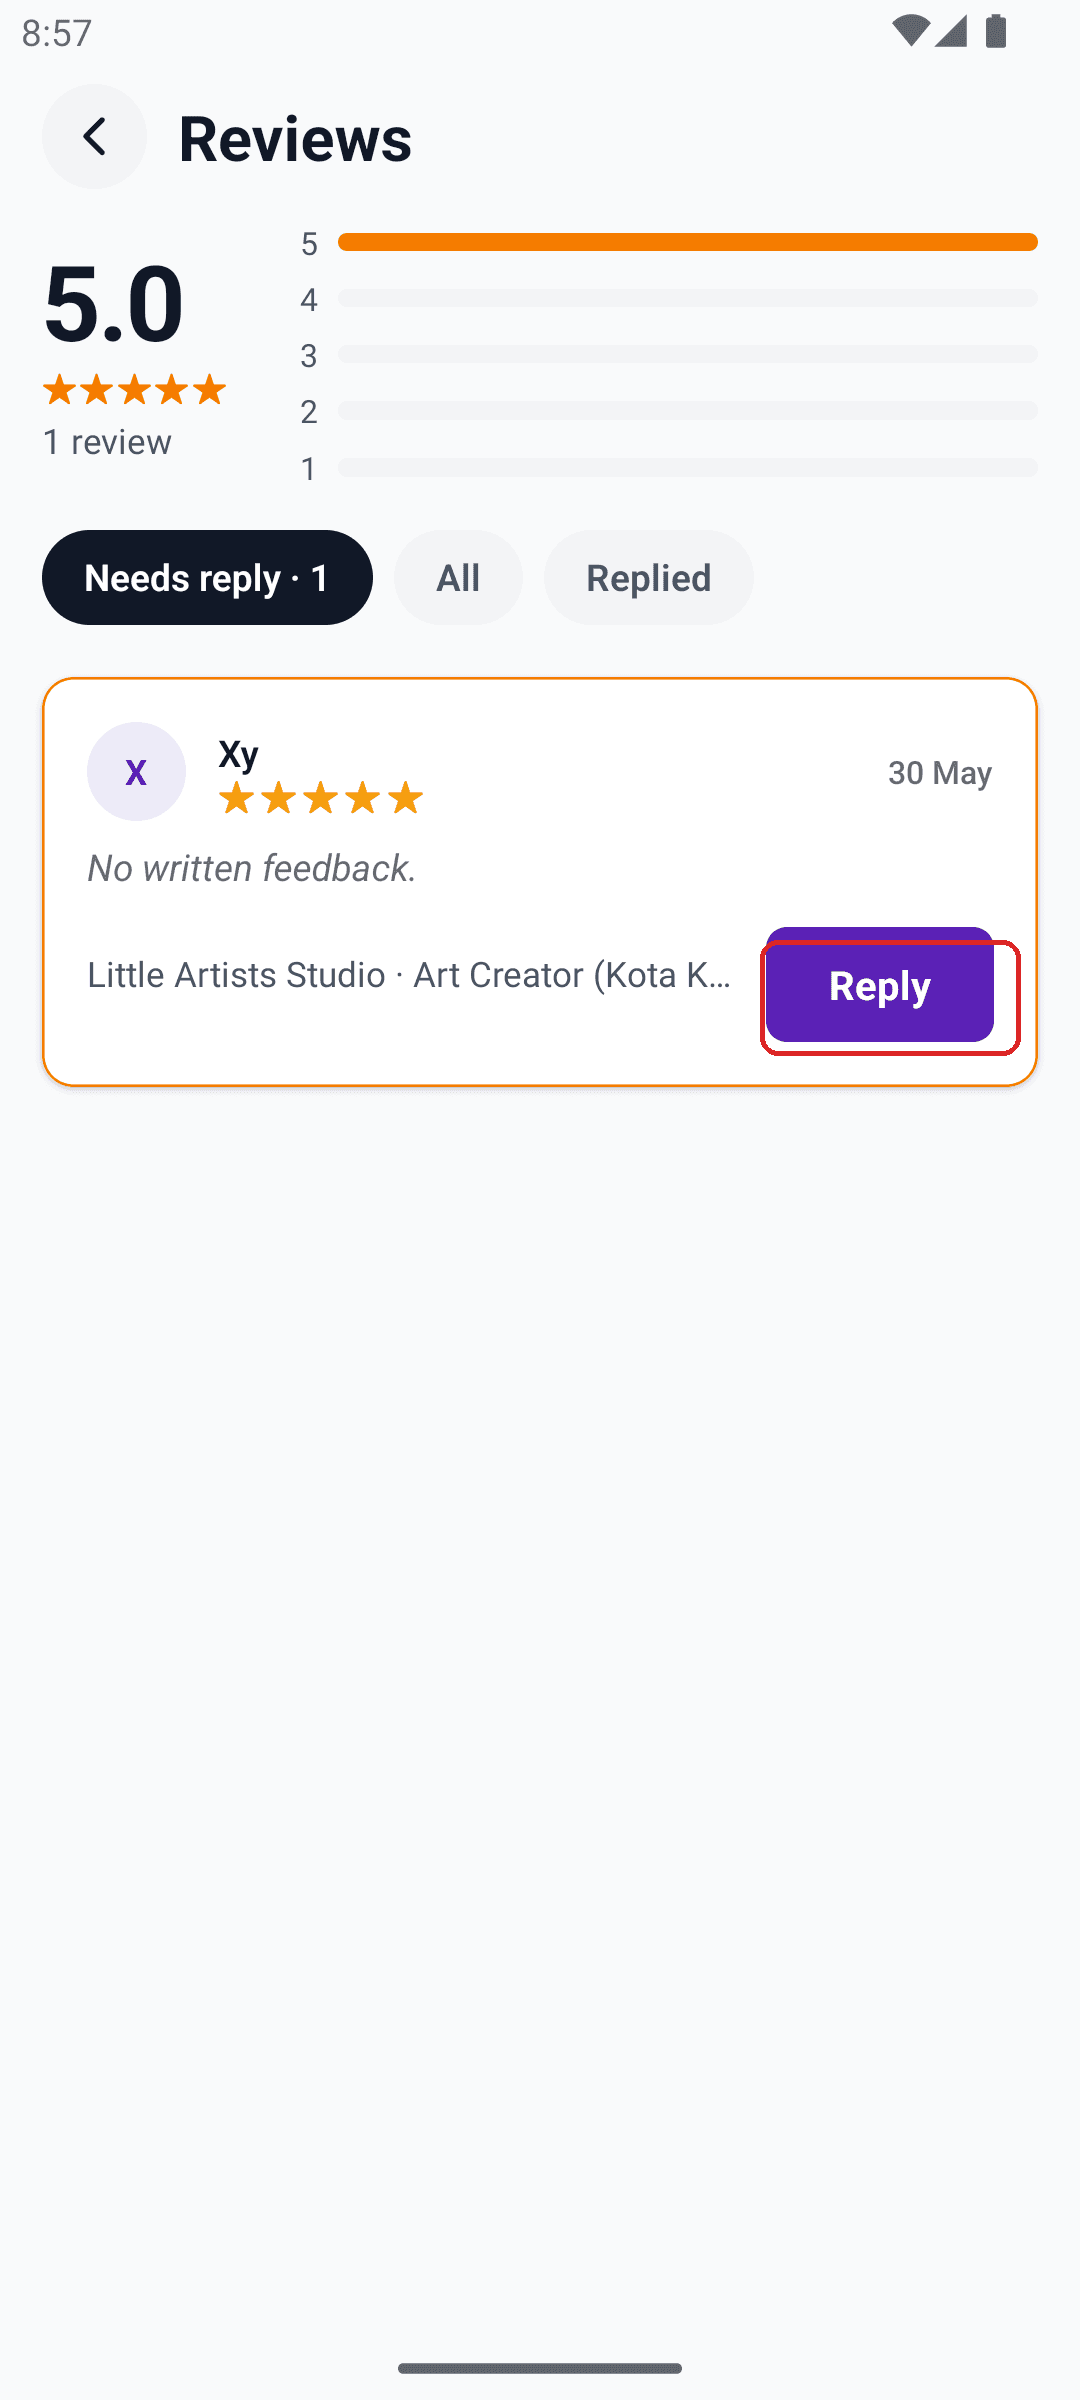
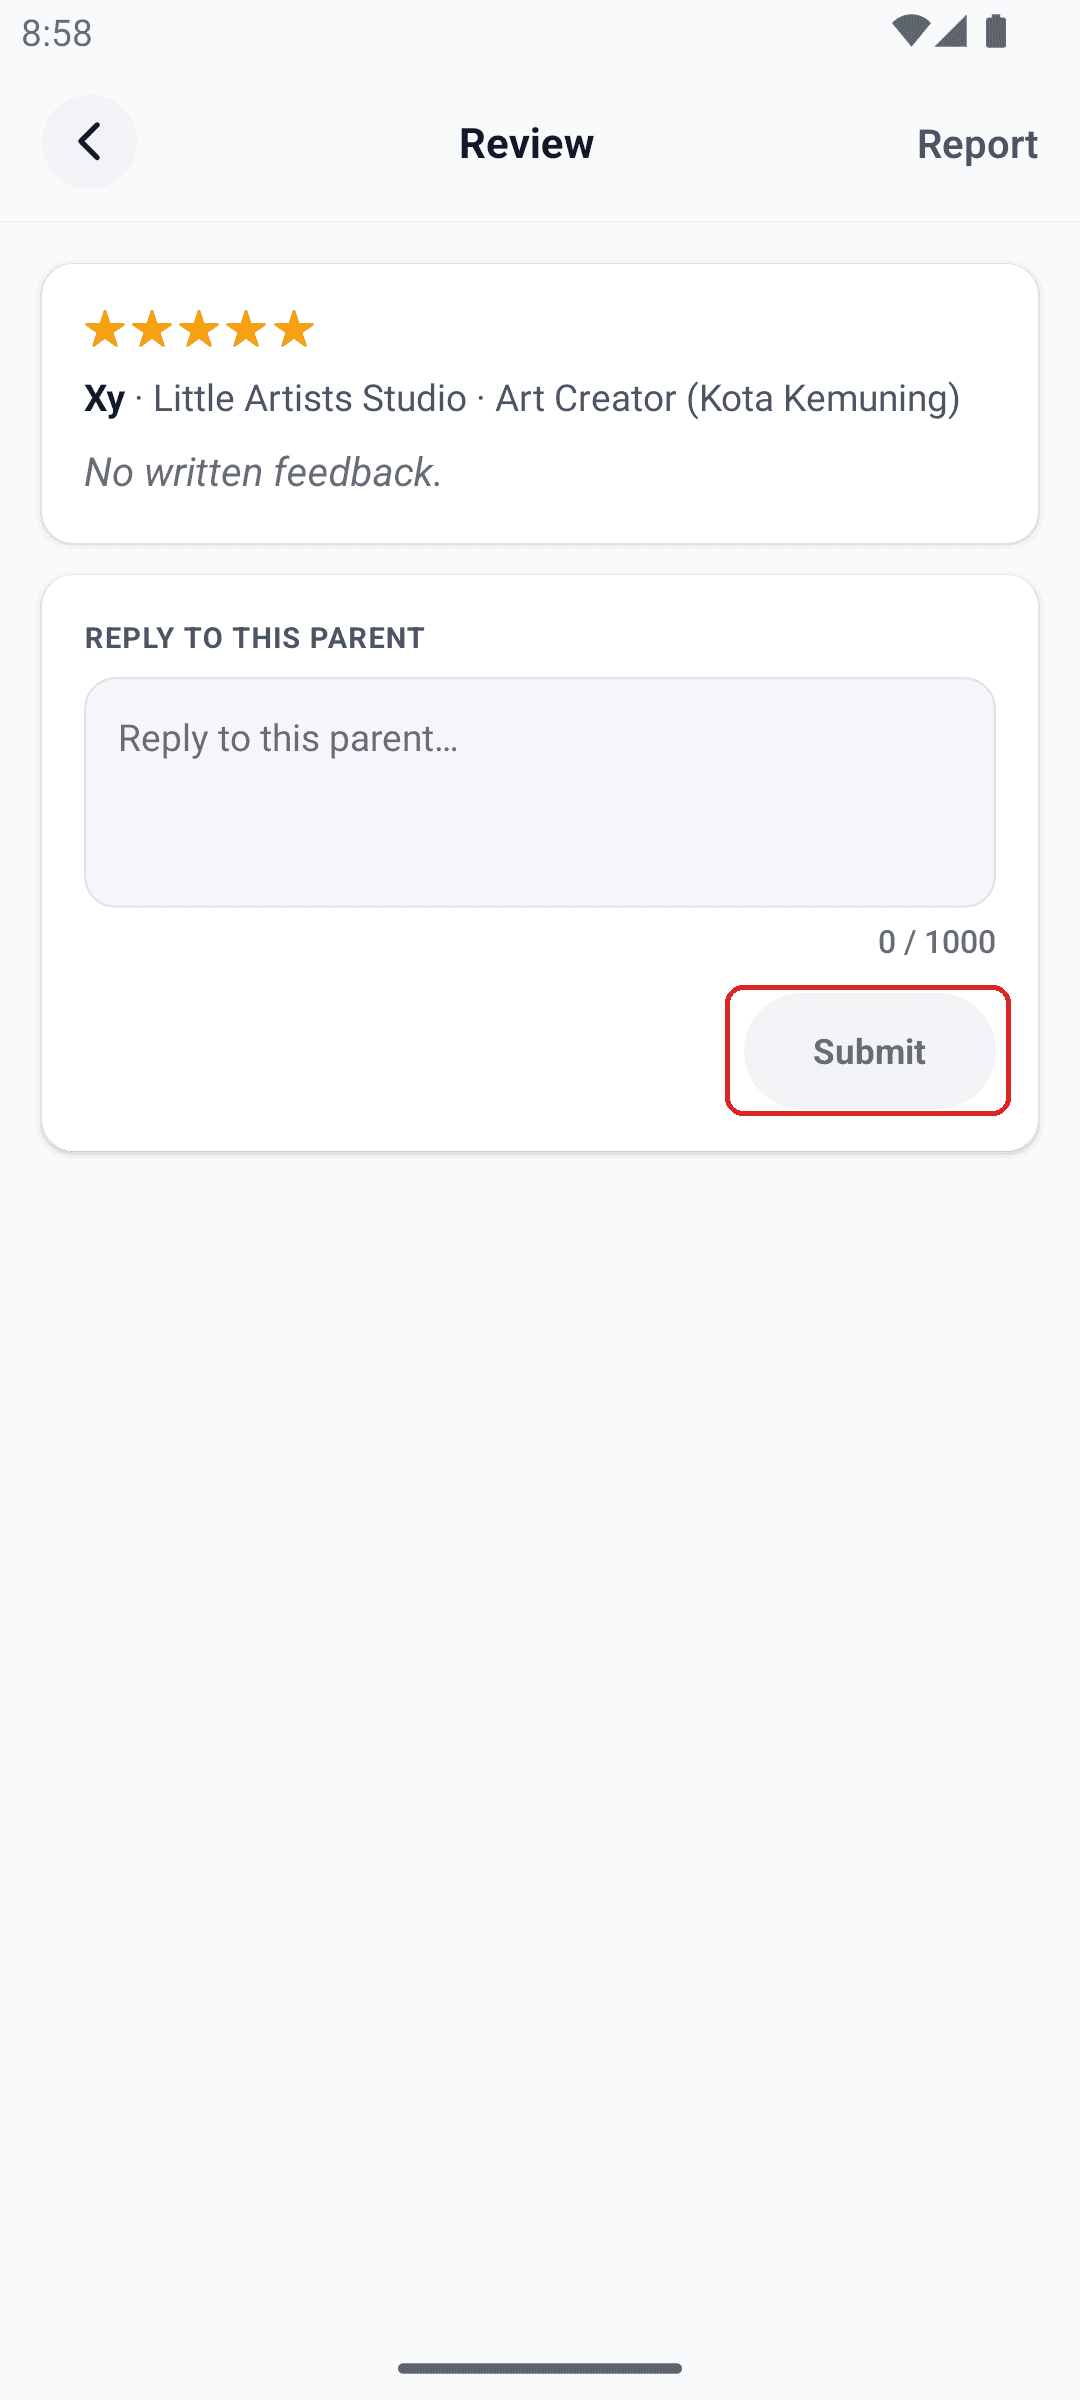
Tips: the “Needs reply” filter shows anything still waiting on you. Your reply posts publicly as soon as you tap Submit.
Profile screen with the Reviews row boxed in red
1. On Profile, tap Reviews.
Reviews screen with a five-star review and the Reply button boxed in red
2. Tap Reply on the review.
Review reply screen with a text field and the Submit button boxed in red
3. Write your reply, then tap Submit.

Money — owner only

How to check earnings & payouts

See what you're owed, and the bookings behind it

The top figure is an estimate for the current month, confirmed once the month closes. “Next payout” shows the amount and bank account for your most recent completed cycle.

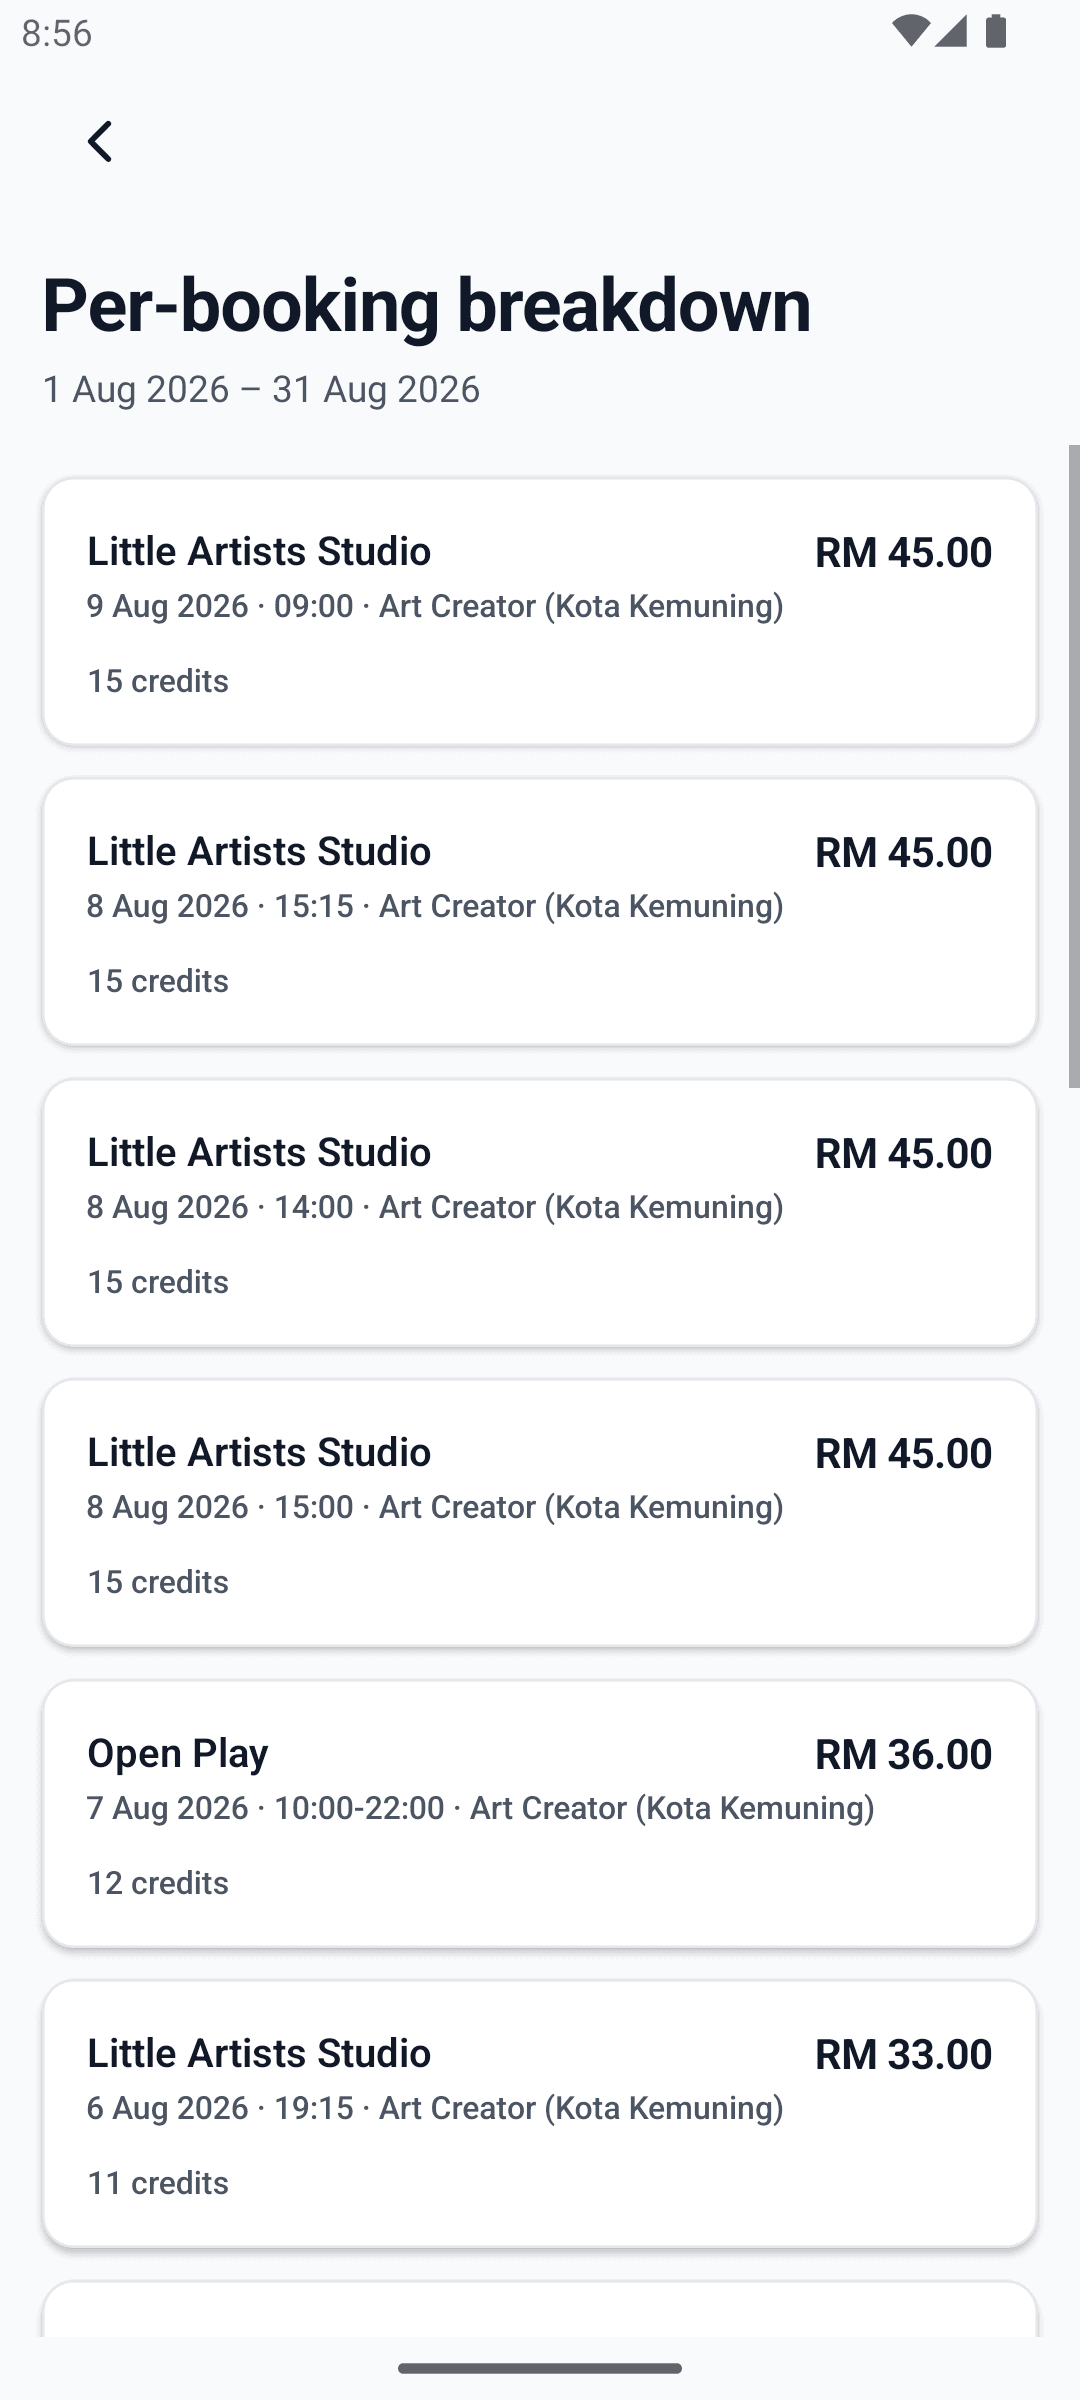
Use the per-booking list to check a payout figure against your own records, or to spot a booking that looks off before the payout closes.
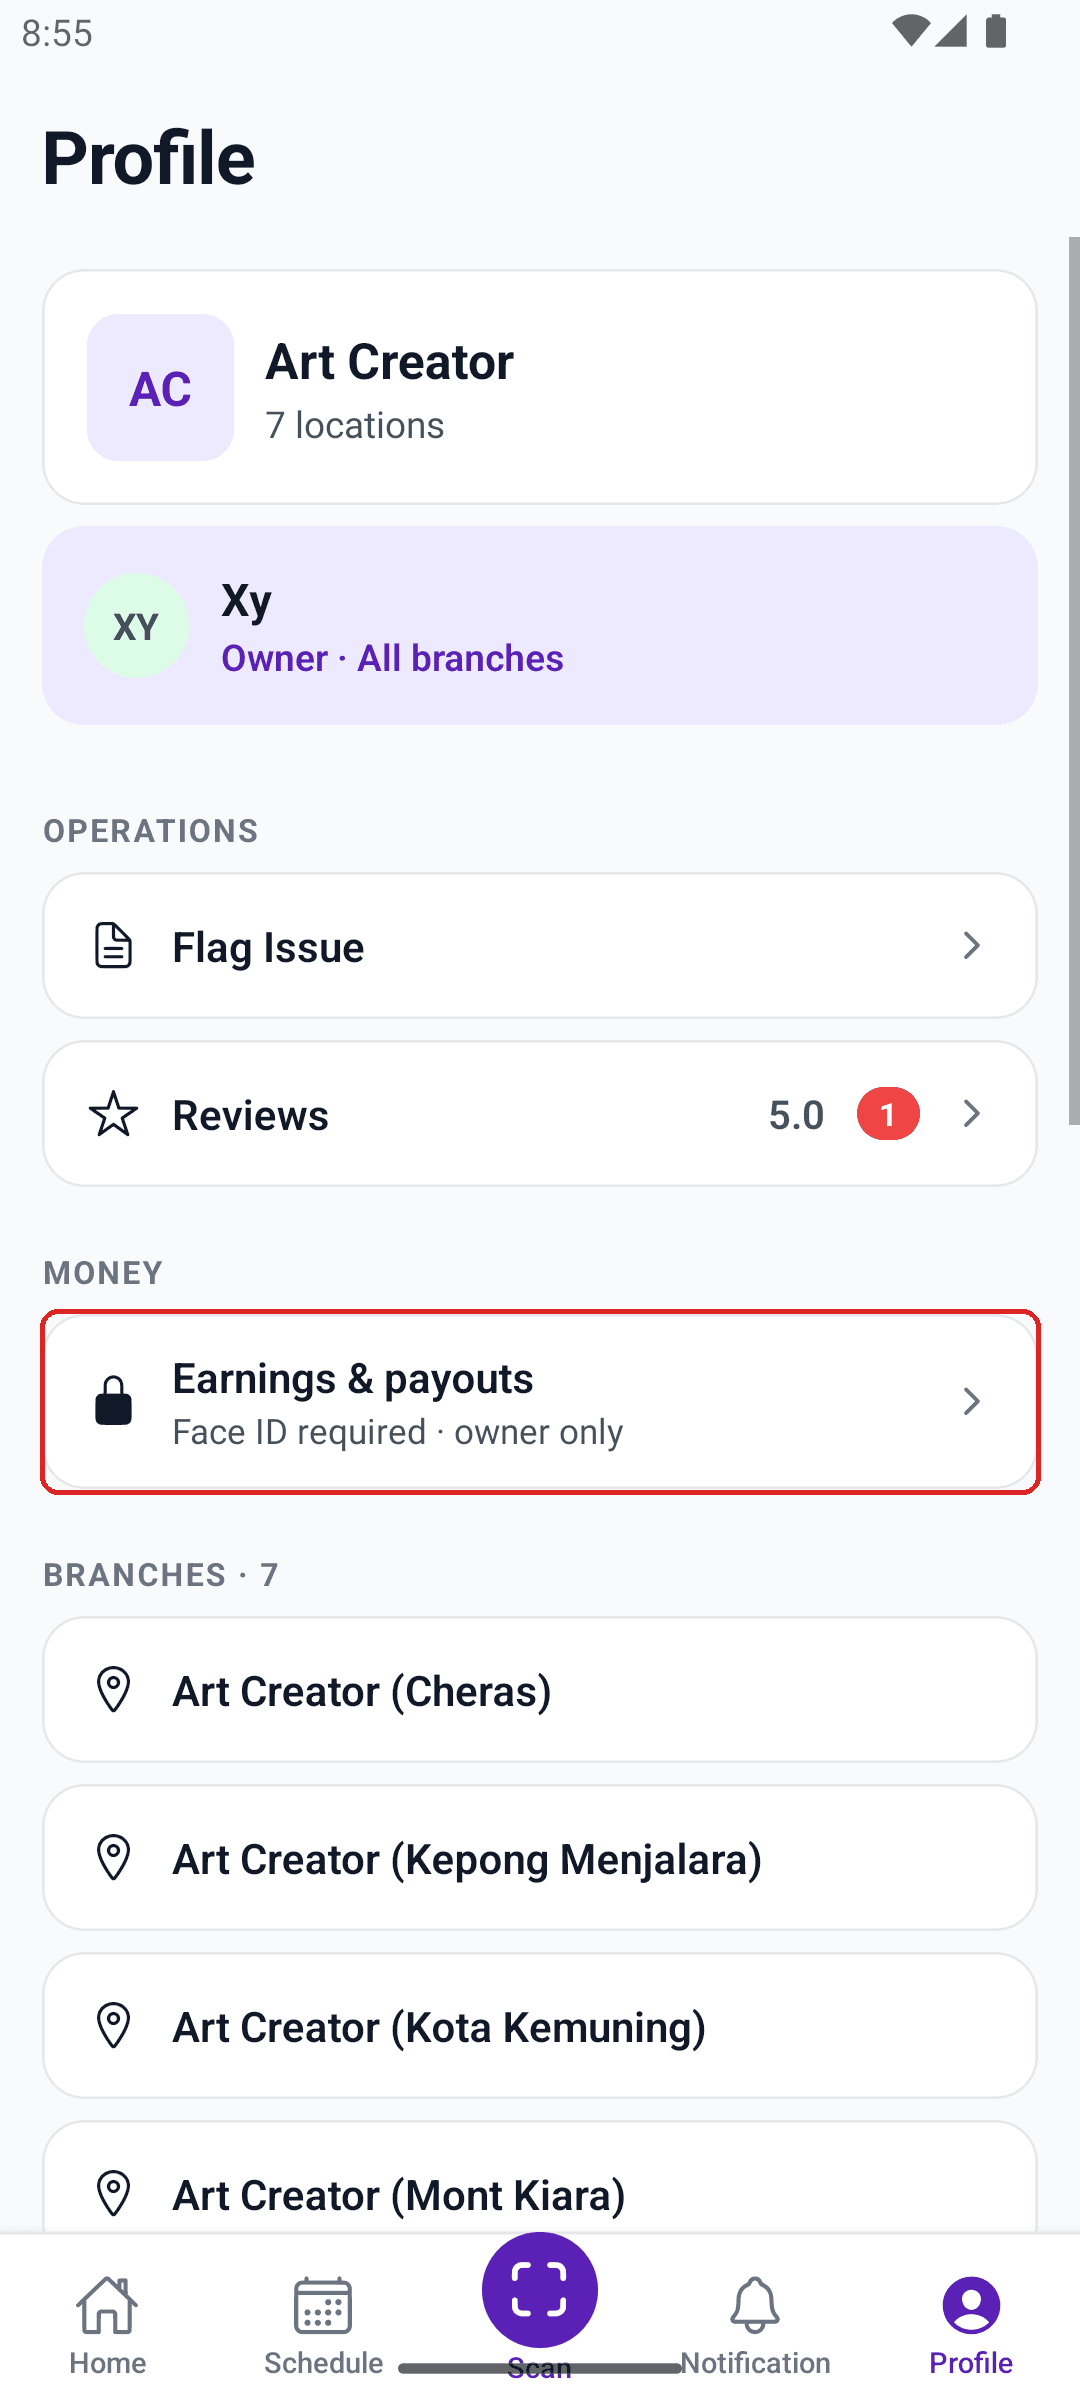
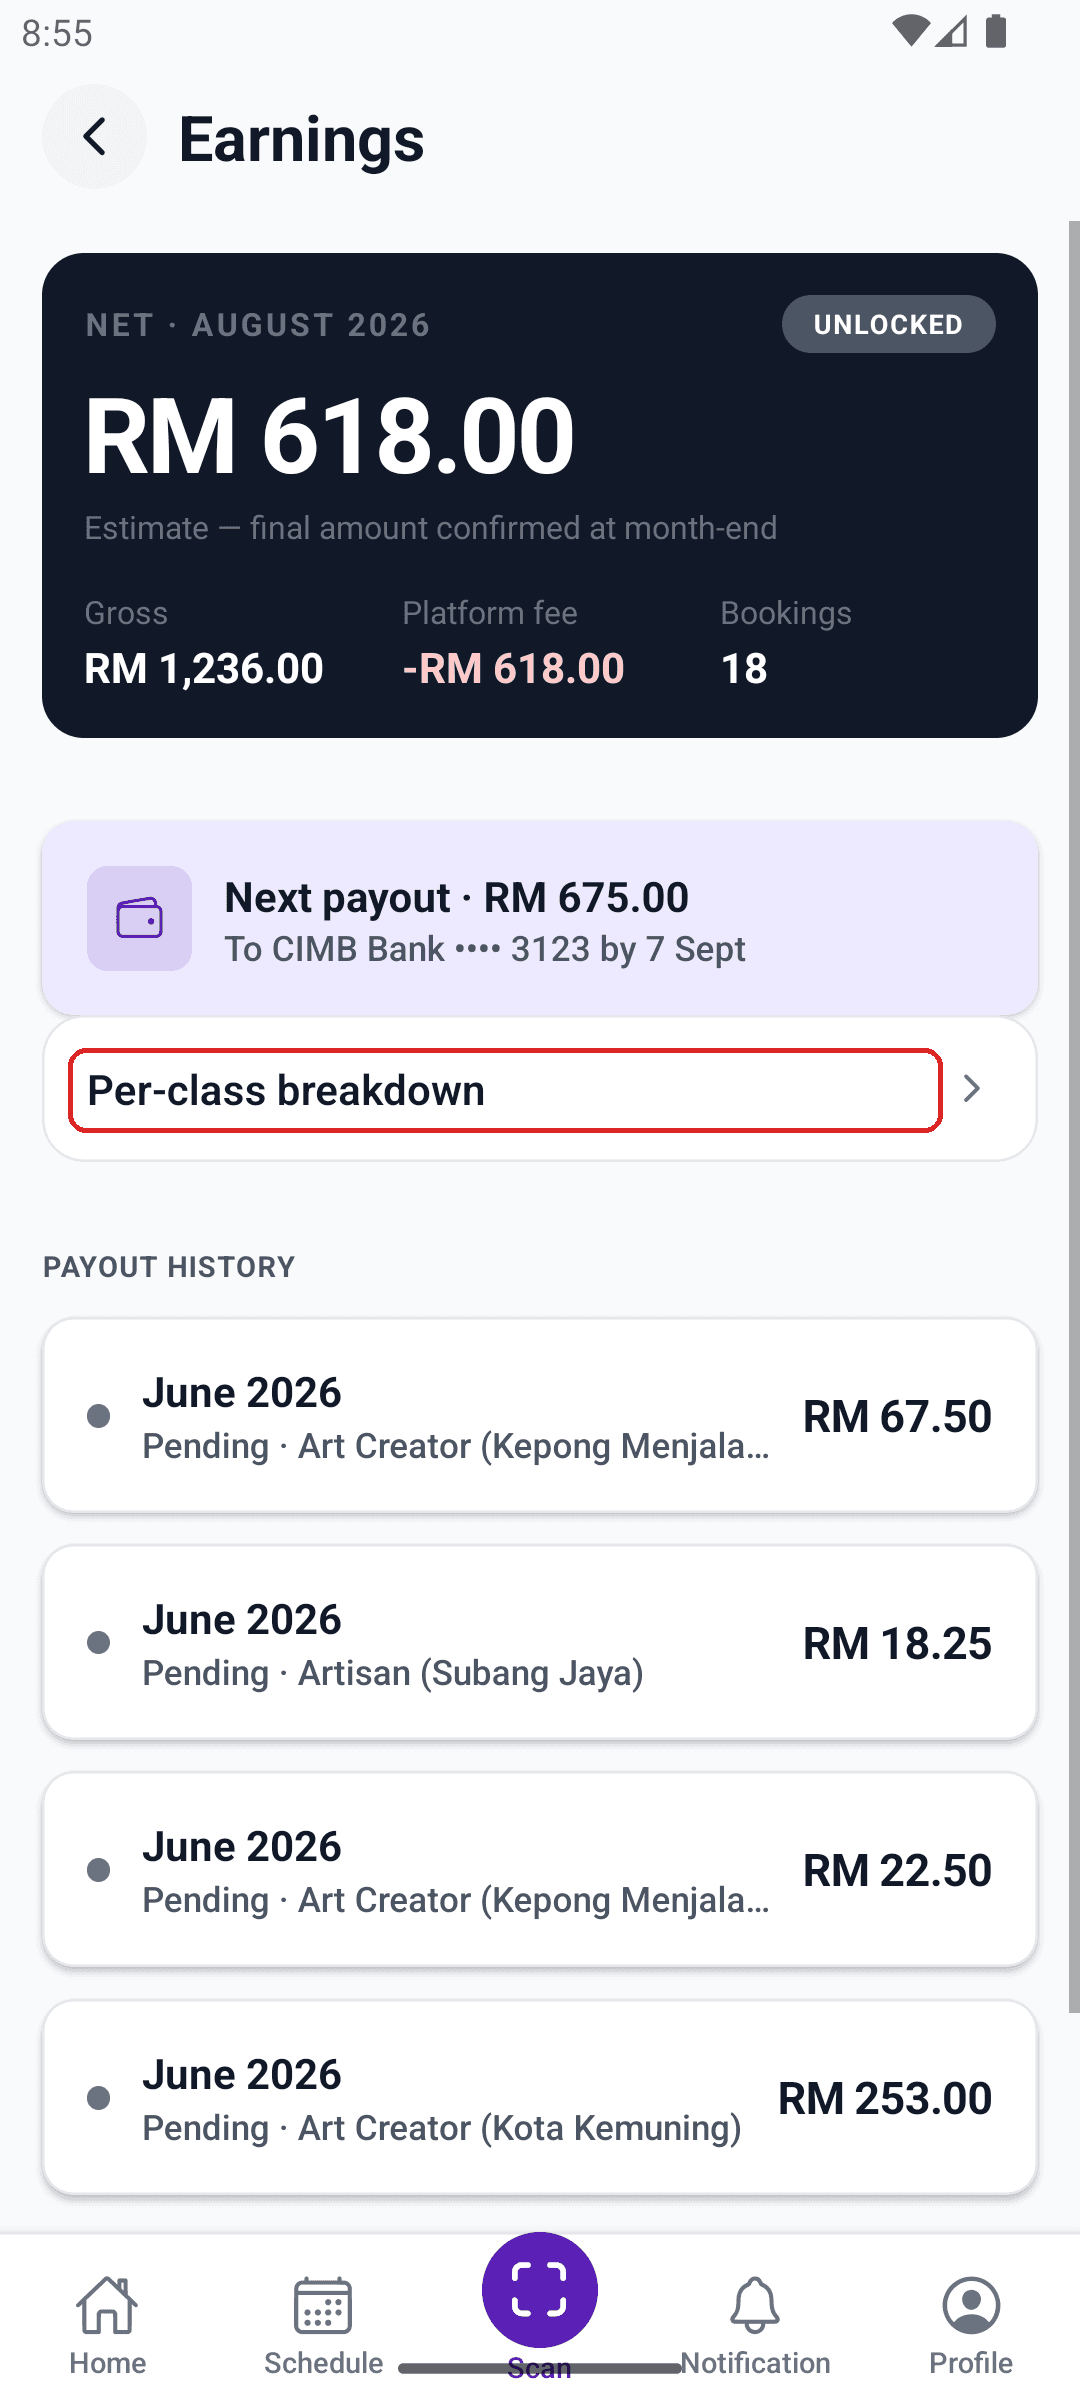
Important: this screen needs Face ID and only opens for the account owner — it's locked down because it shows money.
Profile screen with the Earnings and payouts row boxed in red
1. On Profile, tap Earnings & payouts.
Earnings screen showing net payout, next payout date, and the Per-class breakdown row boxed in red
2. Tap Per-class breakdown.
Per-booking breakdown list showing individual class earnings and credit counts
3. Every booking, credit, and ringgit.

Your account

How to check branches & account

Everything under your account

Tap Profile for every branch under your account, your overall review score, and a Flag Issue button for reporting something that isn't tied to a class you have open.

“Earnings & payouts” sits here too, but only opens for the account owner and needs Face ID.
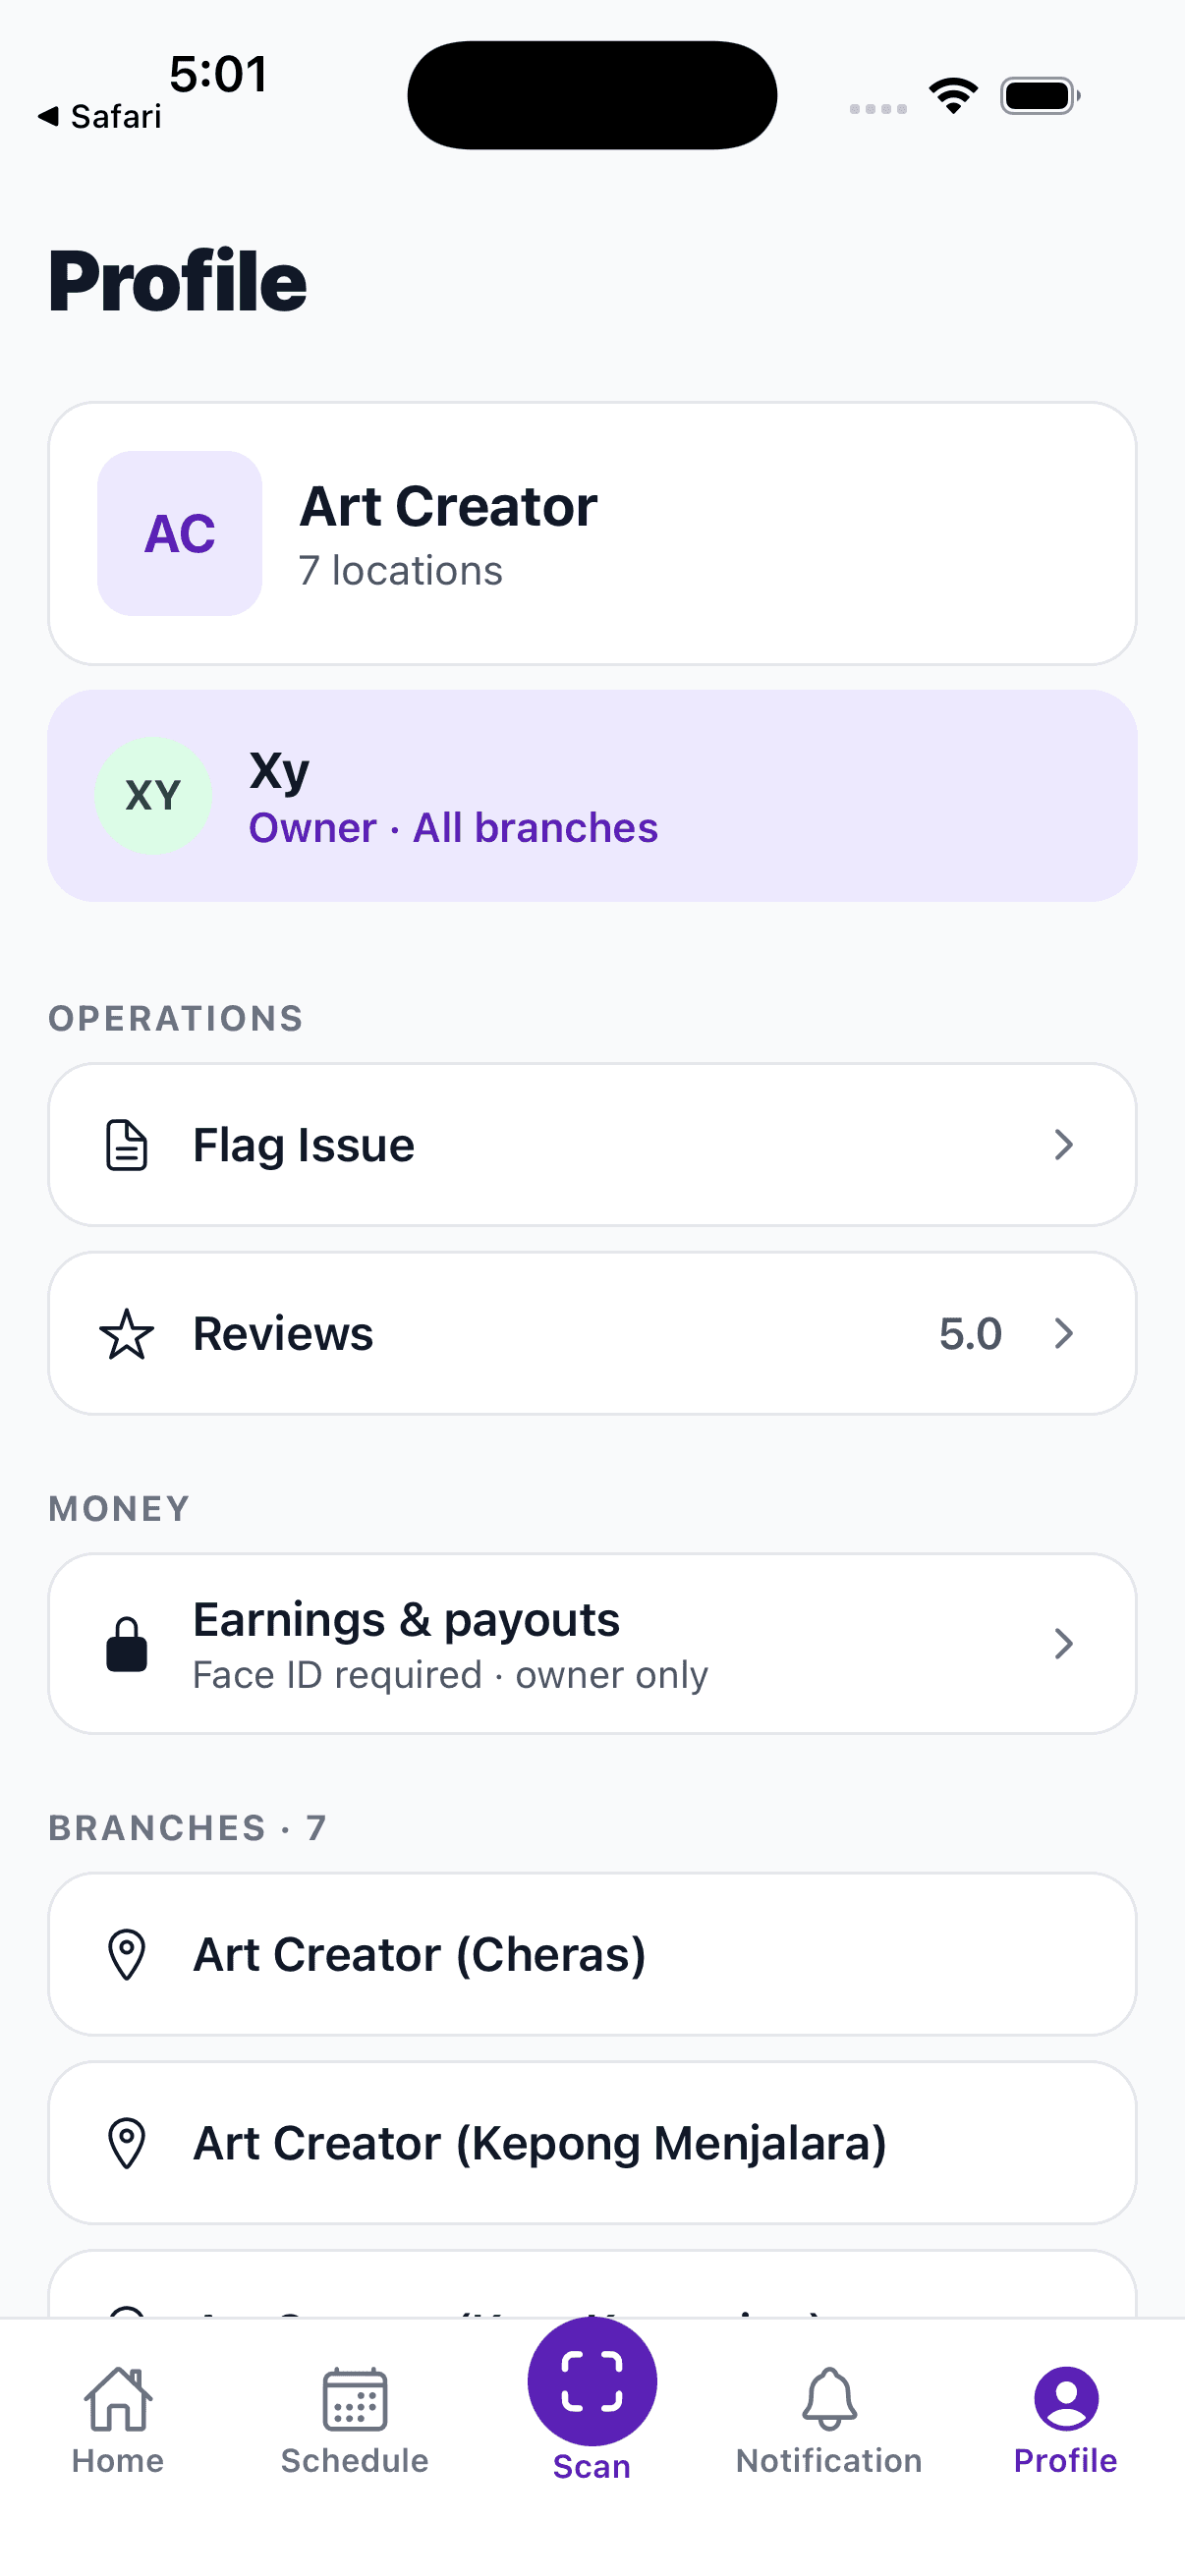
Profile screen listing branches, reviews, and account options