How to use the KINPASS Partner dashboard, one task at a time.
Each topic below is a single task, laid out in the order you'd actually do it. Multi-step tasks are numbered, and the button or field for each step is boxed in red.
Getting started
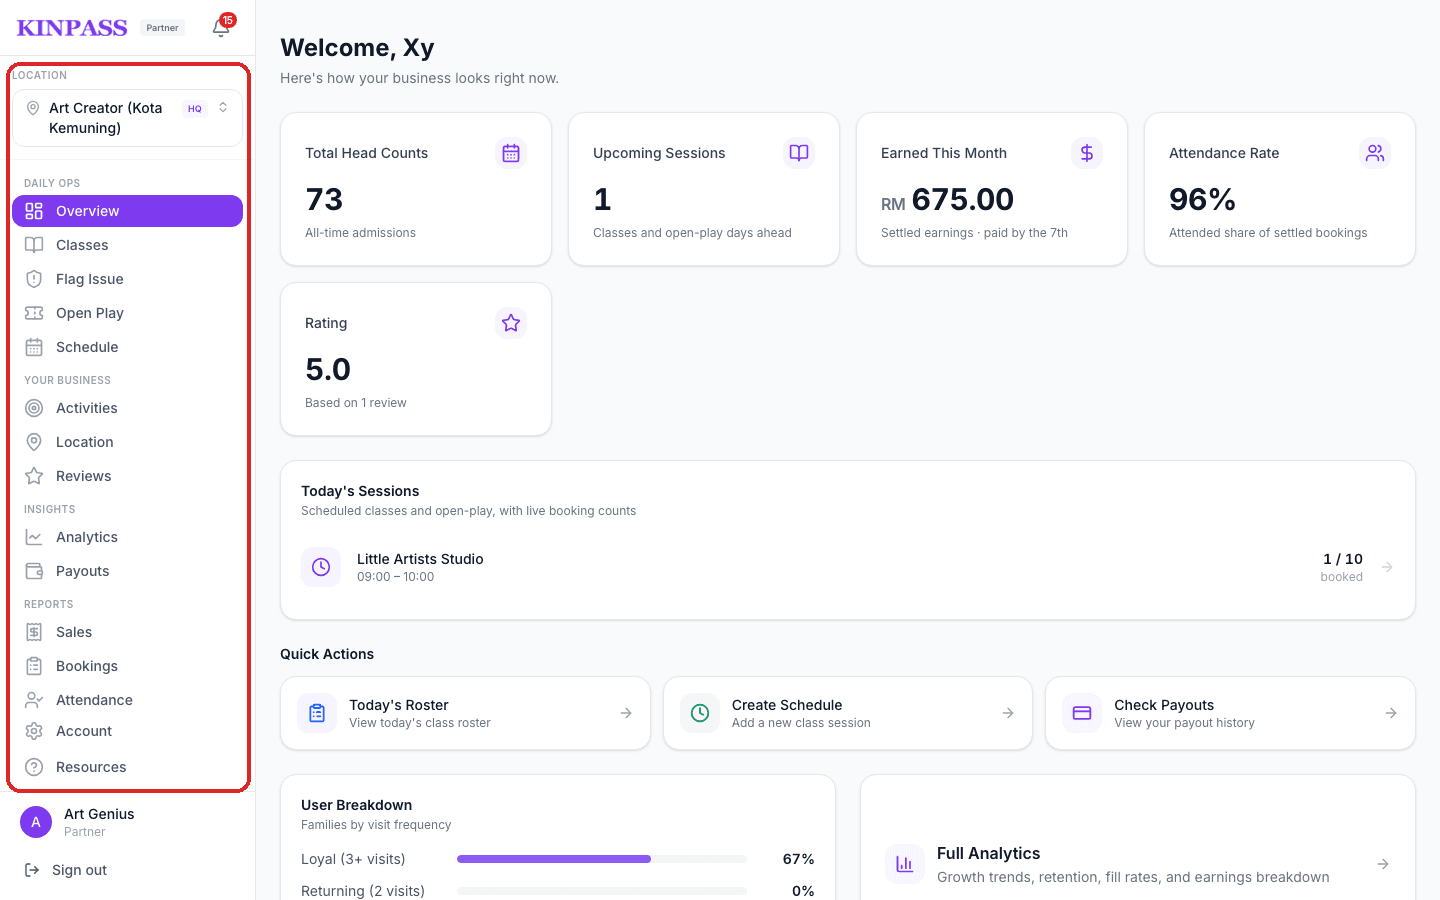
Everything lives in the left sidebar
- Daily ops is what you touch during opening hours.
- Your business is your activities, branches, and reviews.
- Insights and Reports show your numbers.
Every day
See head counts, earnings, and today's sessions
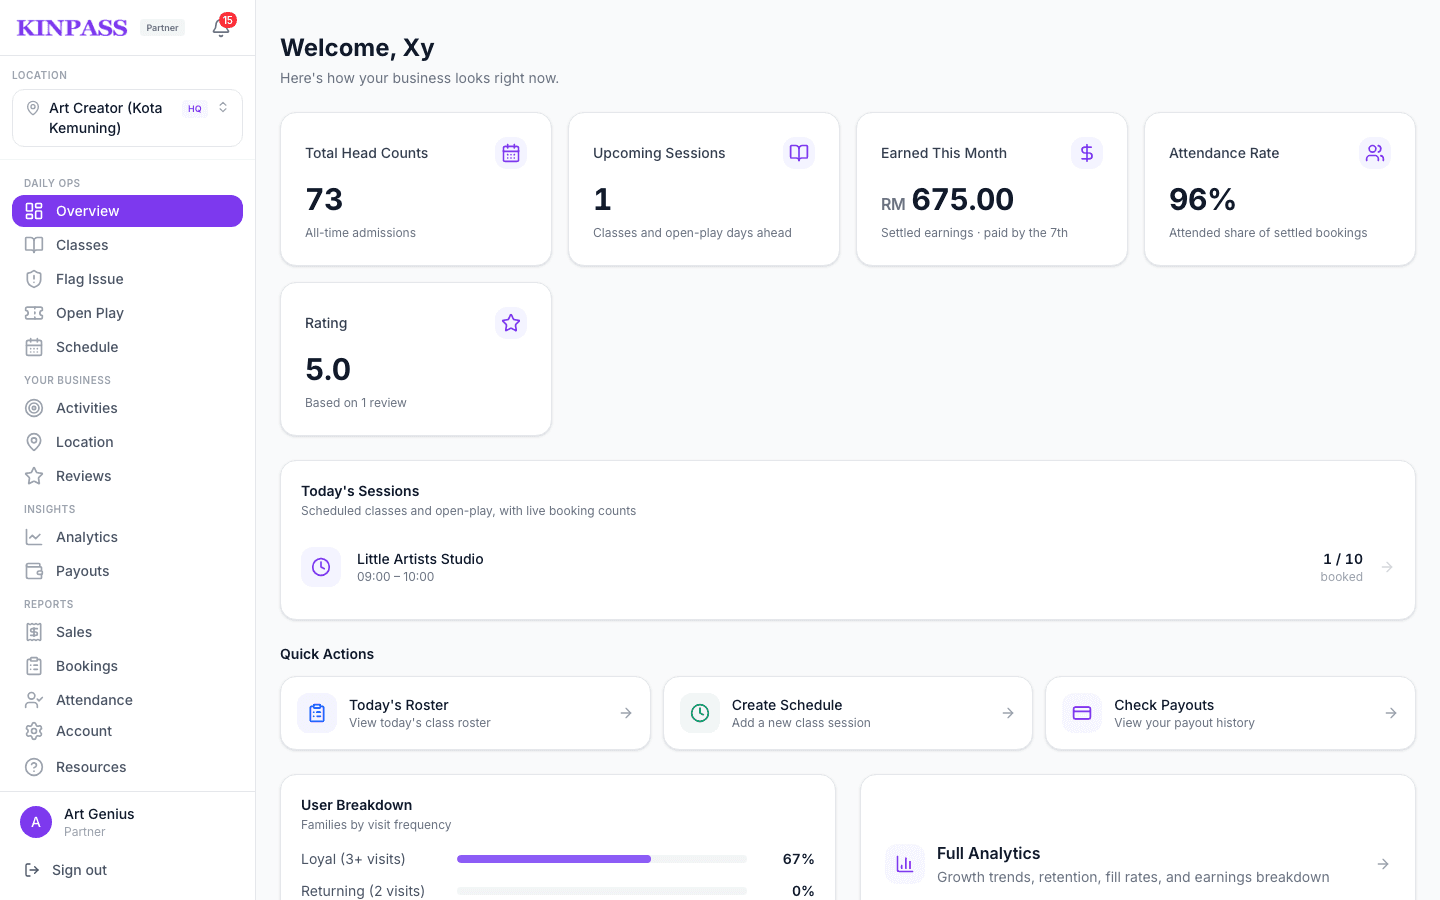
When you log in you land on Overview — head counts, upcoming sessions, this month's earnings, attendance rate, and your rating, all in one place.
Check in kids and mark attendance from your desk
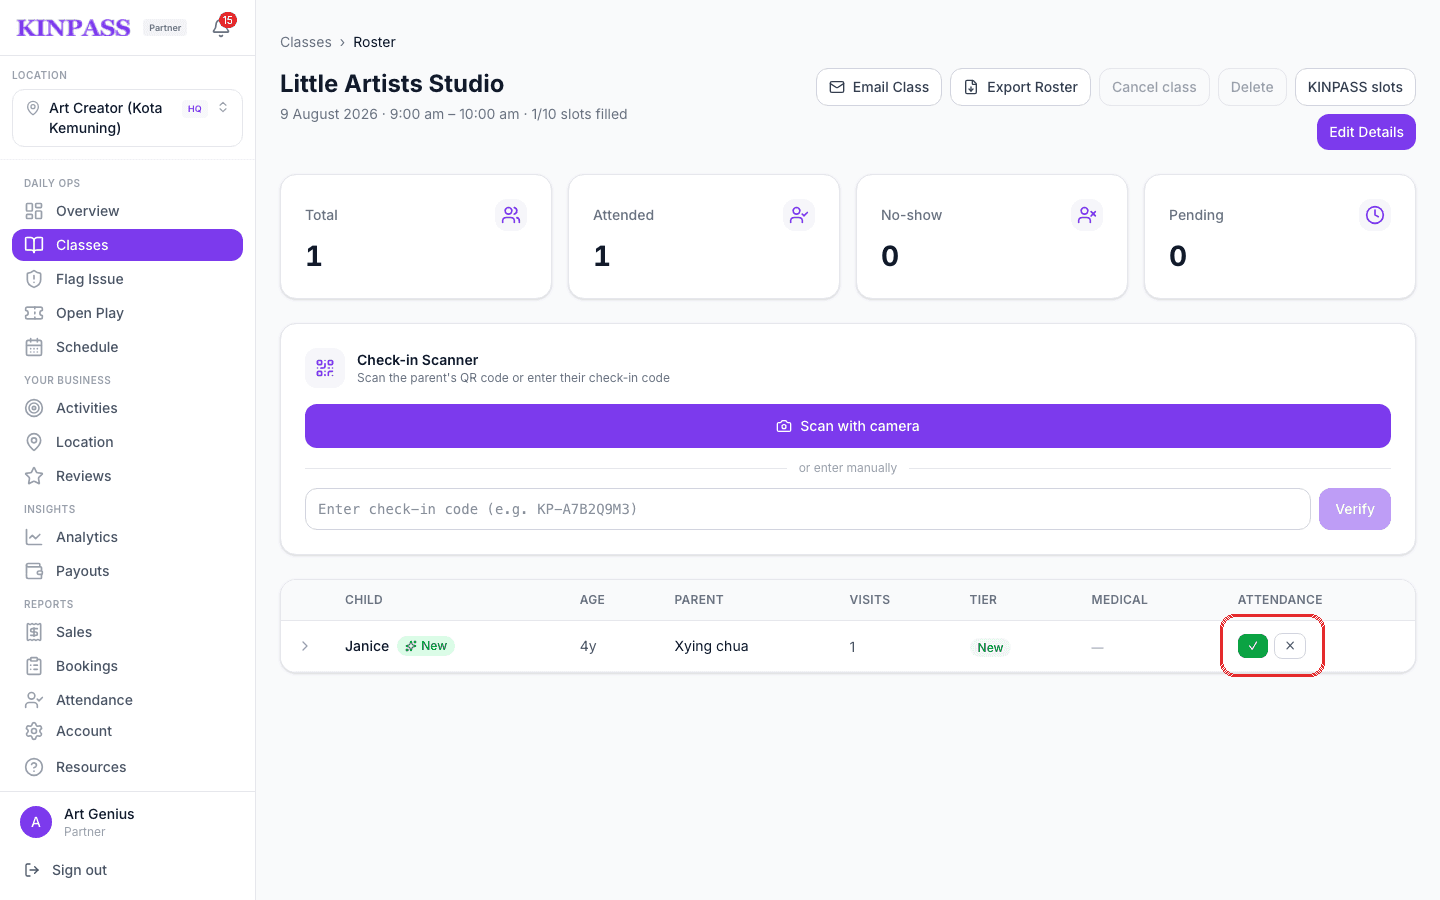
Mark attendance right from your desk — open the class roster and tick off each child as they arrive, no phone needed.
You can also skip tapping each name individually — the same roster page has a Check-in Scanner that marks attendance by scanning a parent's QR code with your webcam, or by typing in their check-in code.
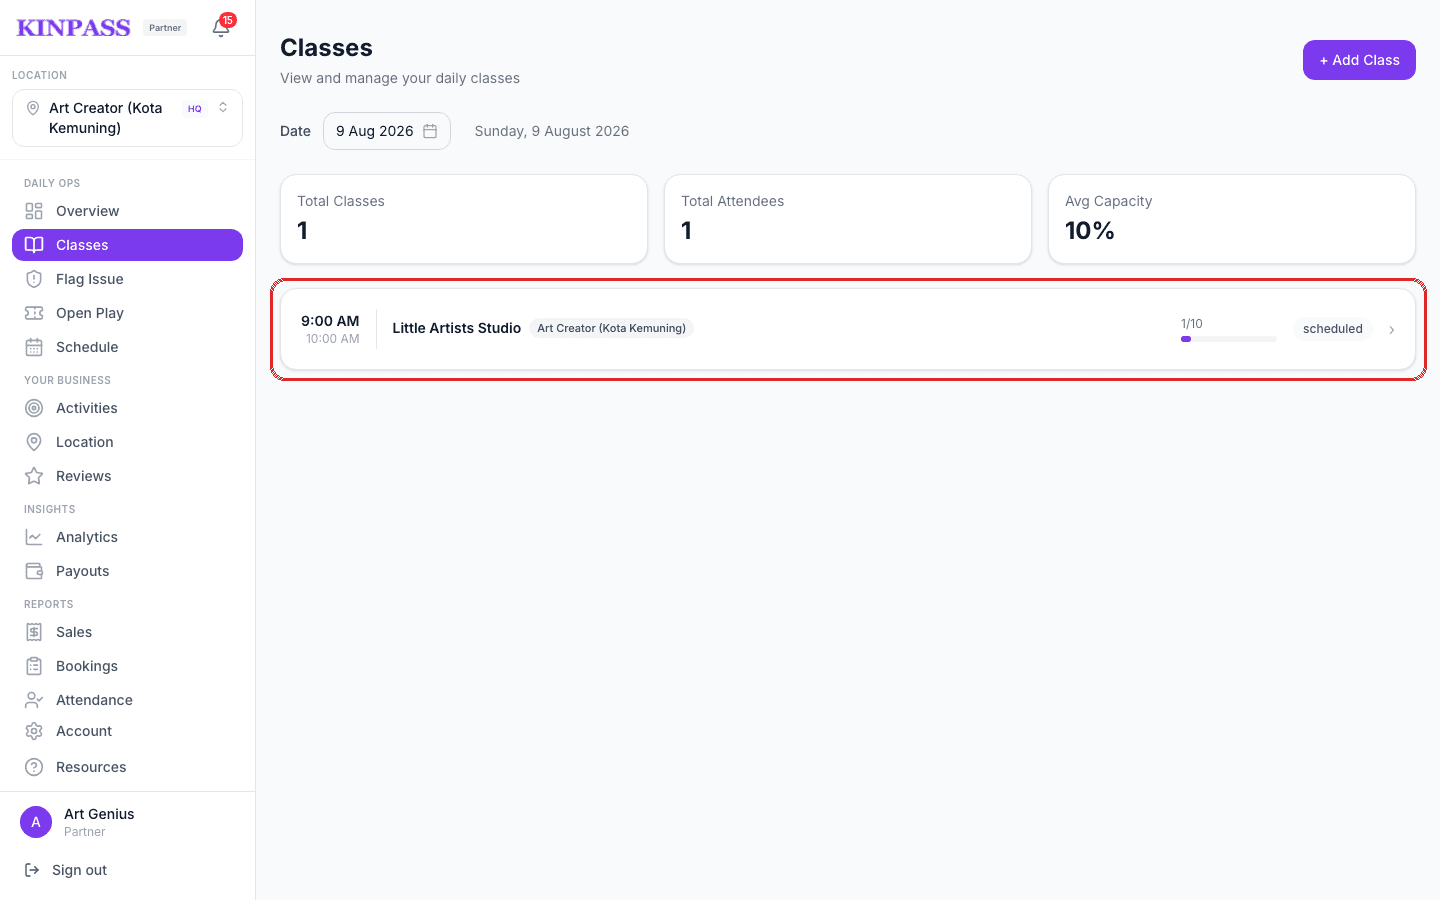
Tap Classes, then click a session row to open its roster.
Find the child's row, then tap the green tick for attended, or the cross for absent.
Admit a family with one scan
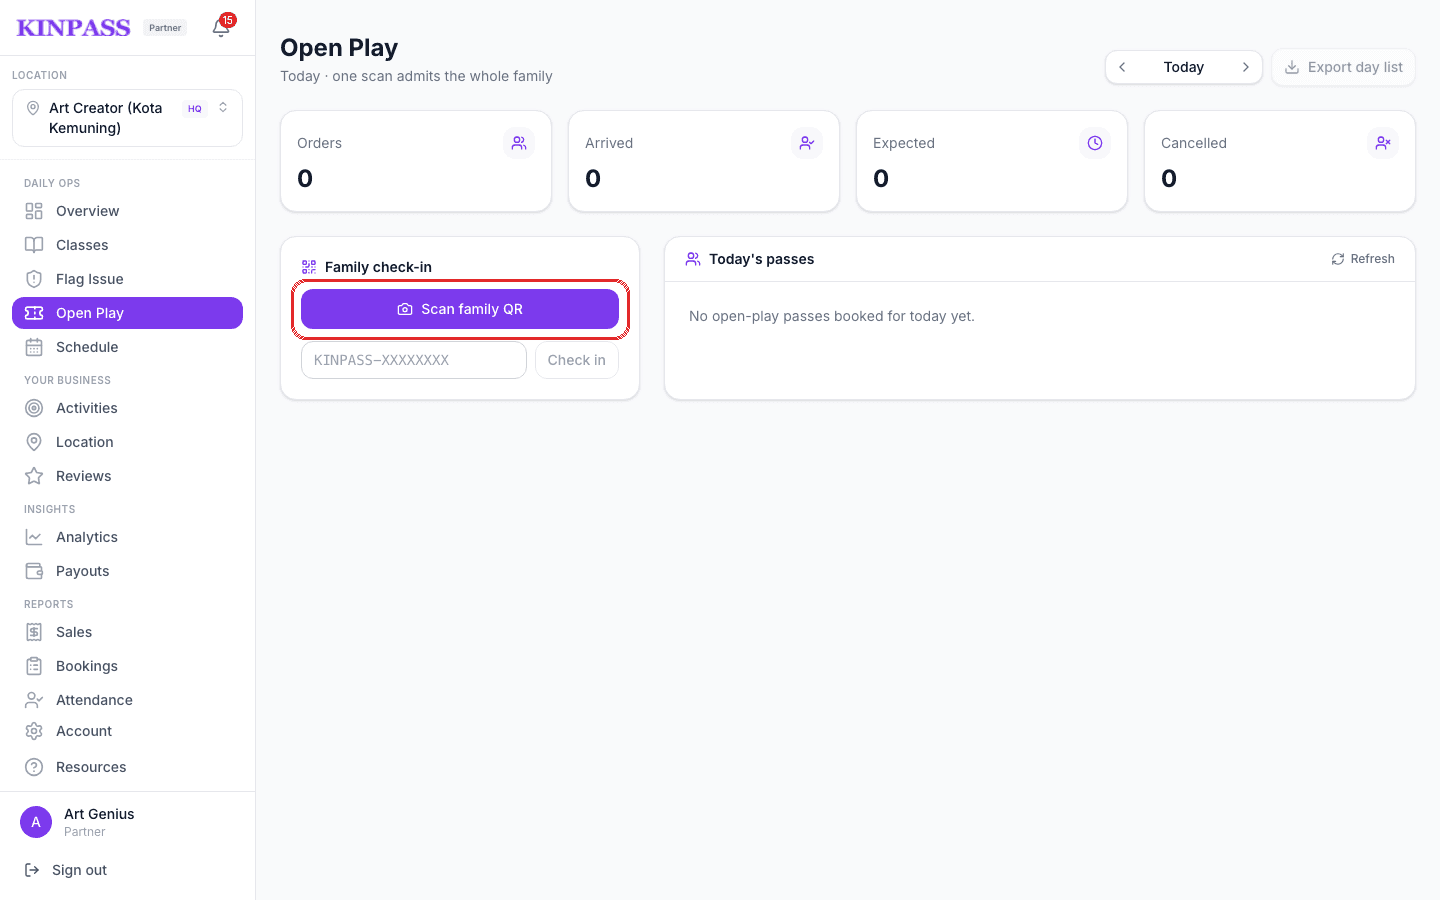
Open Play is for day-pass families, separate from timed classes. One scan or code checks in everyone in their group — parents and kids — at once.
On Open Play, click Scan family QR to admit a family with your webcam.
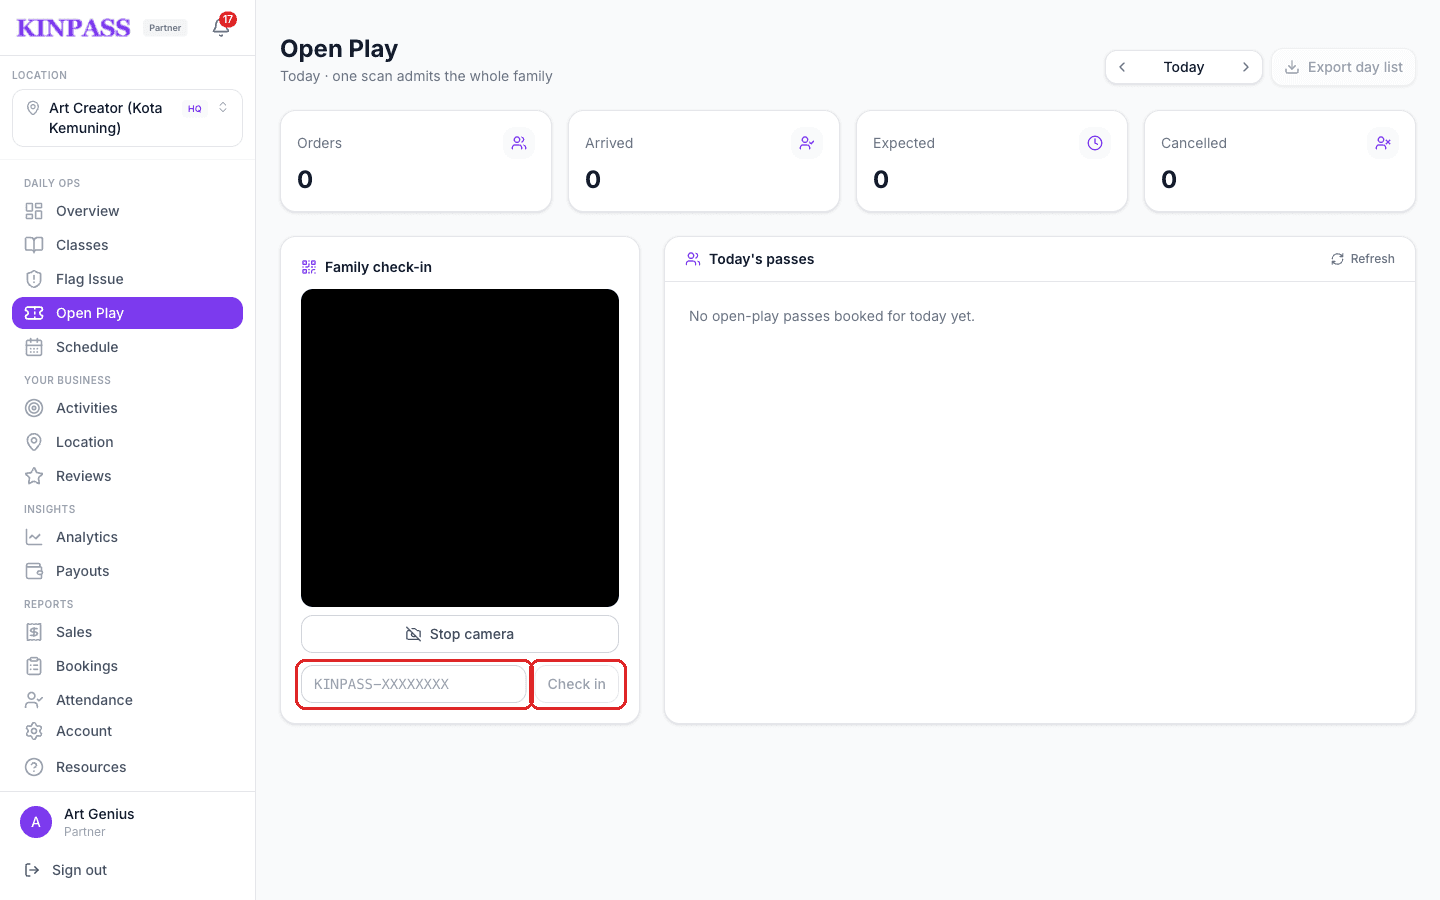
No webcam, or the browser can't access the camera? Type the family's code and click Check in.
Report an injury or safety concern
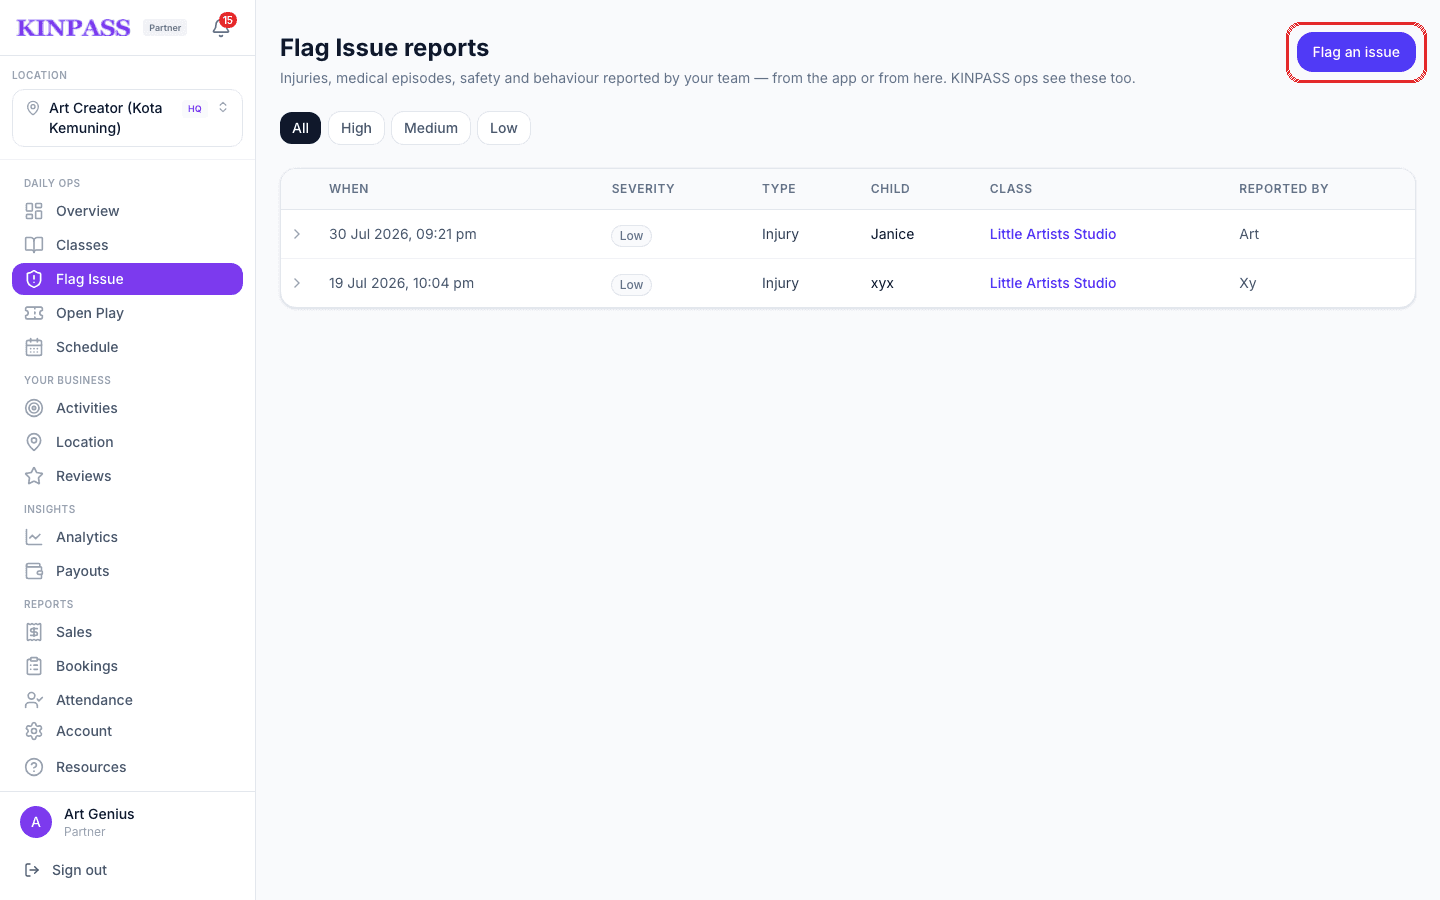
Tap Flag Issue to see everything your team has reported — from here or from the app — with severity, the child involved, and who reported it.
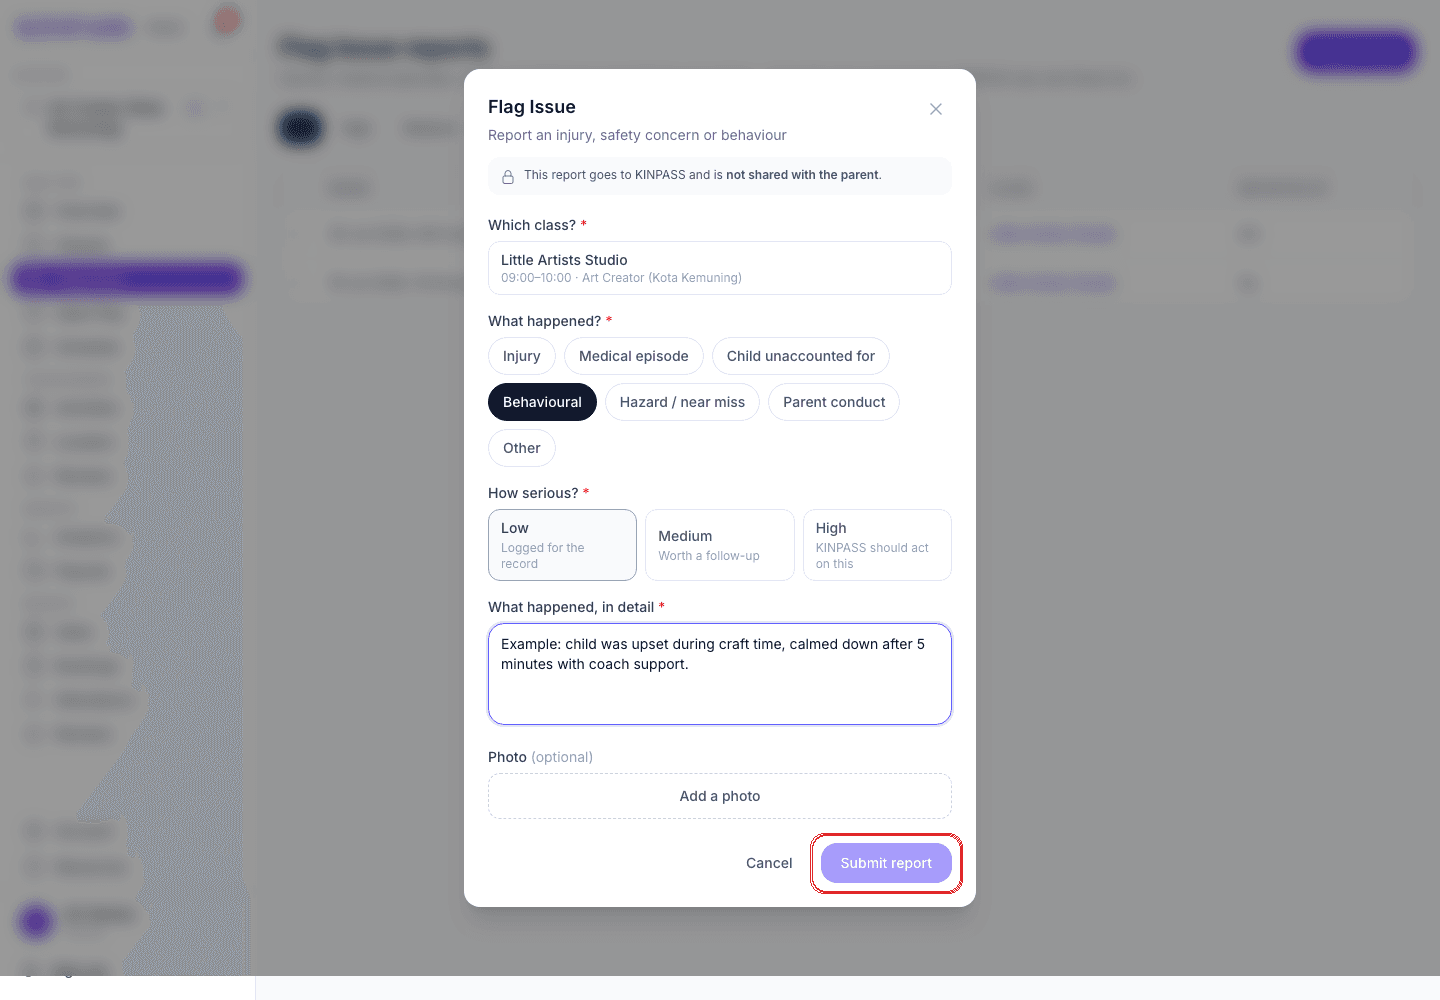
On Flag Issue, click Flag an issue.
Pick the class, what happened, how serious it is, describe it, then click Submit report.
Don't miss a low-attendance or cancellation alert
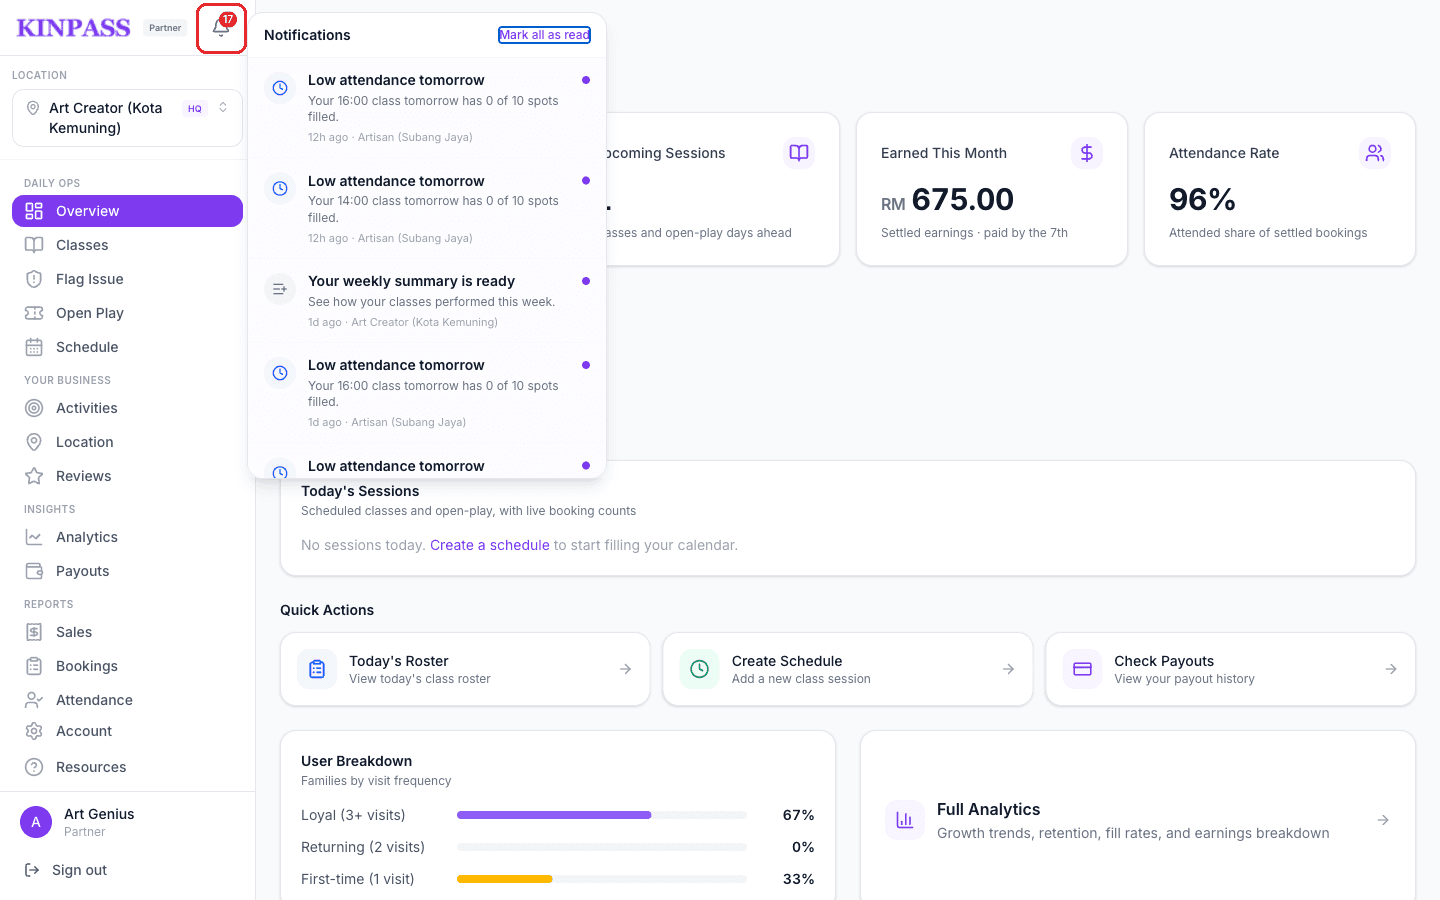
Click the bell icon at the top of the sidebar to see what needs your attention — a class with low bookings tomorrow, a cancellation deadline closing in, or your weekly performance summary.
Classes & schedule
Build your weekly class schedule
An activity needs approved pricing before you can schedule it — if it's missing from the list, check Activities; it's probably still Draft or Pending Approval.
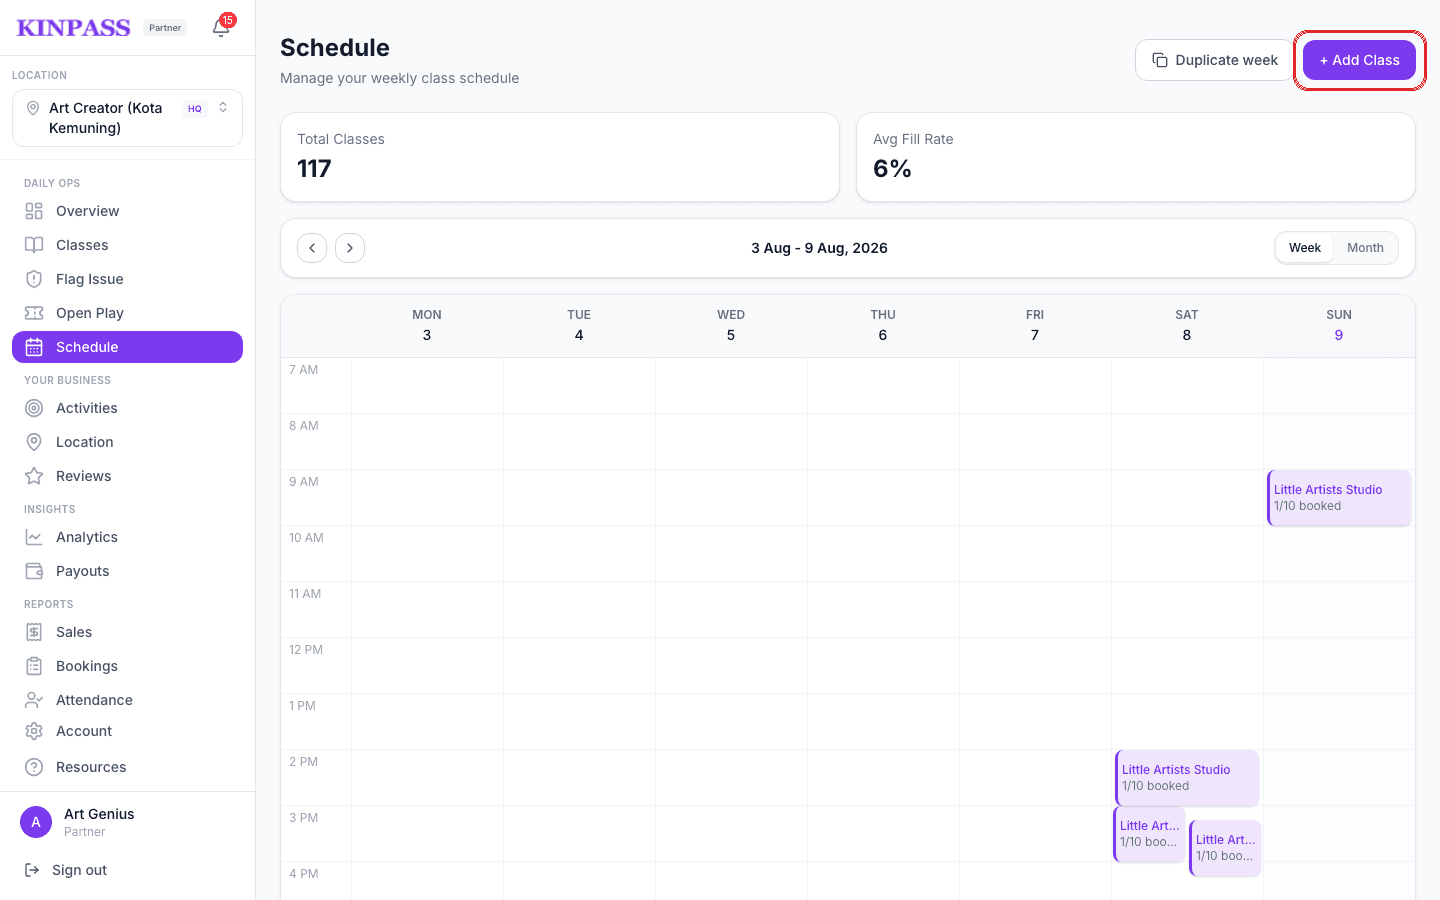
Rather than build each class from scratch, duplicate one instead: use Duplicate week on the Schedule page to copy last week's classes into the next one, or Duplicate from previous week right inside this form.
On the Schedule page, click + Add Class.
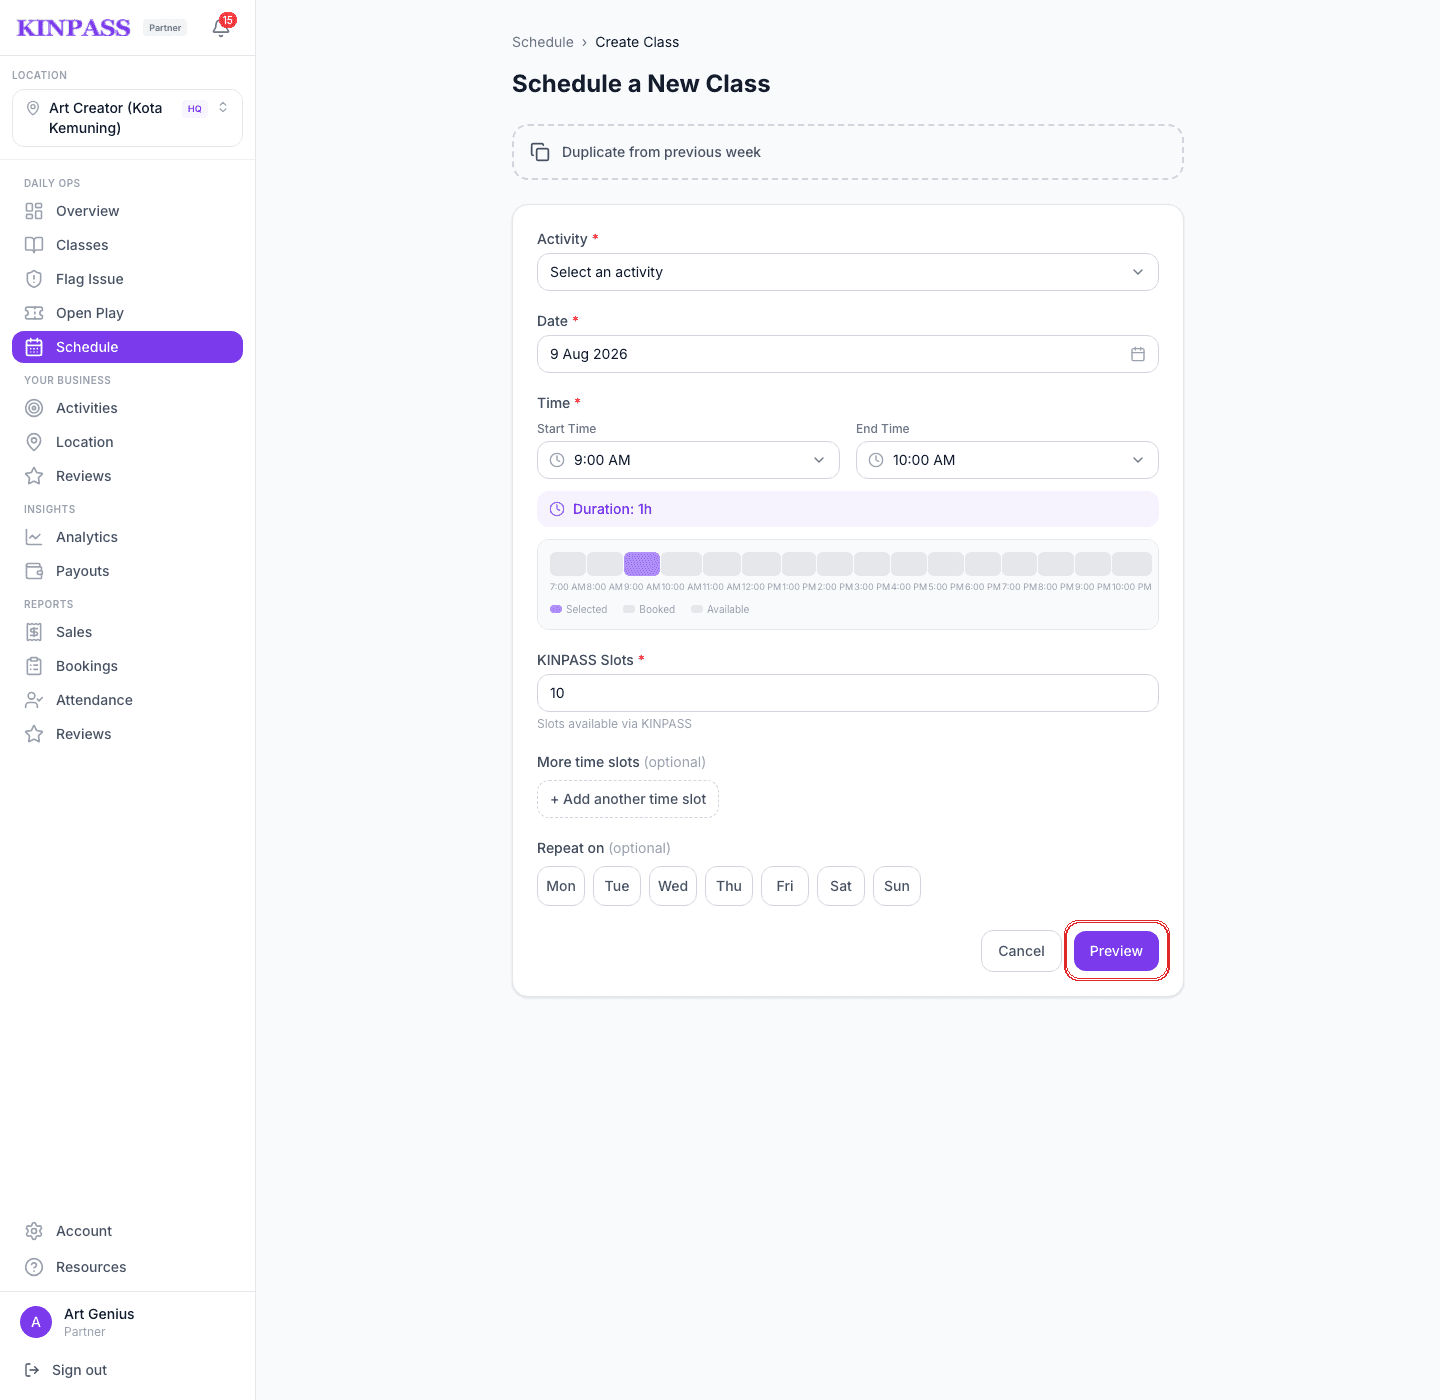
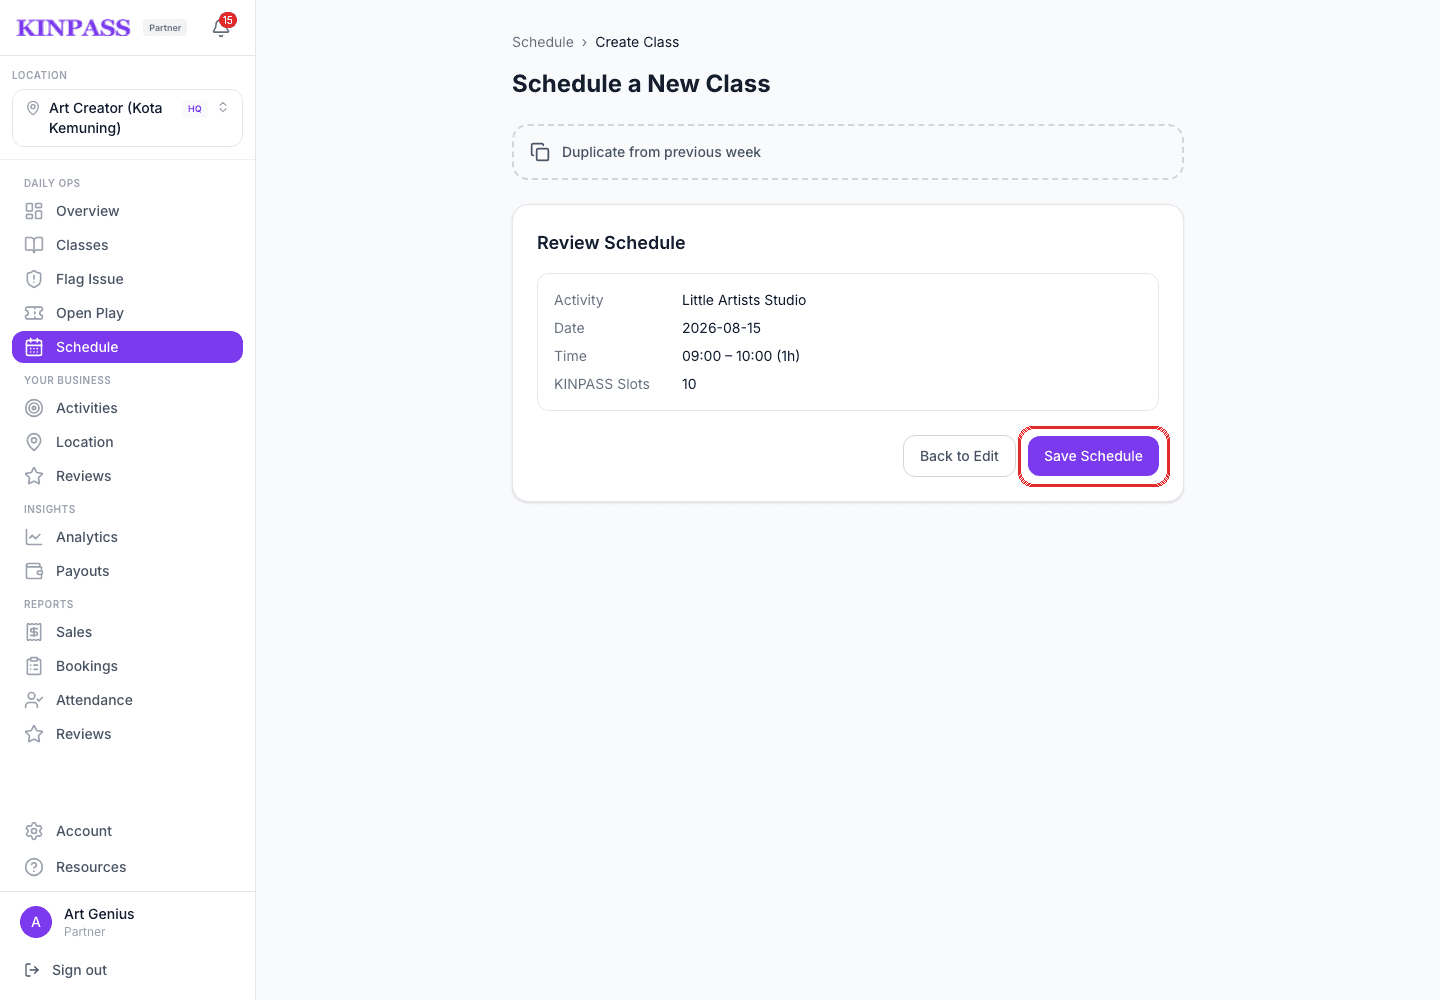
Choose the activity, date, and time, set how many KINPASS Slots to open, then click Preview.
Check the details on the review screen, then click Save Schedule.
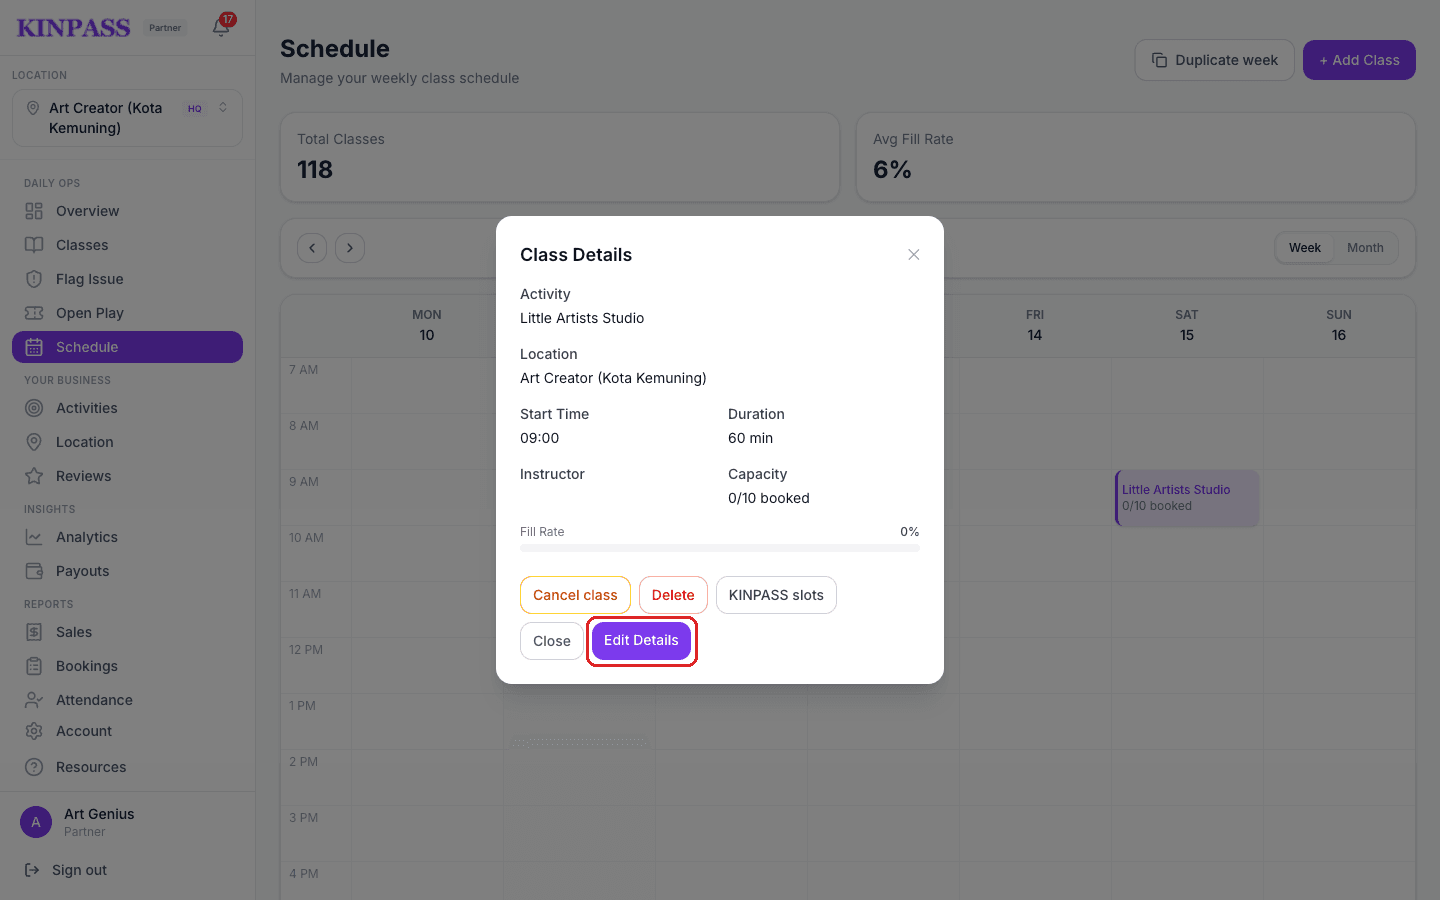
Change a class's time, date, or slots
Editing keeps the class and its existing bookings in place. If you need to call the session off entirely, cancel it instead.
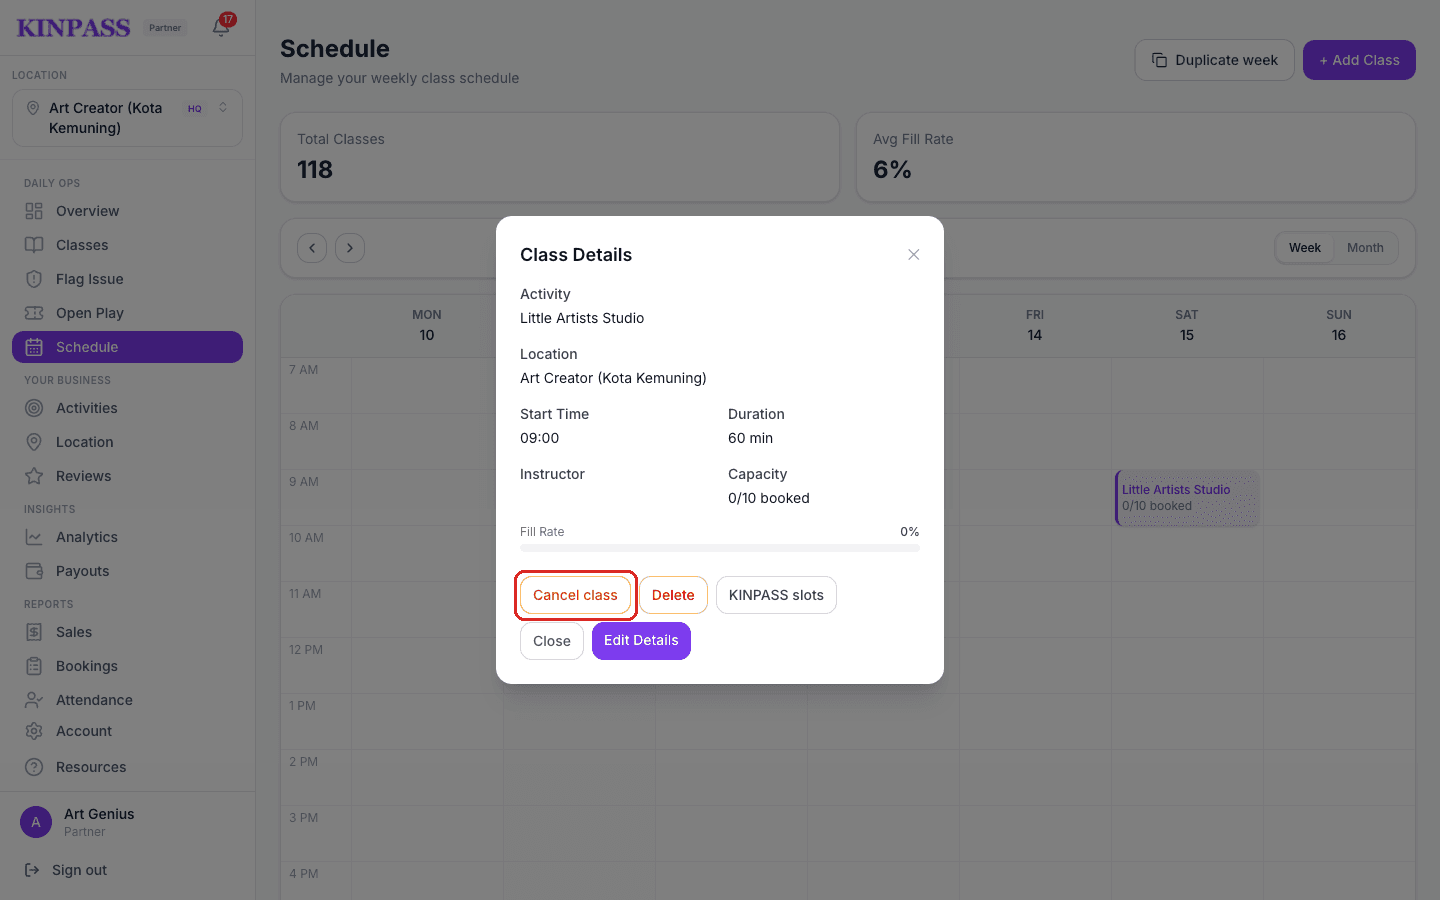
Call off a session you can't run
Cancelling refunds the families booked into that class in full — it's meant for when you genuinely can't run the session (instructor unavailable, venue issue). Use it sparingly; repeated cancellations hurt your fill rate and rating.
Click the class on the calendar, then click Cancel class.
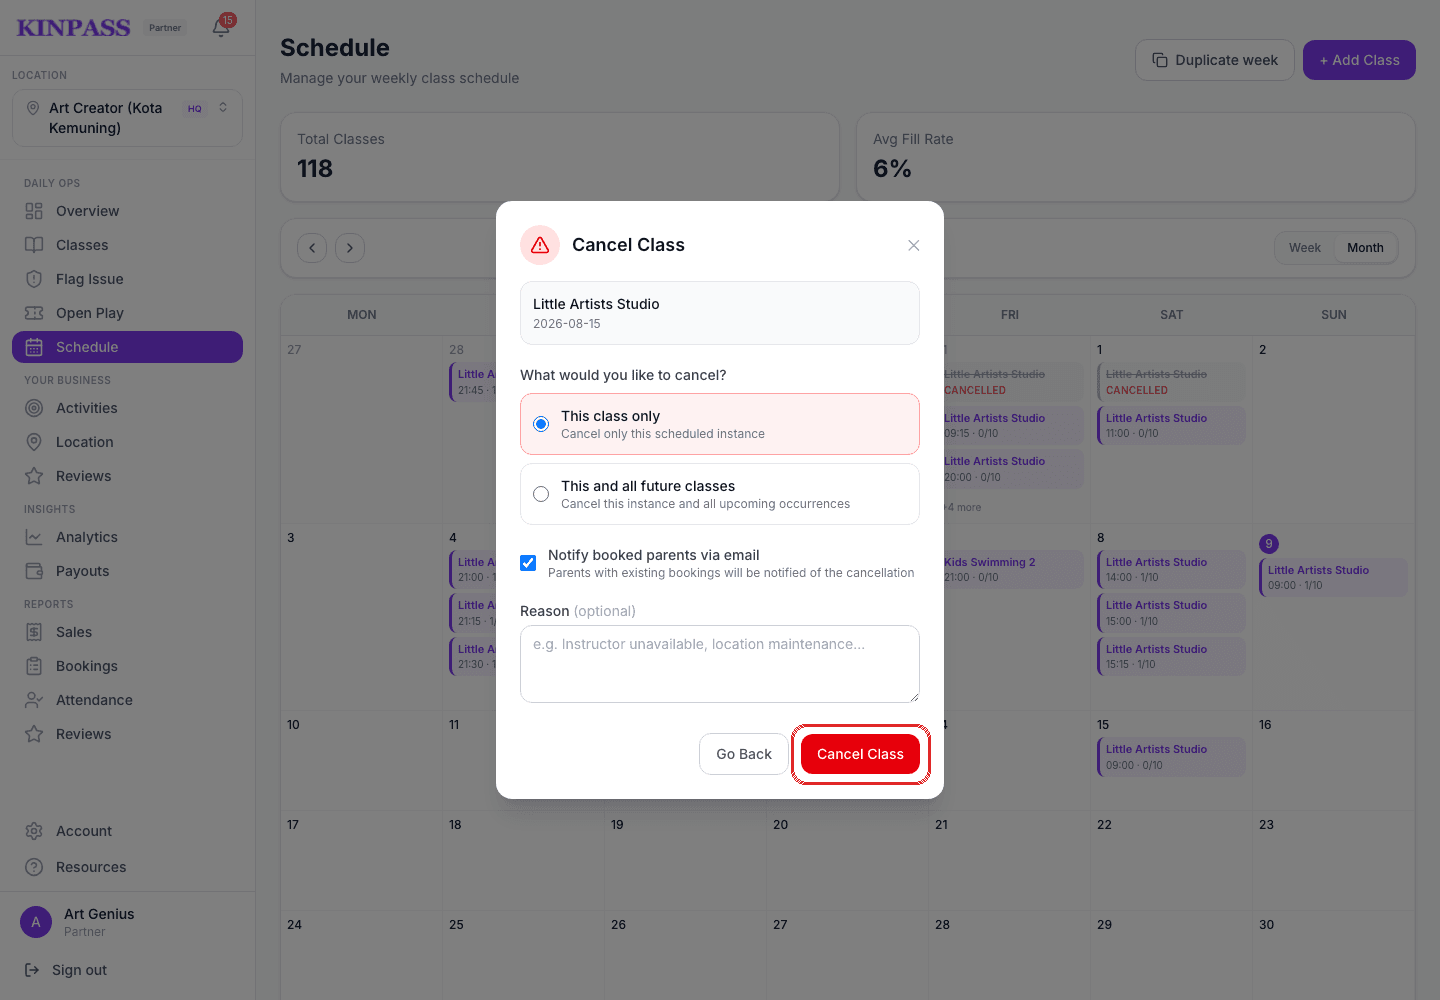
Choose This class only or This and all future classes, decide whether to notify parents, then click Cancel Class.
Activities & pricing
Create it, set its price, and manage it over time
Pick the Format carefully — it can't be changed later:
- Scheduled classes — fixed time slots parents book into, like a swim lesson or an art class. Create sessions for it on the Schedule page, each with its own date, time, and number of slots.
- Open play (day pass) — walk-in access during your opening hours, like a playground or jungle gym. Families buy a day pass and you admit them from the Open Play page.
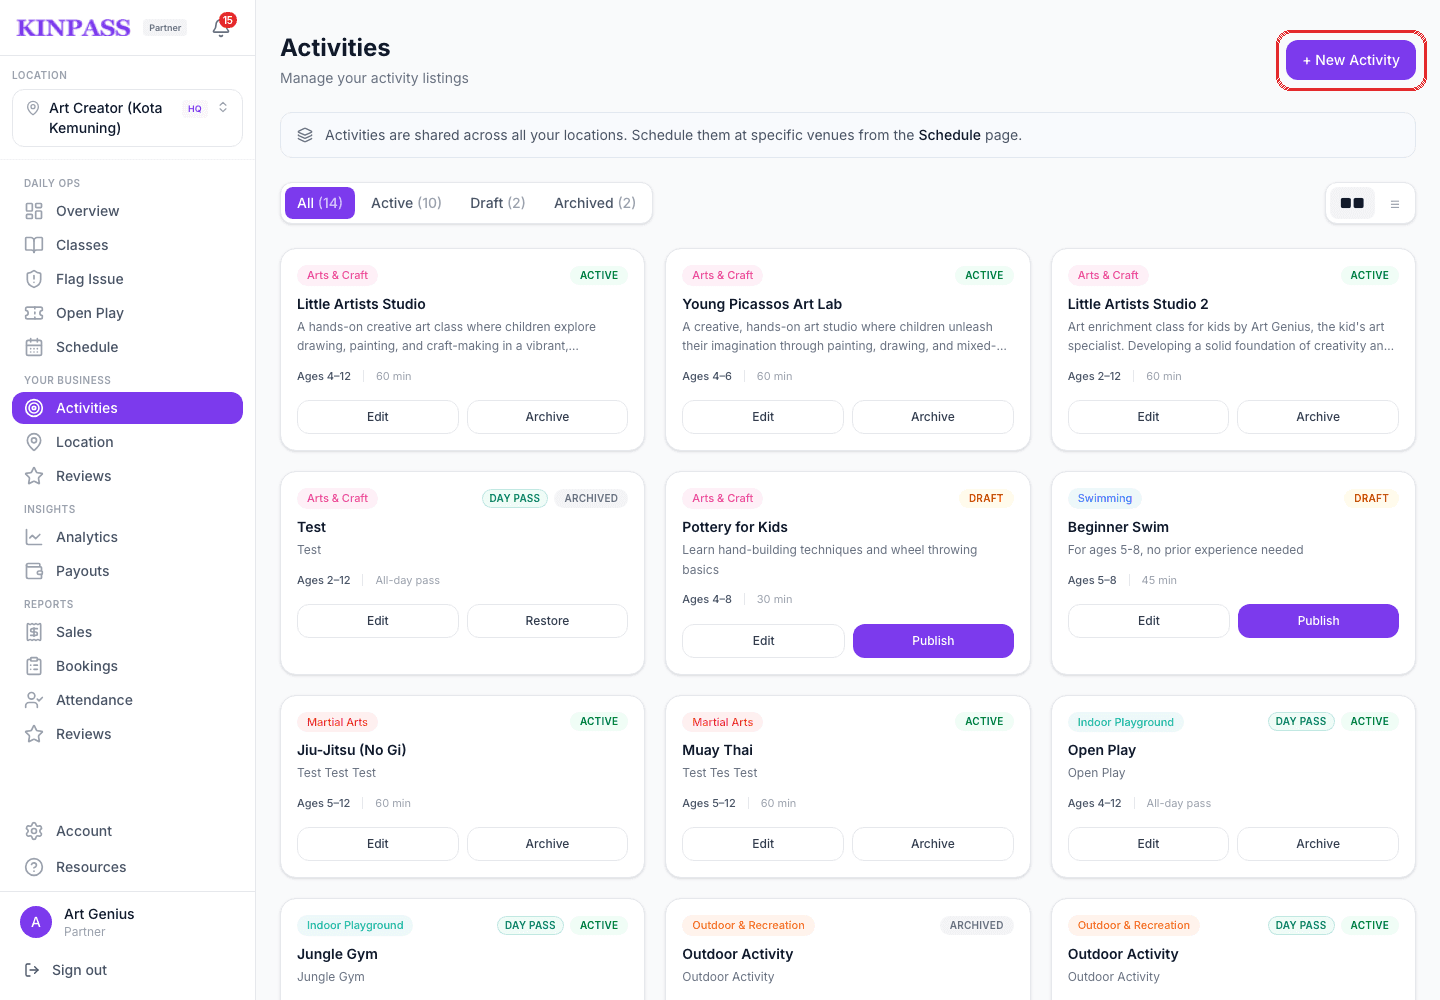
On Activities, click + New Activity.
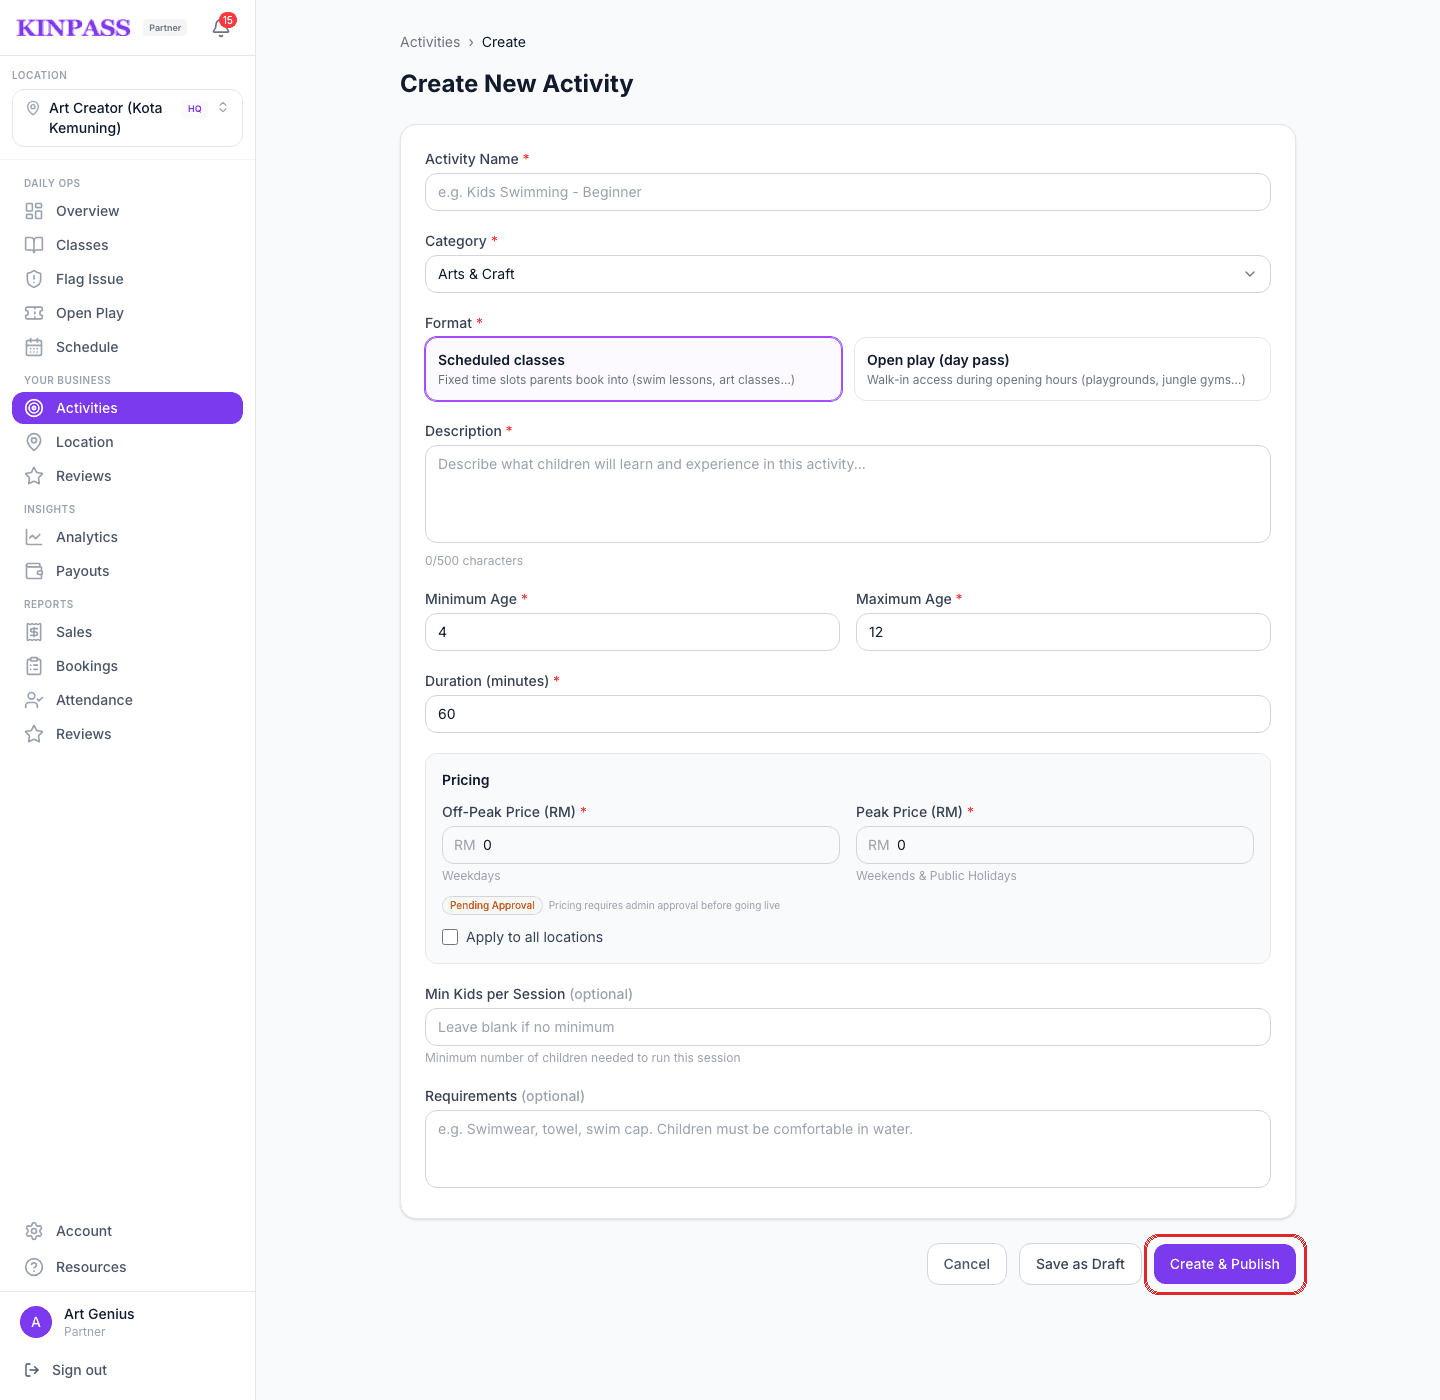
Fill in the Activity Name, Category, Format, and Description, set the age range and duration, then set your Off-Peak and Peak prices. Min Kids per Session and Requirements are optional. Click Create & Publish when you're ready.
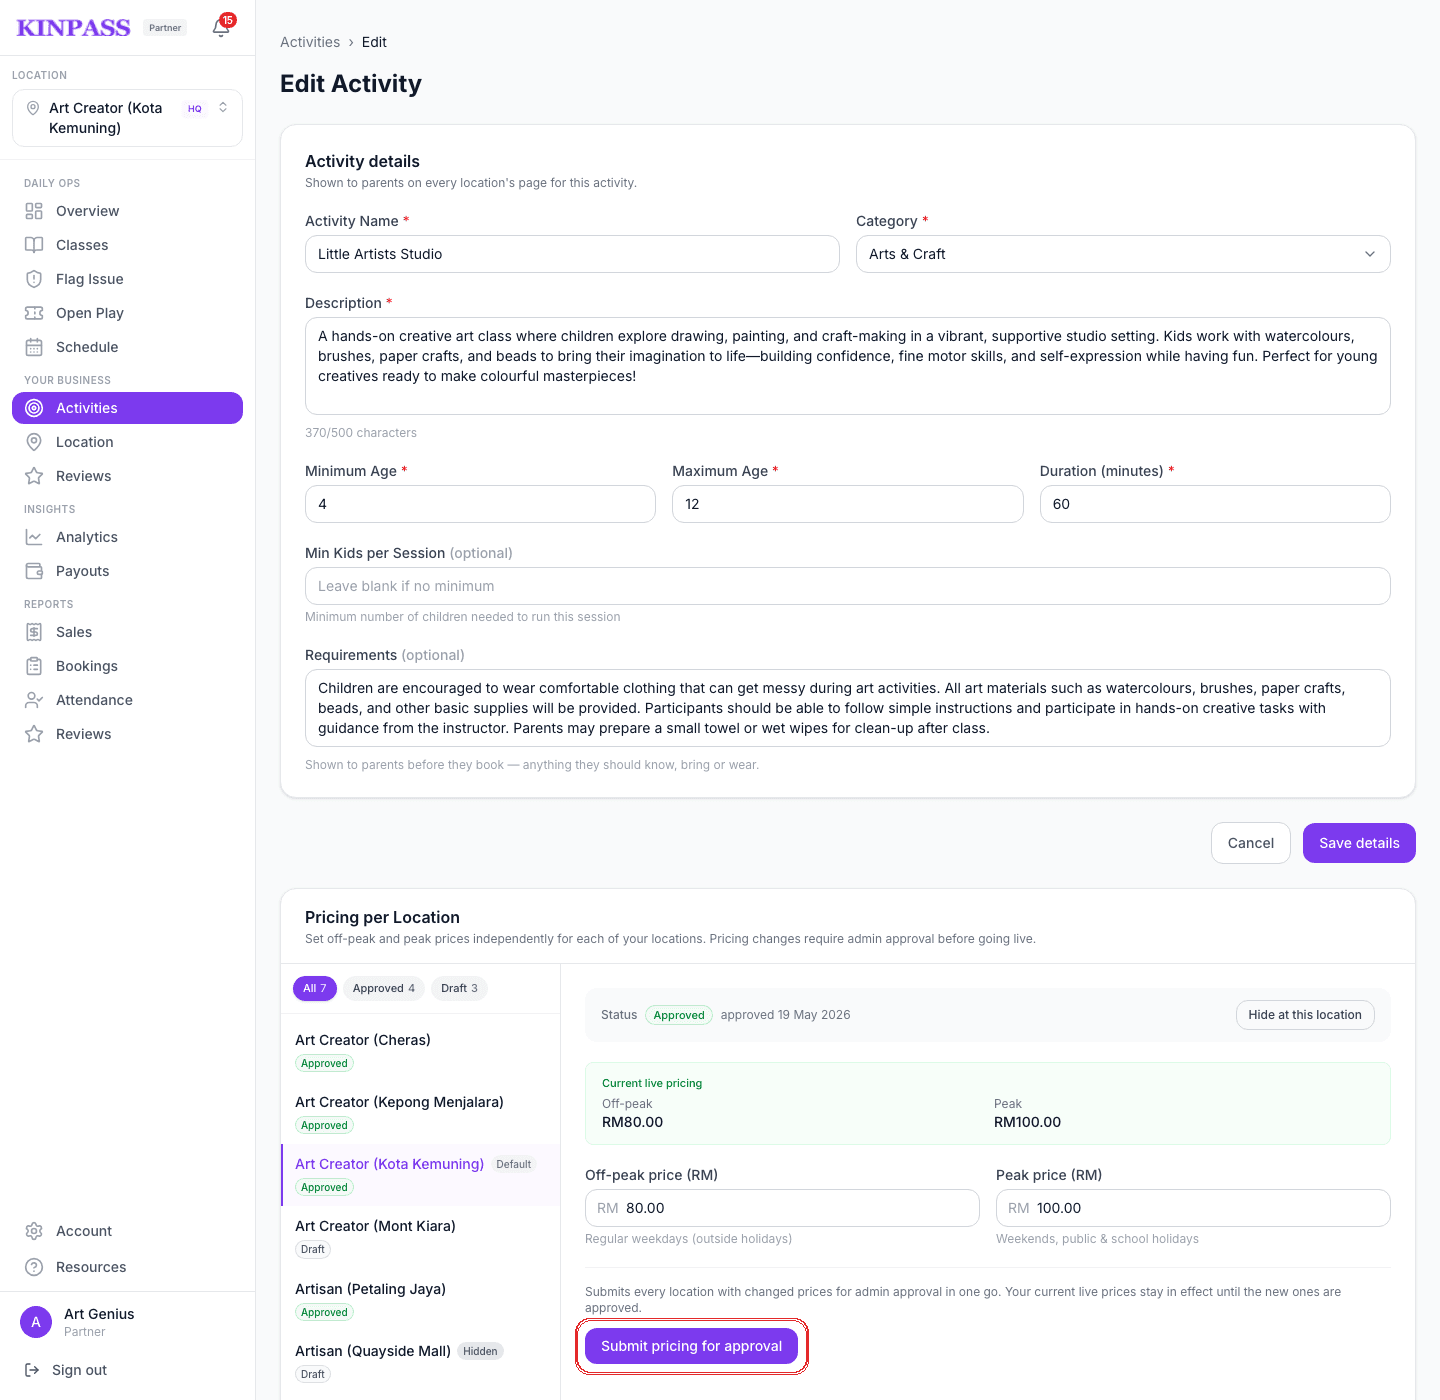
To change the price later, click Edit on the activity, scroll to Pricing per Location, update the price for that branch, then click Submit pricing for approval.
Take a listing down, or bring it back
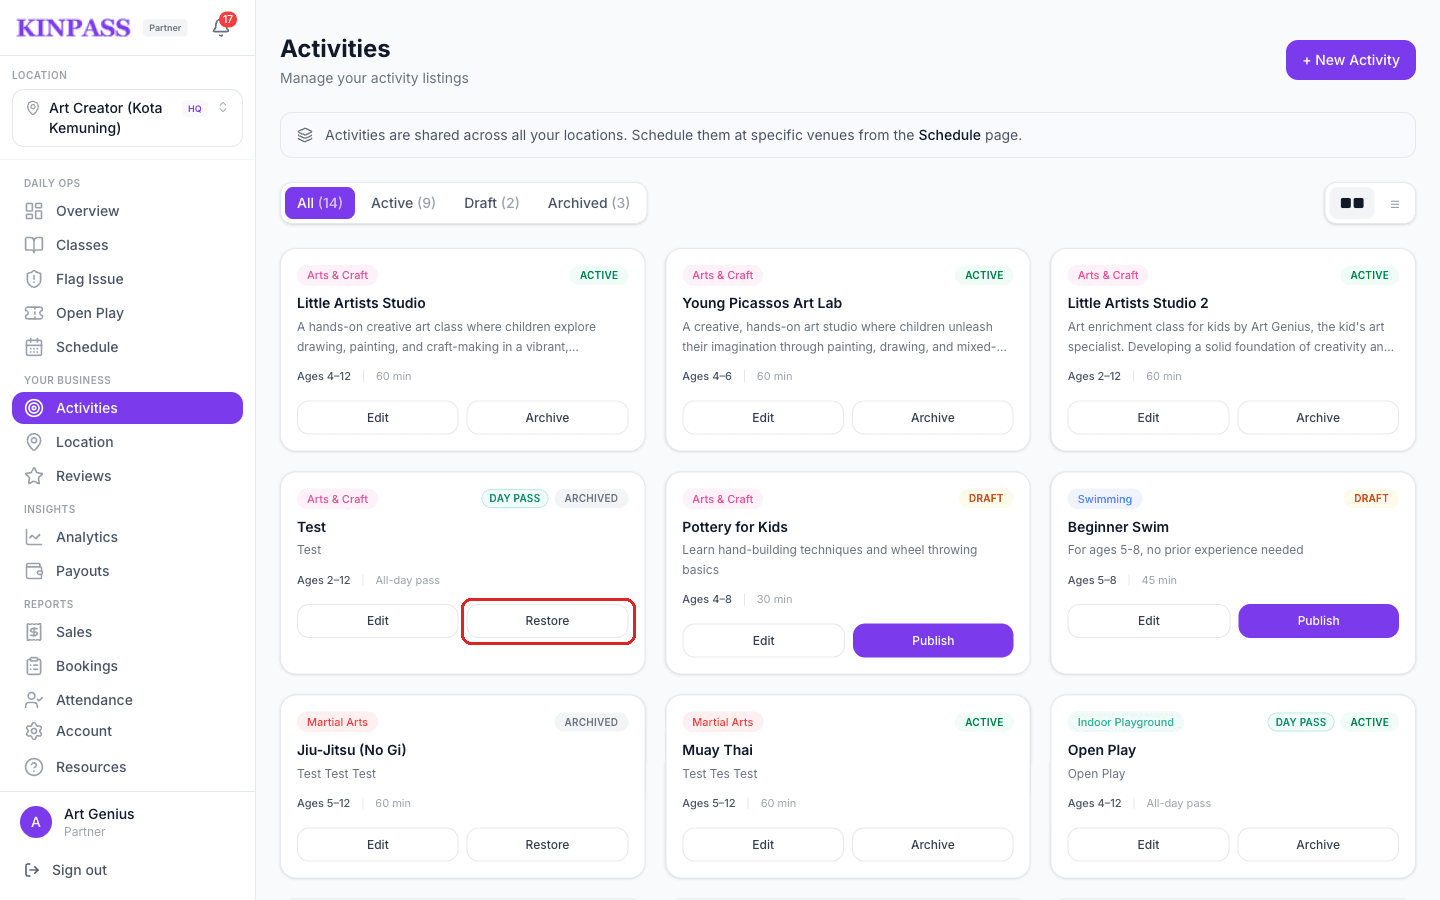
Only Active activities show up in the parent app. Draft and Archived ones are hidden from parents, so archive anything you're not currently running rather than deleting it — the activity and its history stay intact.
On an active activity, click Archive to take it down.
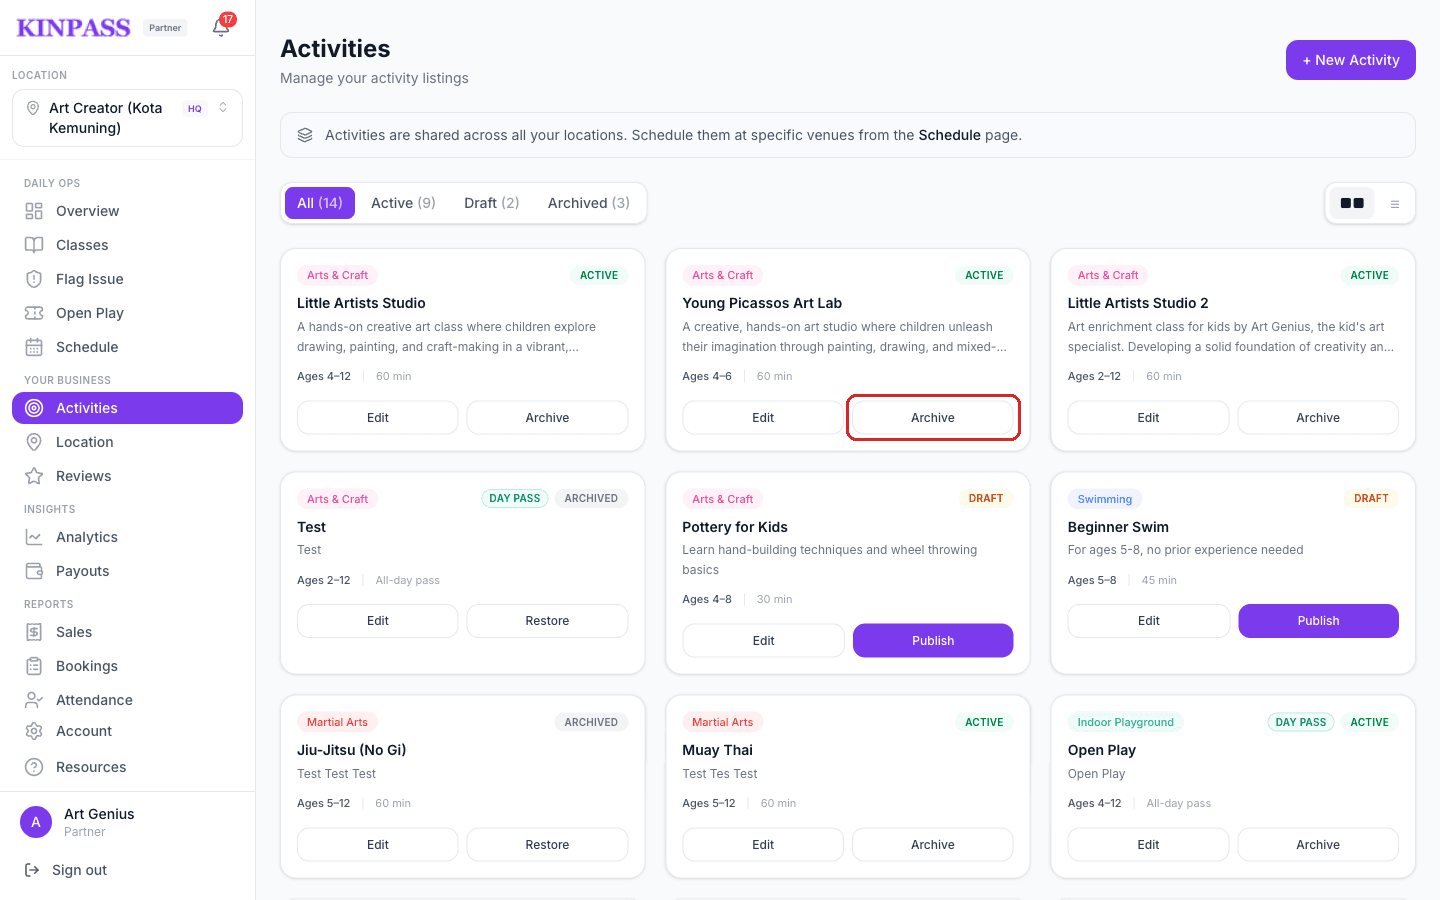
On an archived activity, click Restore to bring it back.
Your locations
Switch branches, add a new one, and edit its page
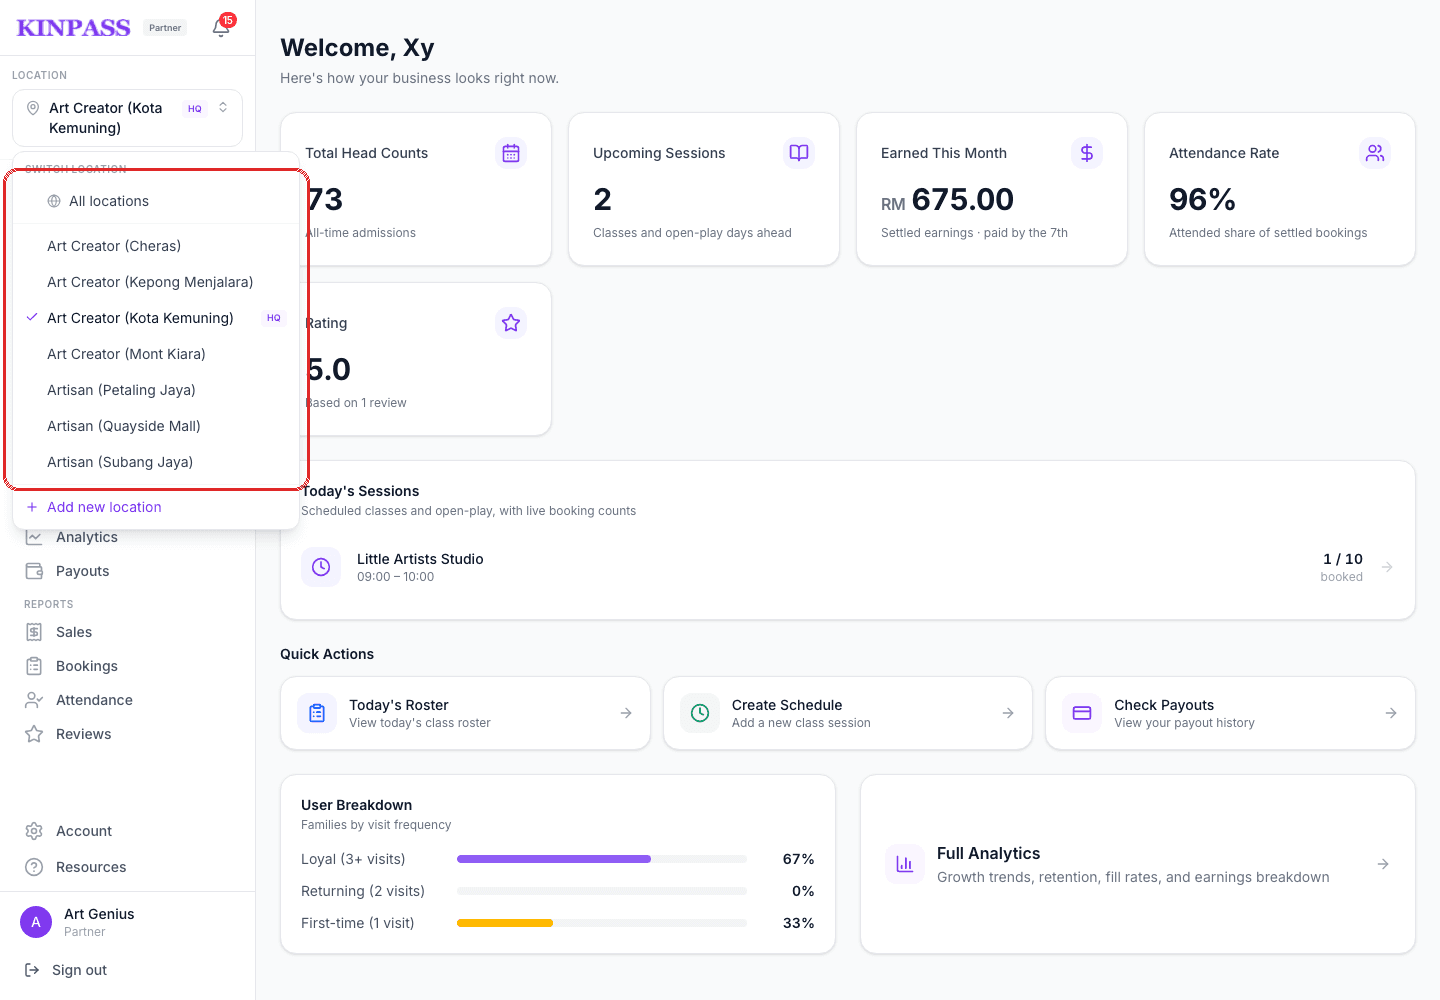
If you run more than one branch, everything in the sidebar — Schedule, Classes, Reviews, Payouts — scopes to whichever location is selected at the top. Switch locations before you check numbers for a specific branch.
You're always editing the branch shown at the top of the sidebar — switch to the right one before you start.
Click your location name at the top of the sidebar, then pick a branch from the list to switch to it.
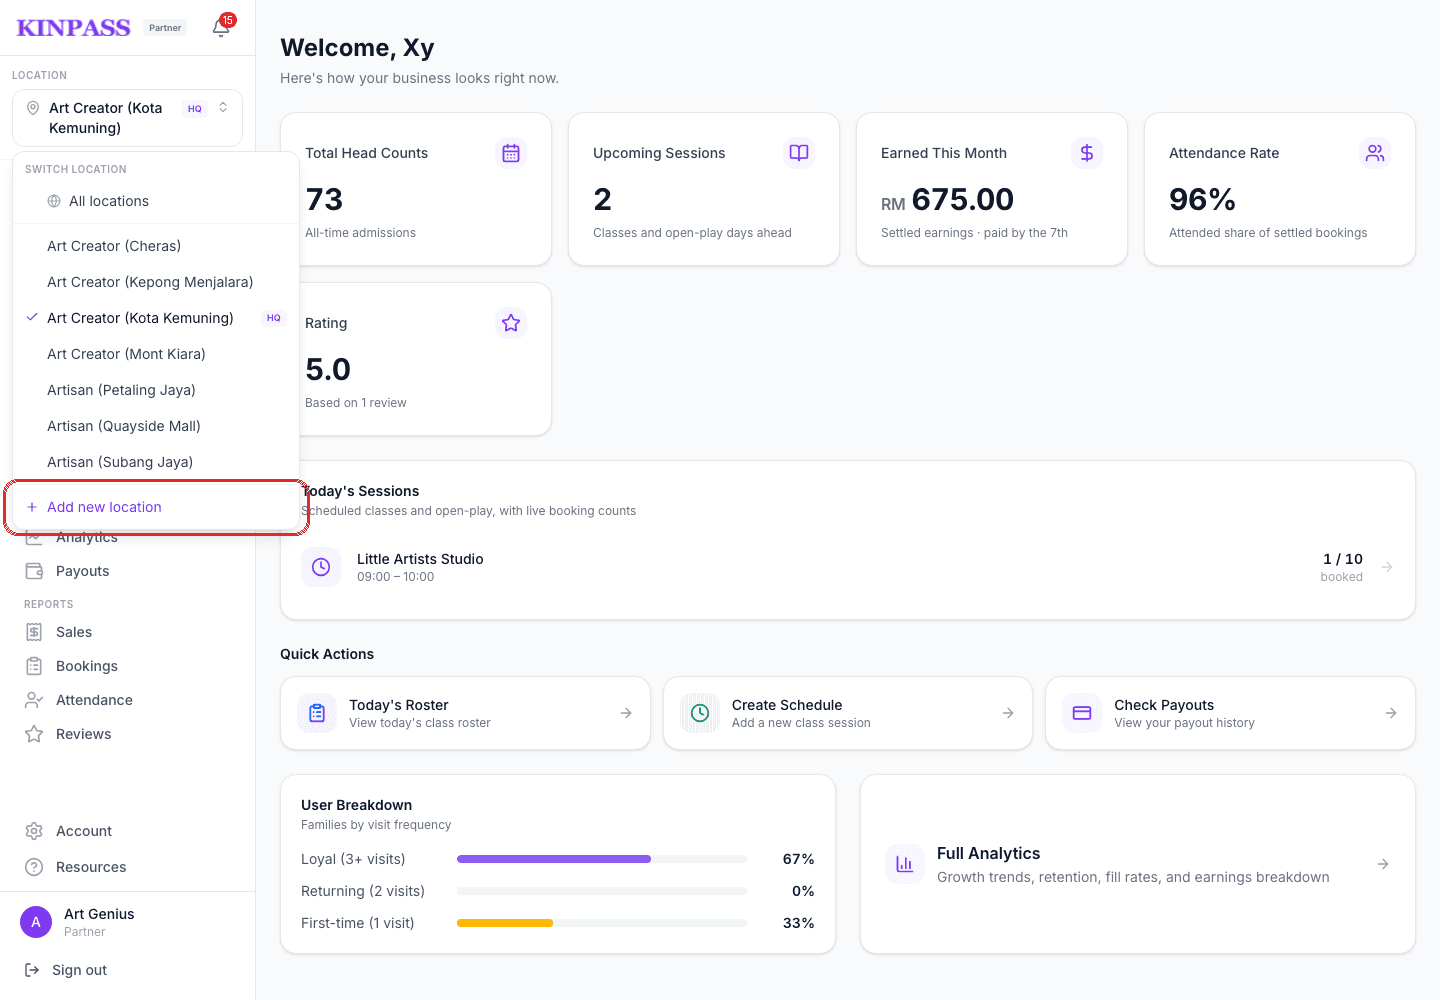
To onboard another branch, click + Add new location at the bottom of the same dropdown.
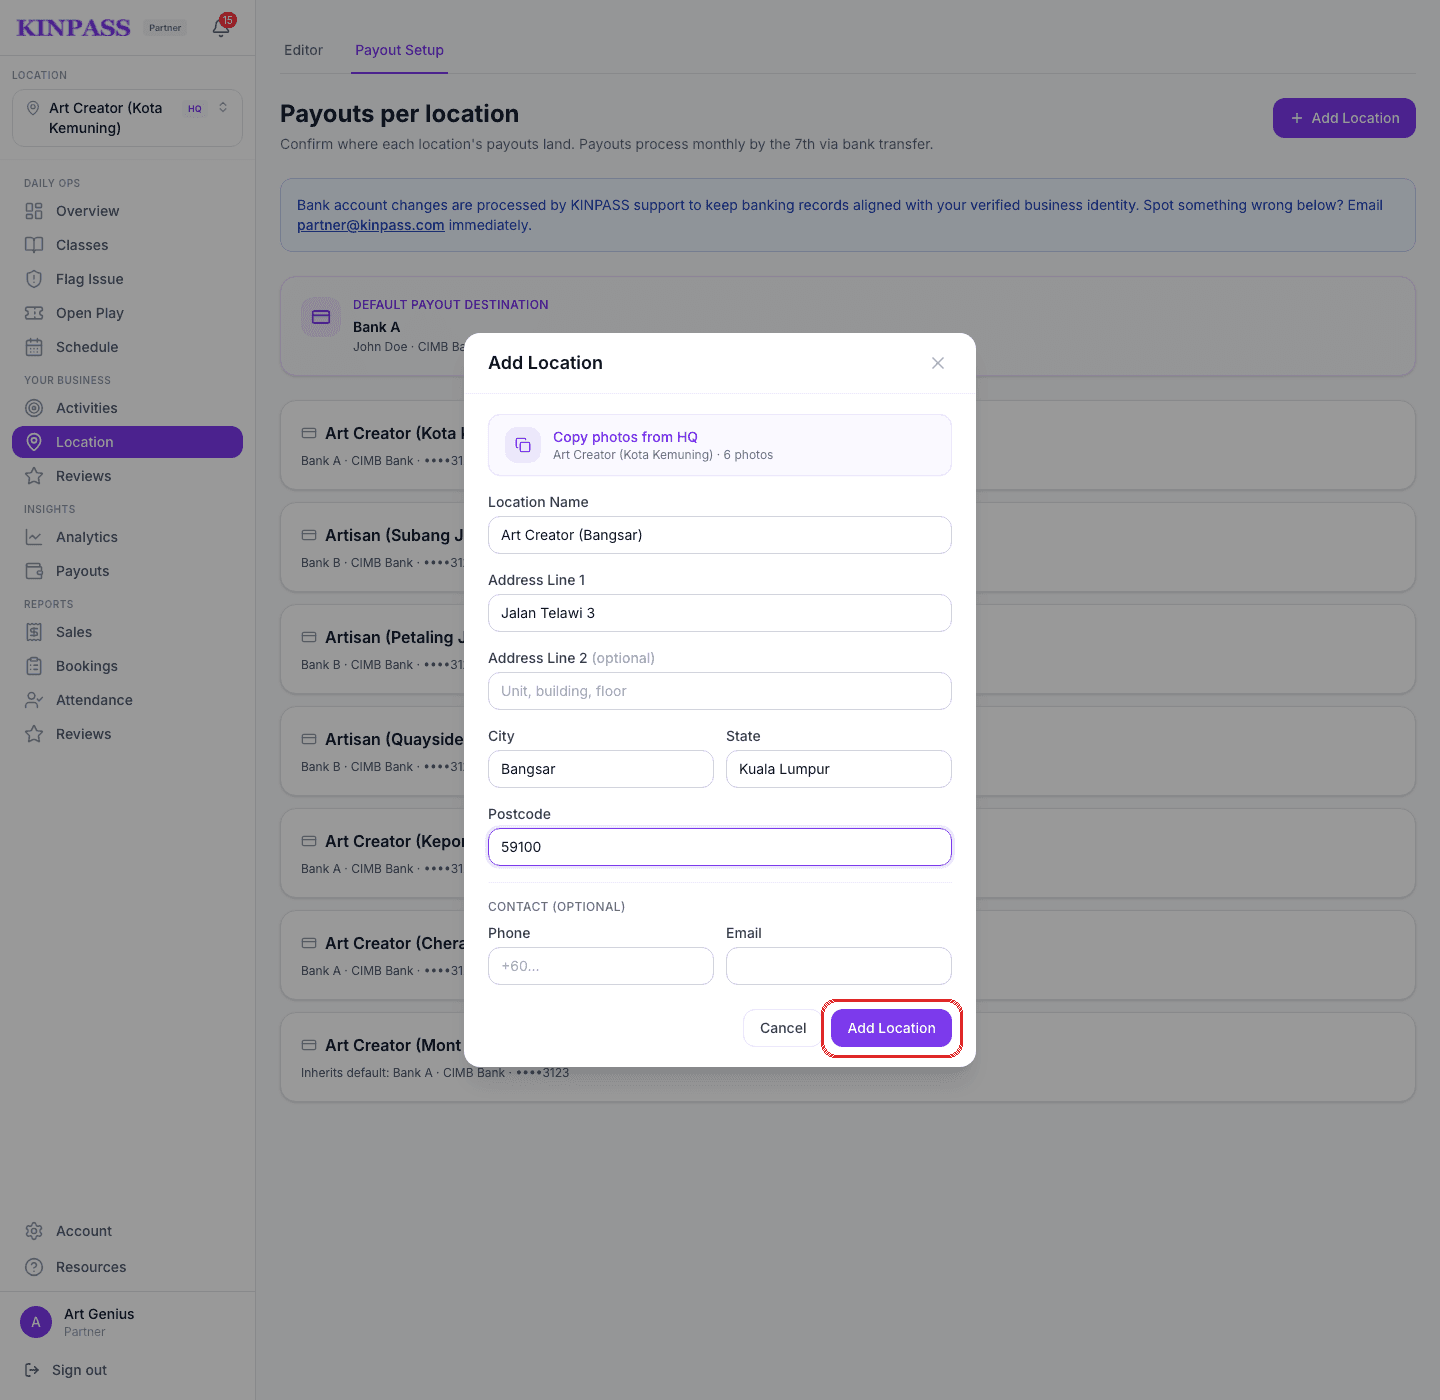
Fill in the location's name and address. Turn on Copy photos from HQ to reuse your main branch's photos, then click Add Location.
On the Location page's Editor tab, write a business description and confirm the address.
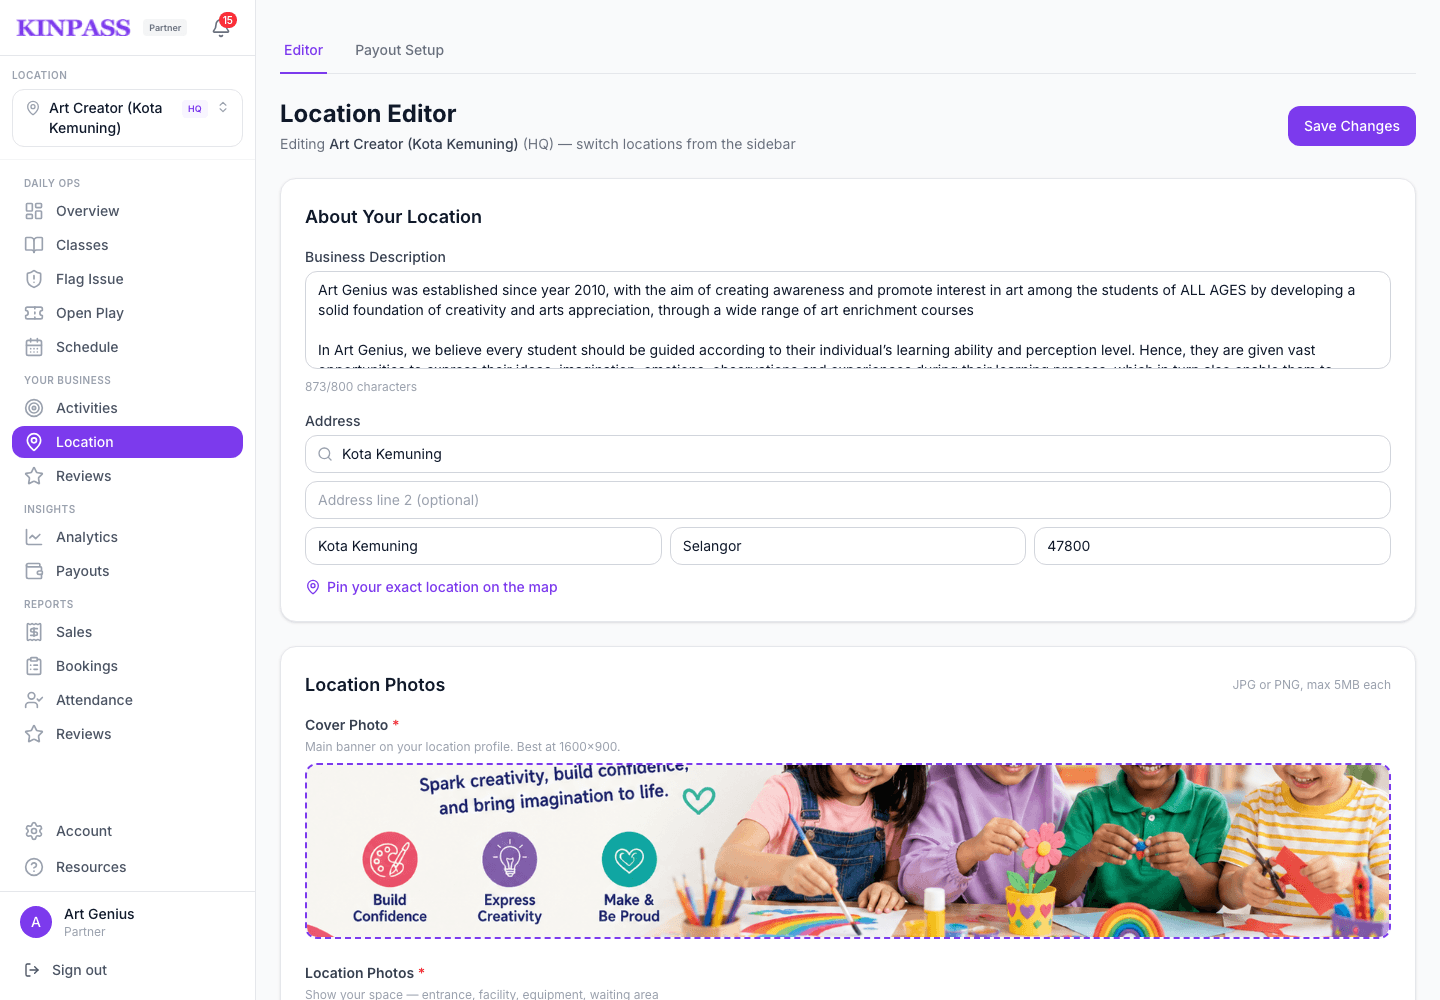
Upload the required Location Photos (your space) and Activity Photos (kids in action).

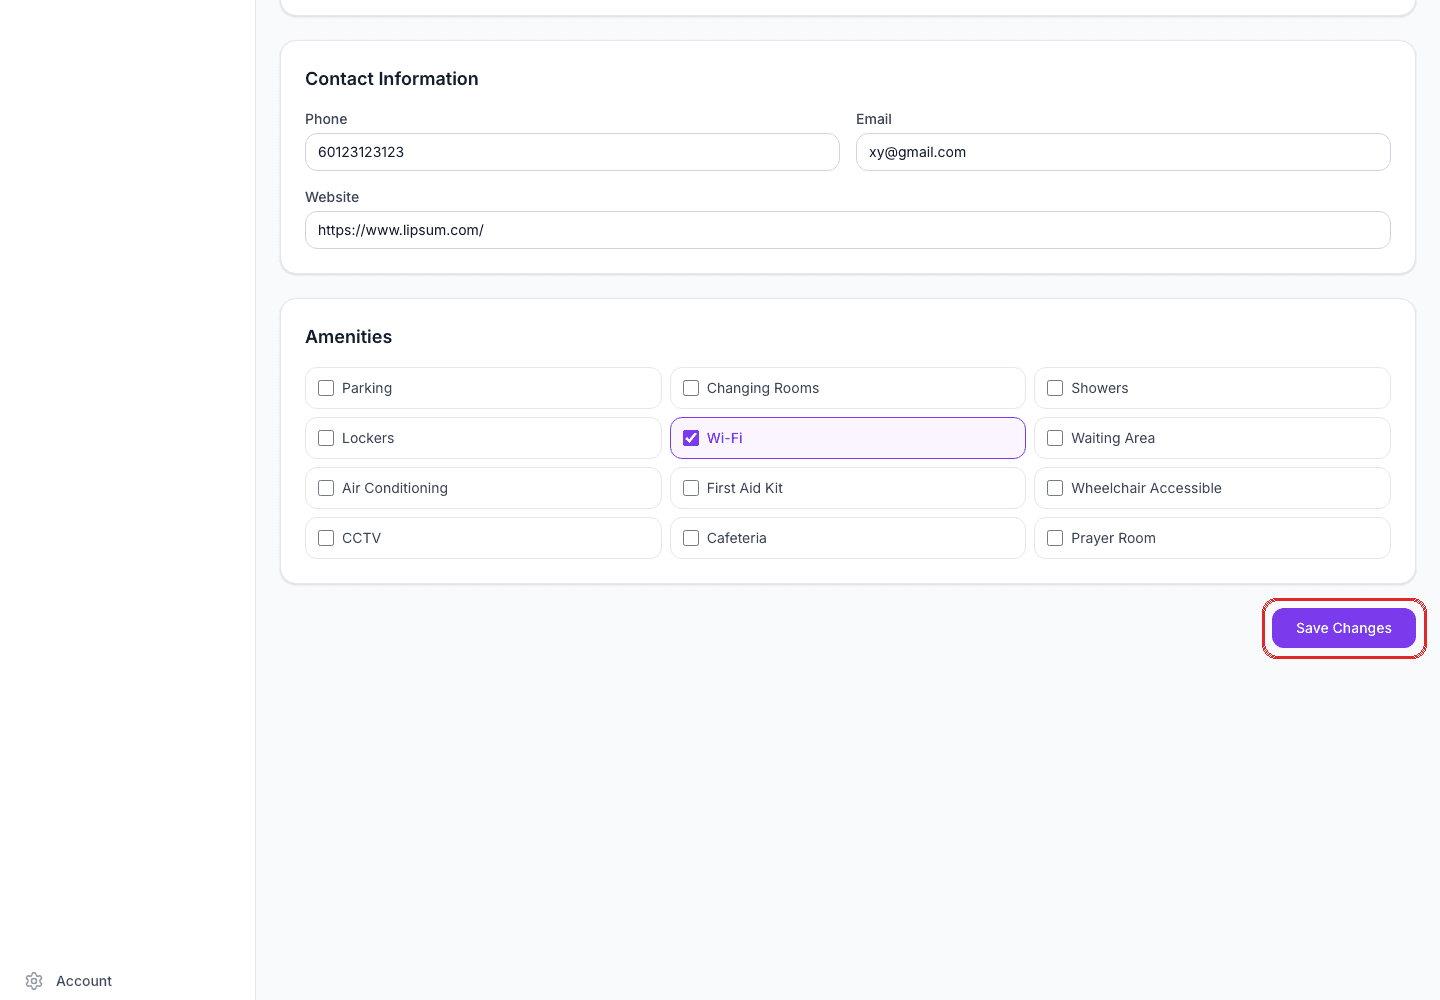
Fill in Contact Information, tick what's available under Amenities, then click Save Changes.
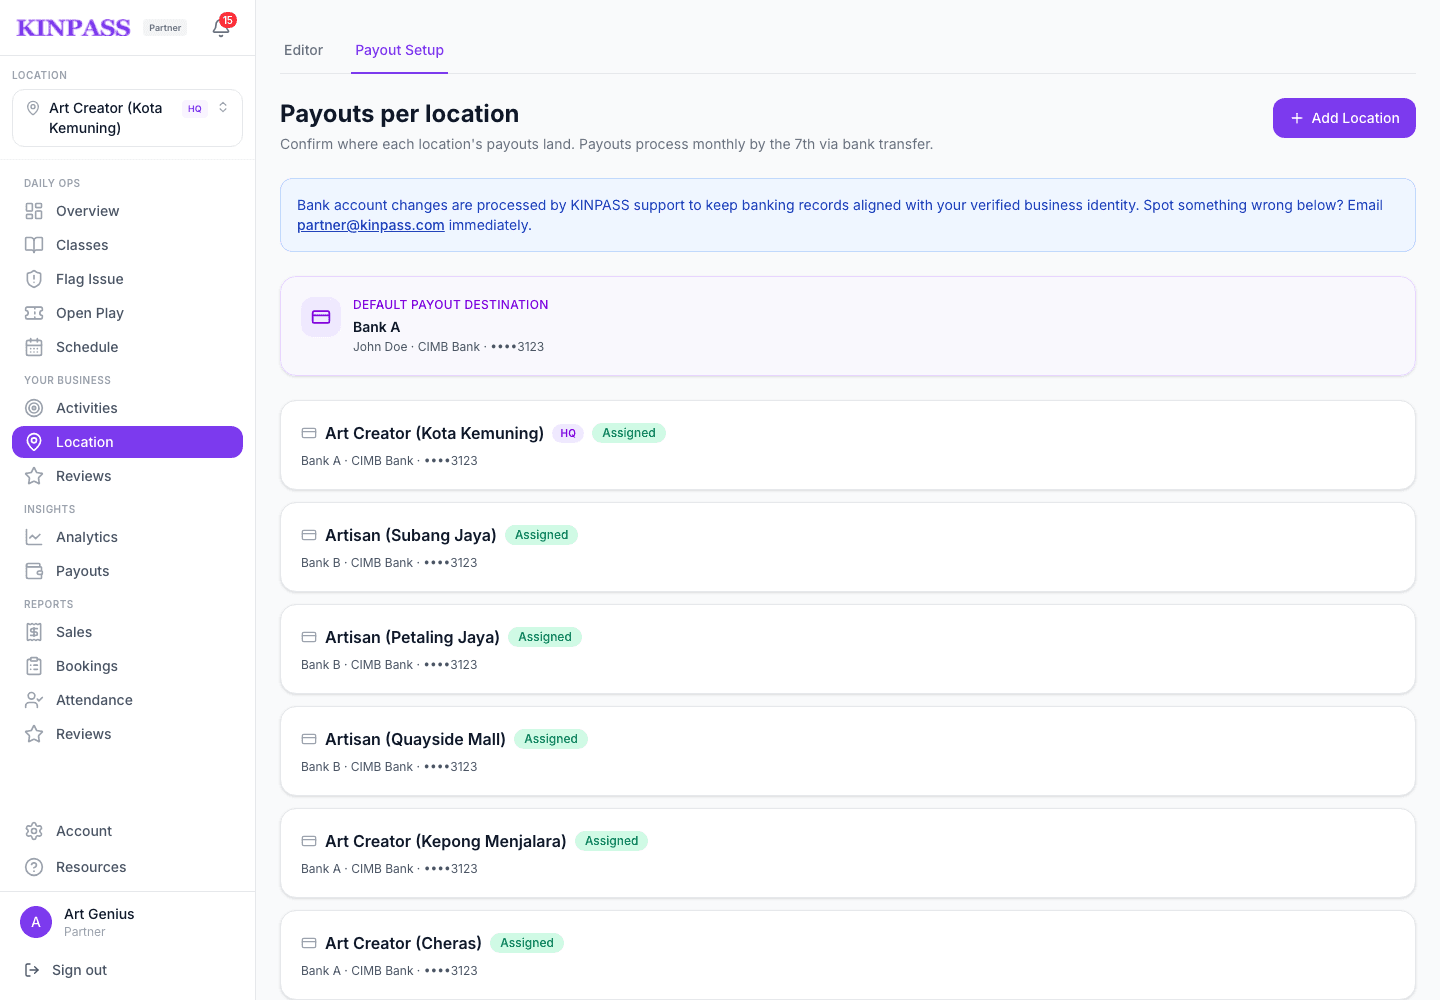
See which bank account each location pays out to
Tap Location → Payout Setup to confirm where each branch's money lands. One bank account can be the default for every branch, or you can assign a different account per location.
Reviews
Respond to what parents are saying
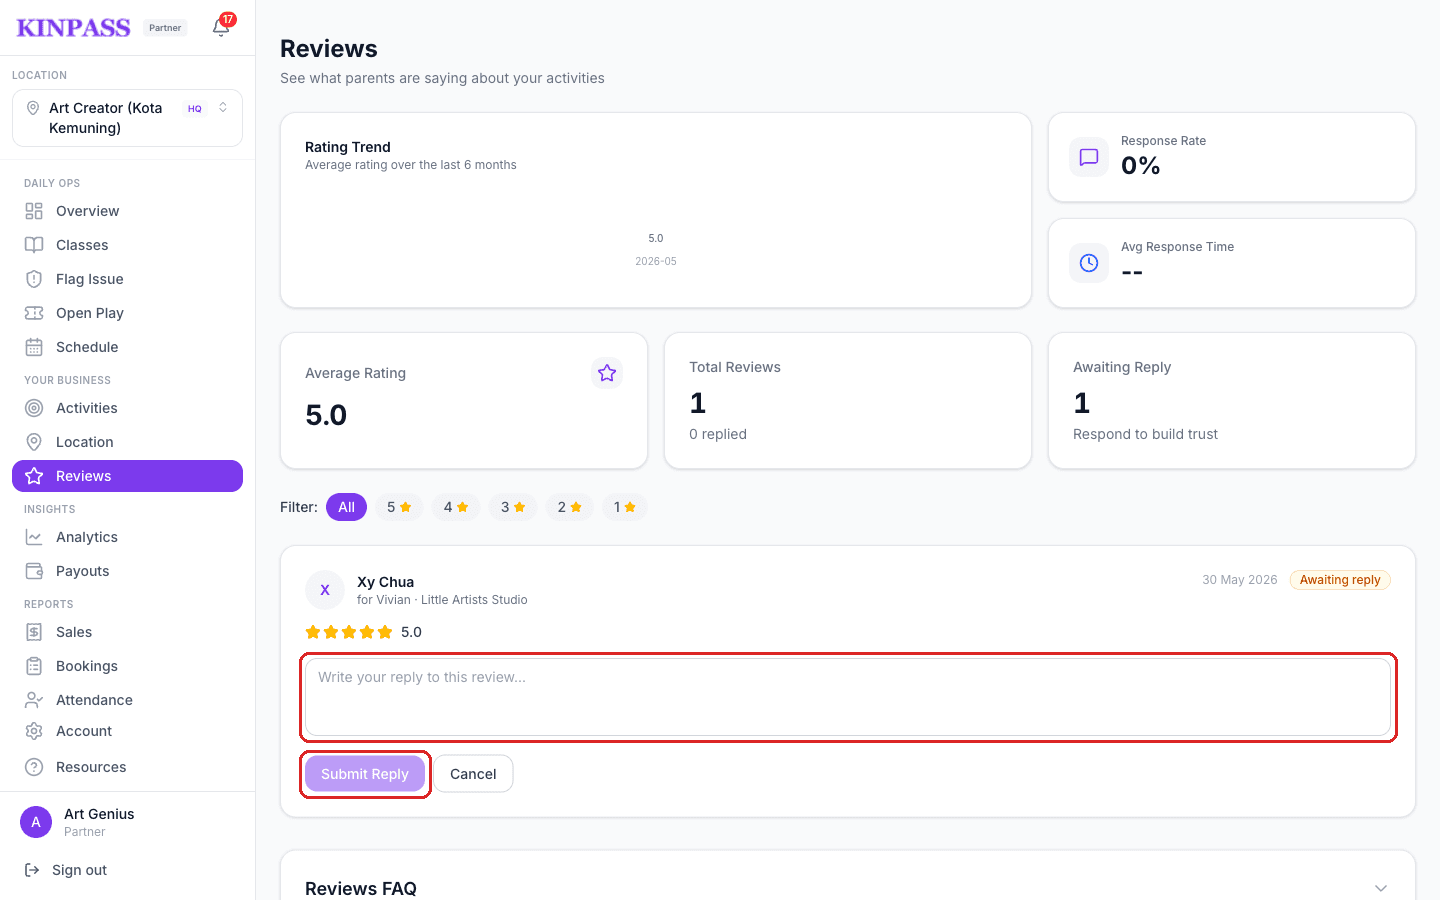
Reviews shows your rating trend, response rate, and every review left for your activities. Filter by star rating using the pills under the summary cards.
Your reply is public — parents see it under their review on your venue page. A fast, friendly reply to every review, good or bad, is one of the best things you can do for your rating.
On Reviews, find the review you want to answer and click Reply.
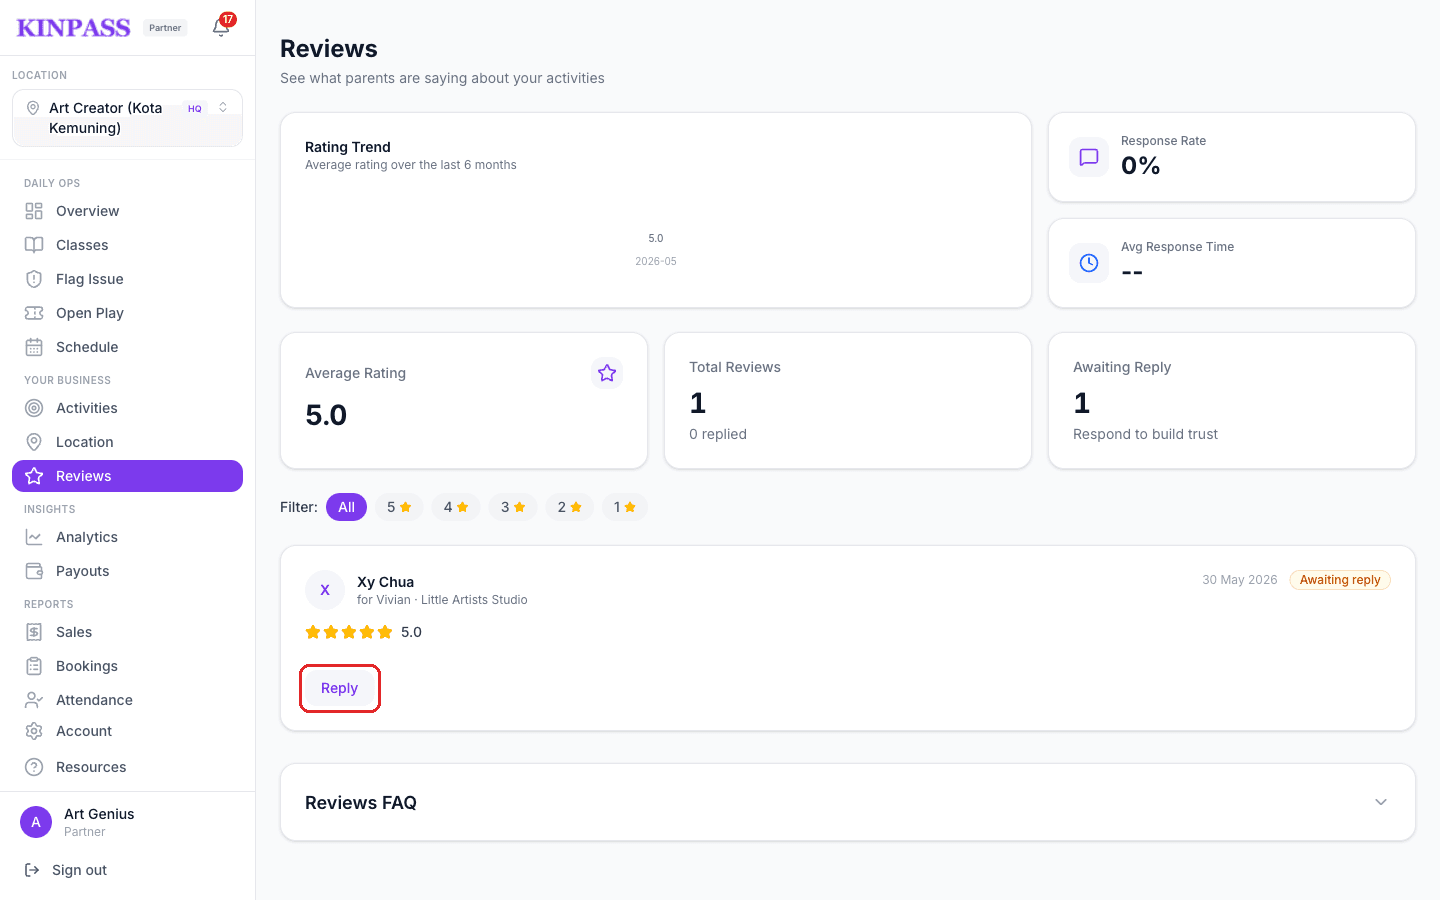
Type your reply in the box, then click Submit Reply.
Money & reports
See what you're owed and when it lands
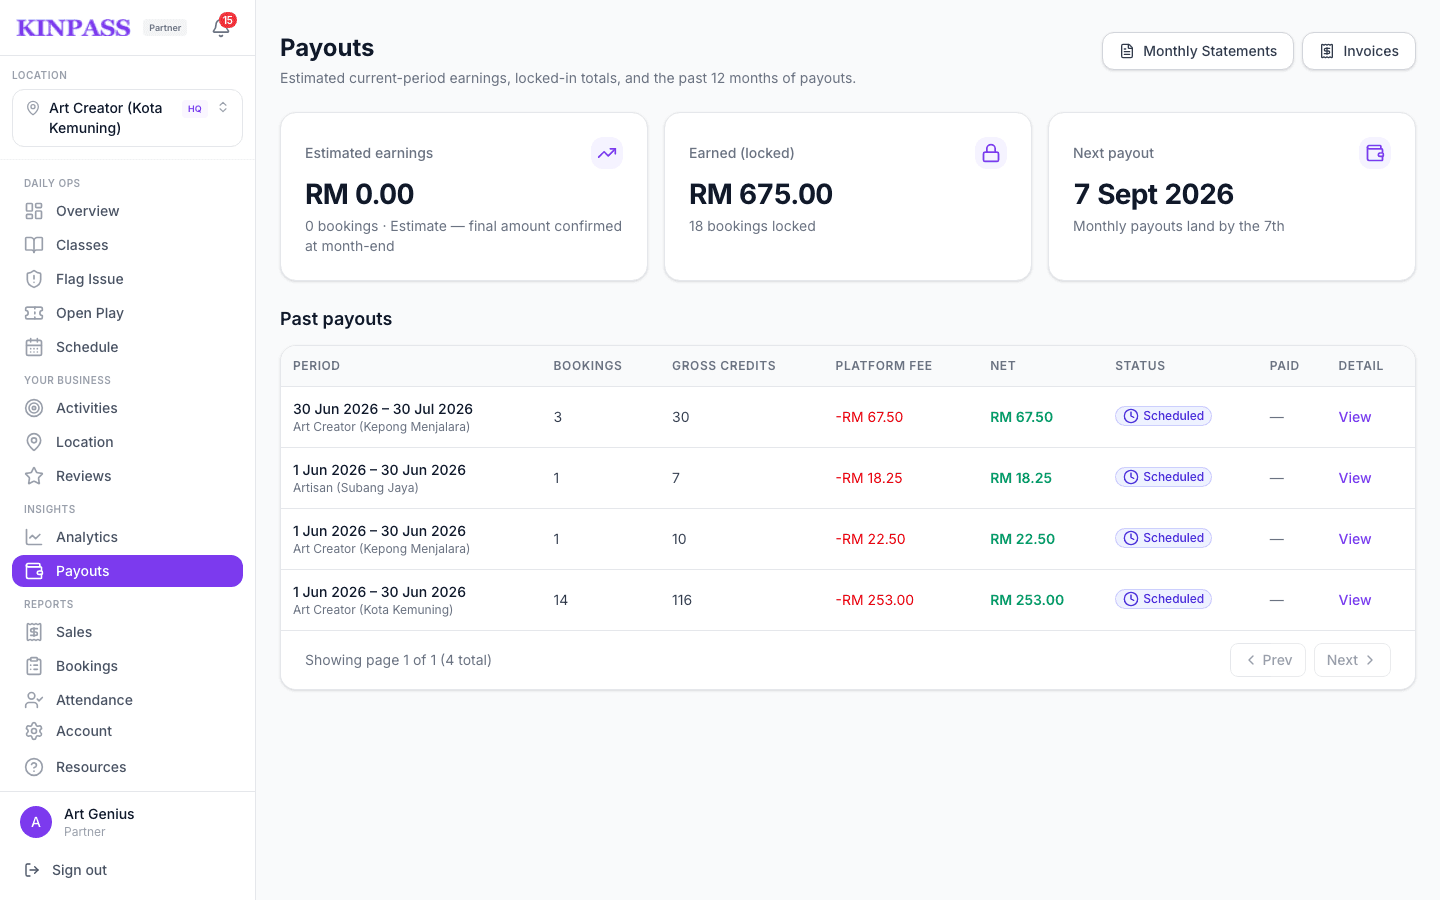
Tap Payouts to see estimated earnings for the current period, the locked (final) amount for last period, and when your next payout lands — monthly, by the 7th, for the previous month's bookings.
Use Monthly Statements or Invoices at the top for records you can download, and View on any past payout row for a line-by-line breakdown.
Let KINPASS write your monthly invoice for you
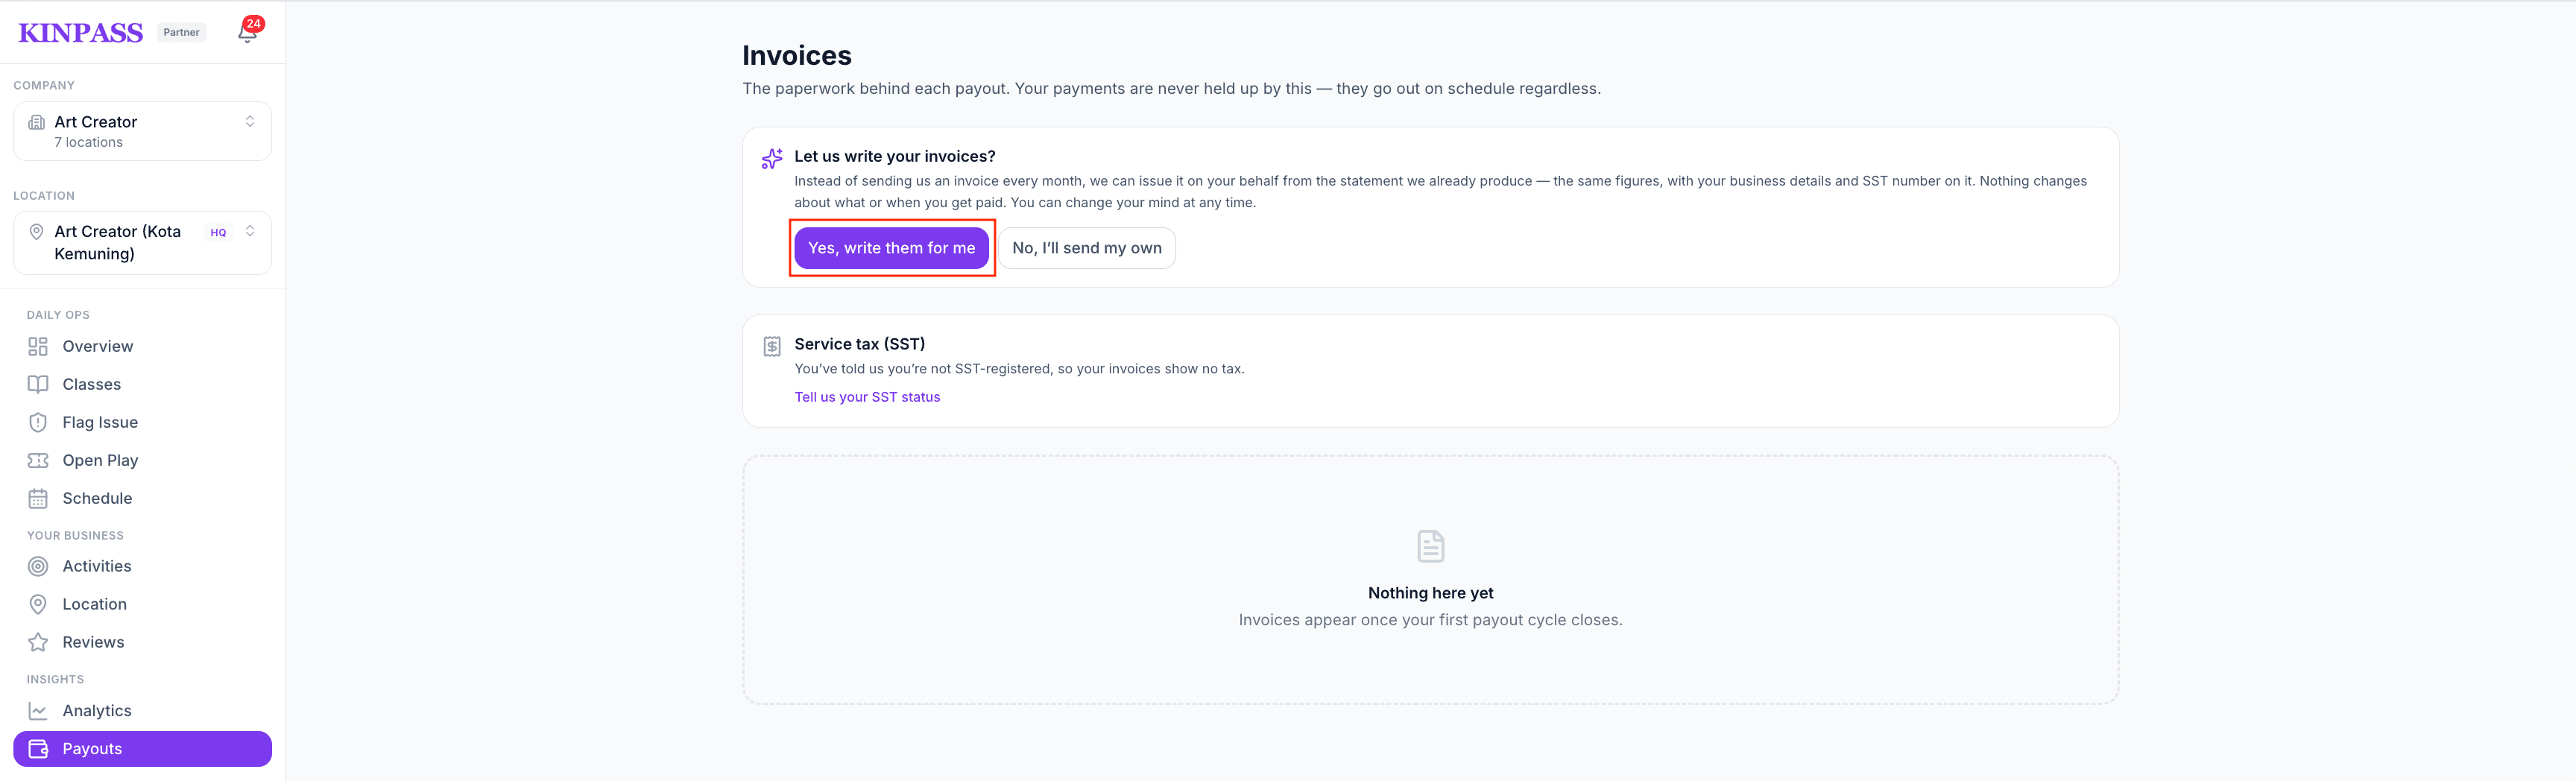
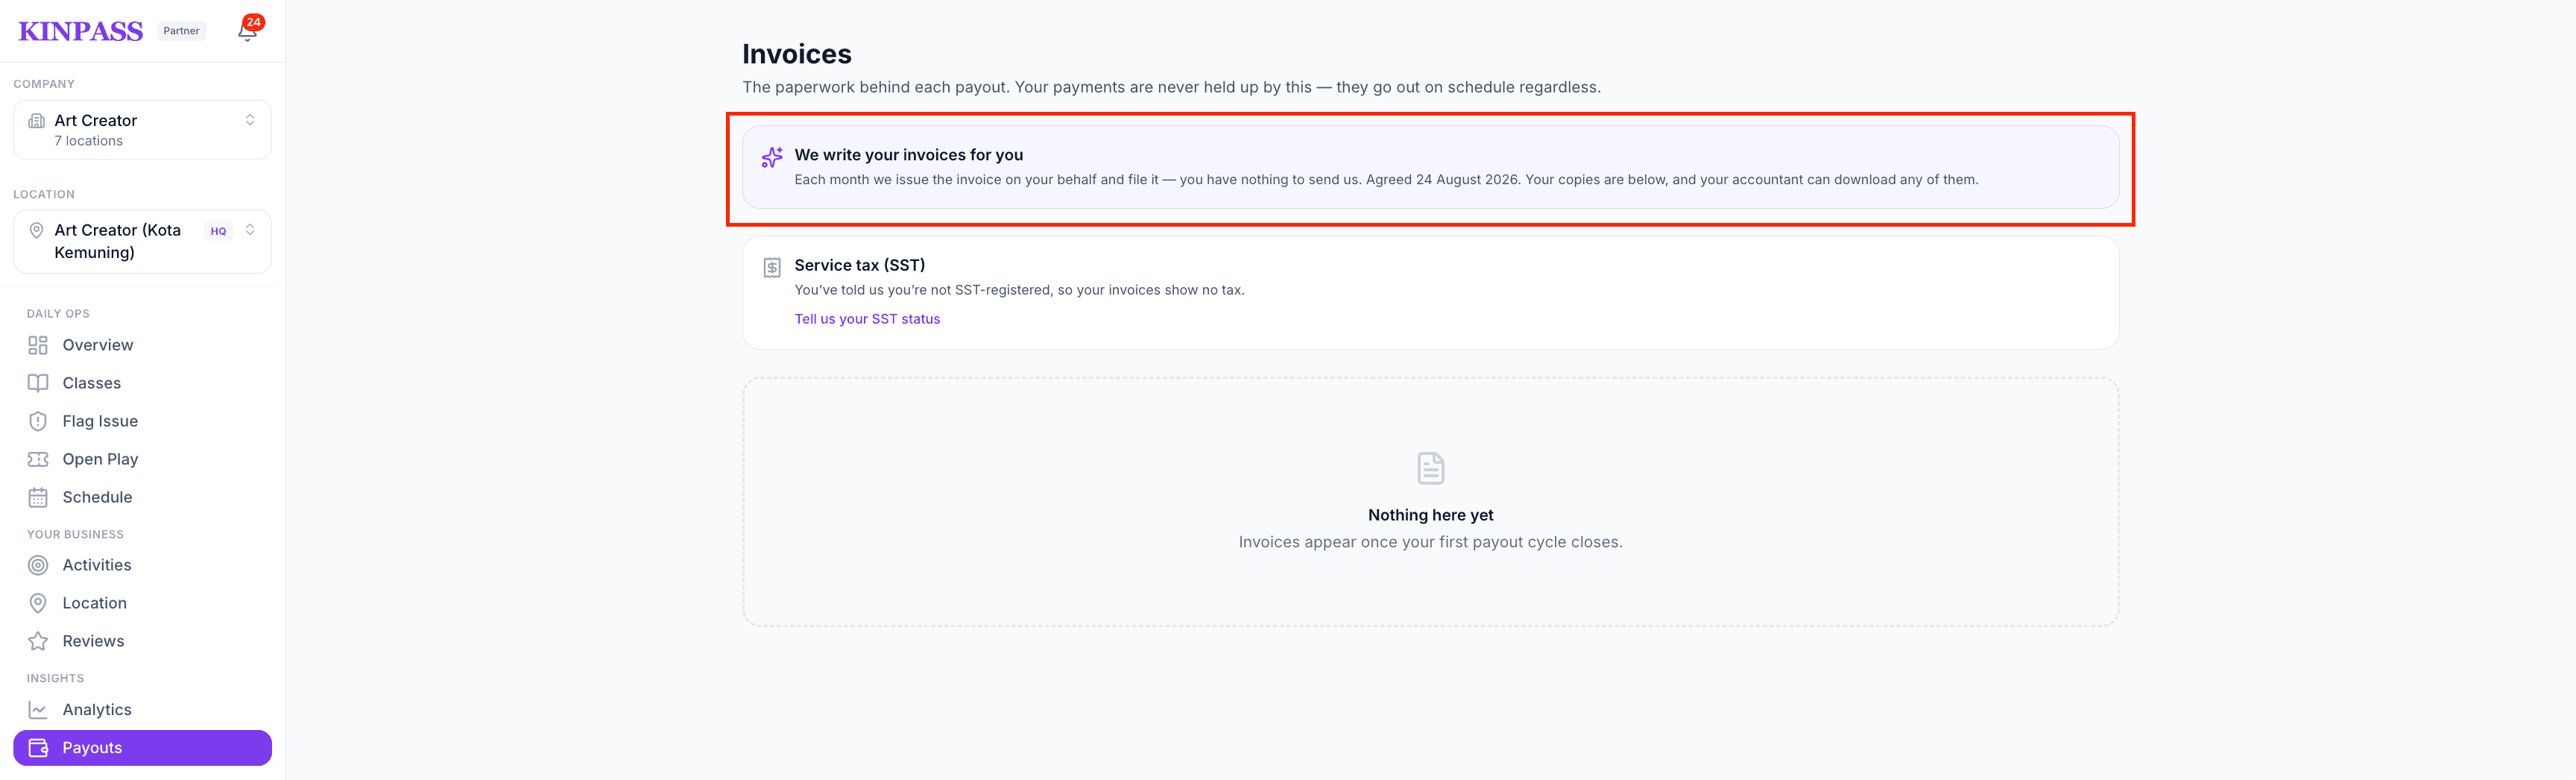
From Payouts → Invoices, let KINPASS write and file your monthly invoice for you — using the same figures as your statement, with your business details and SST number on it. Your payout timing doesn't change either way.
Whether SST appears on the invoice follows your registration status. If you're not SST-registered, invoices show no tax — update your SST status on this page once you register.
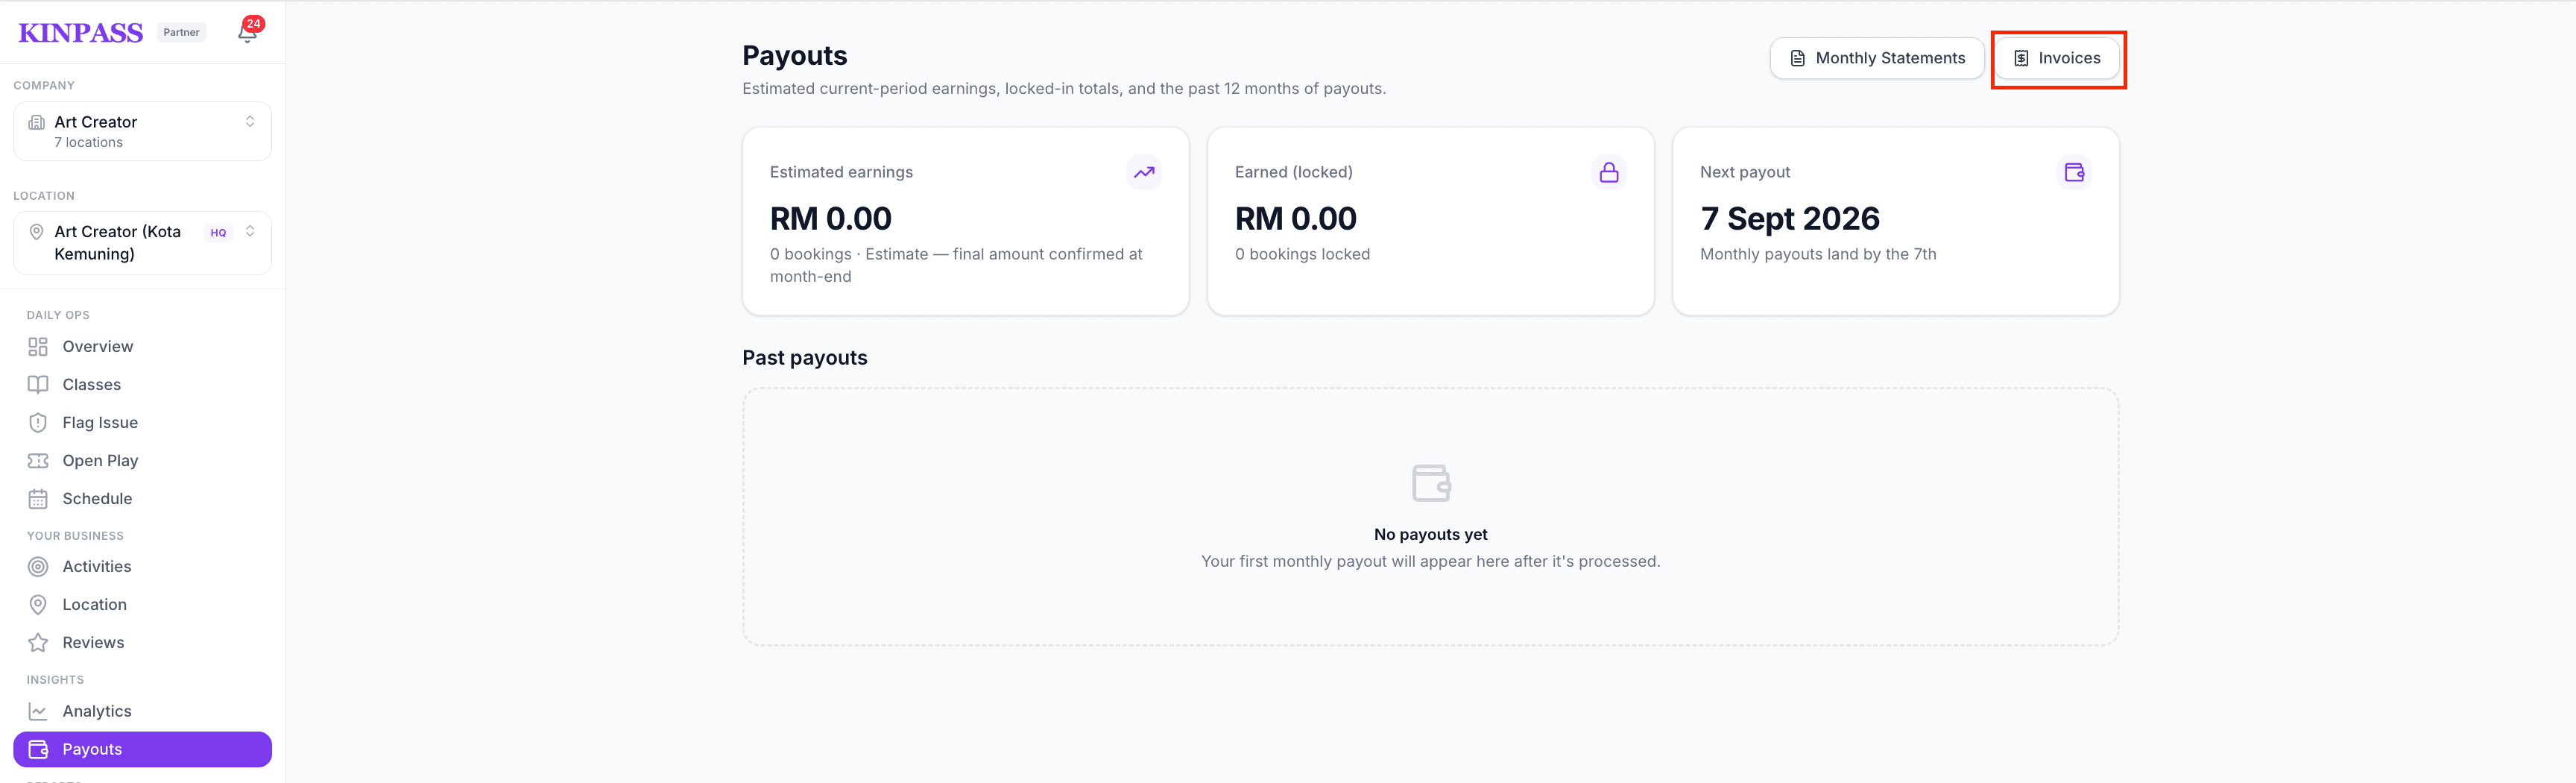
On the Payouts page, tap Invoices.
Choose "Yes, write them for me" so KINPASS issues the invoice on your behalf every month.
You're set — automated invoicing is on, and KINPASS issues the invoice for you each month.
Confirm your monthly statement before payment
Tap Monthly Statements to check last month's amount and every booking behind it — then Acknowledge it if it's right, or Dispute it if something's off. Reply by the 3rd; if you don't get to it, your payment still goes out by the 7th as usual.
Only a dispute holds the payment, until our team has sorted it out with you. Statements are visible to the Owner and Finance roles only.
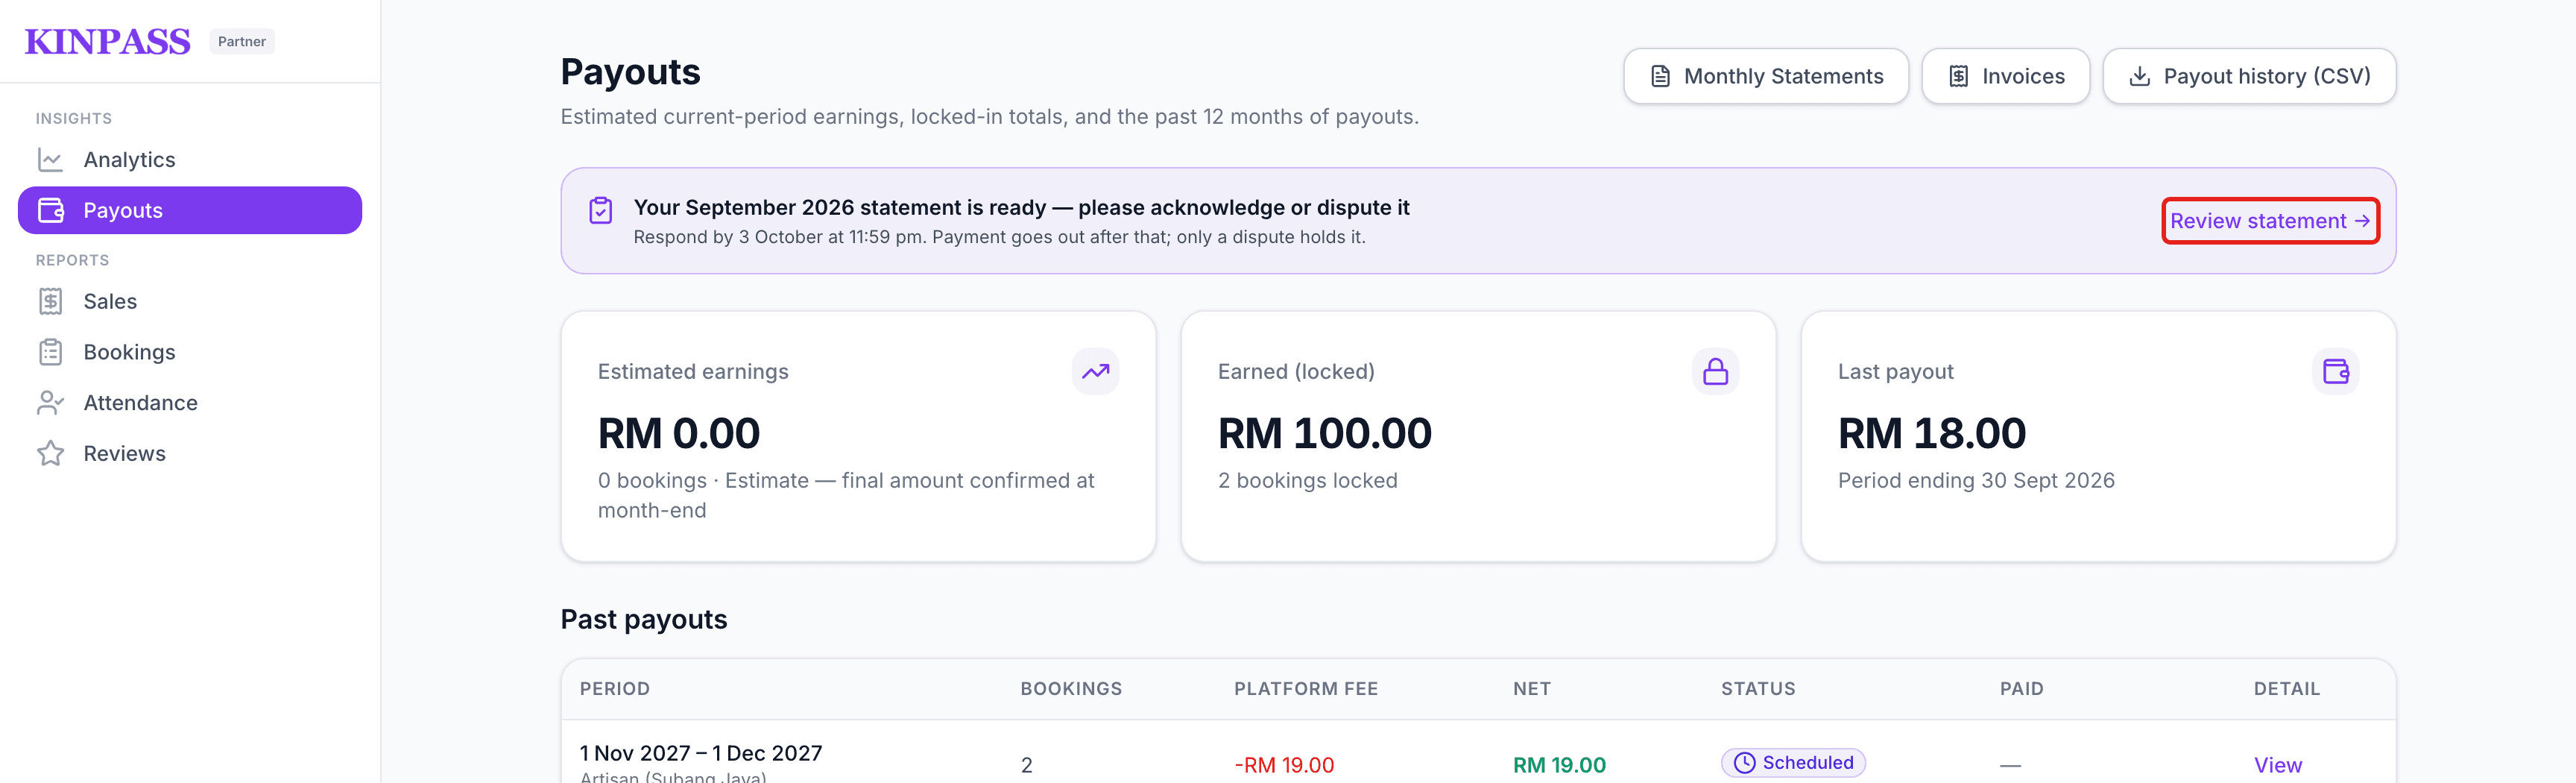
On the Payouts page, tap Review statement on the purple banner.
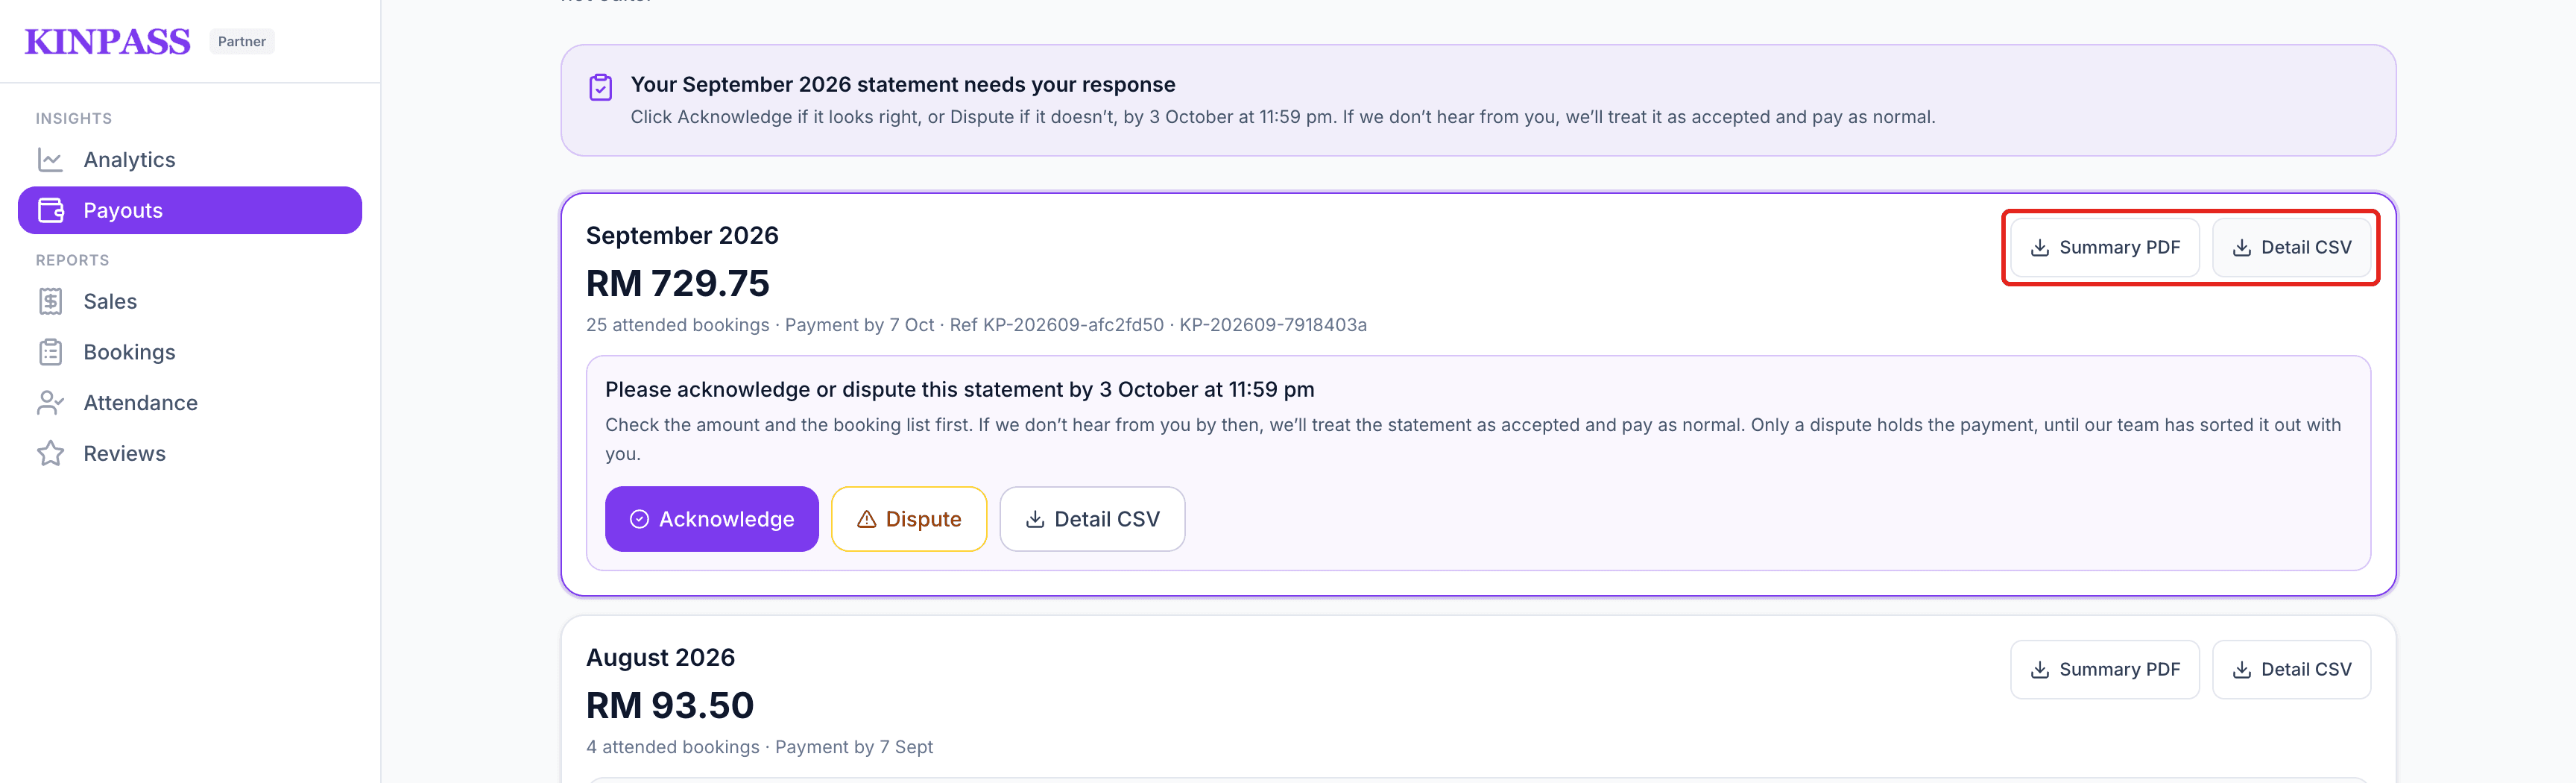
Check the amount, then open Summary PDF or Detail CSV to see every booking it covers.
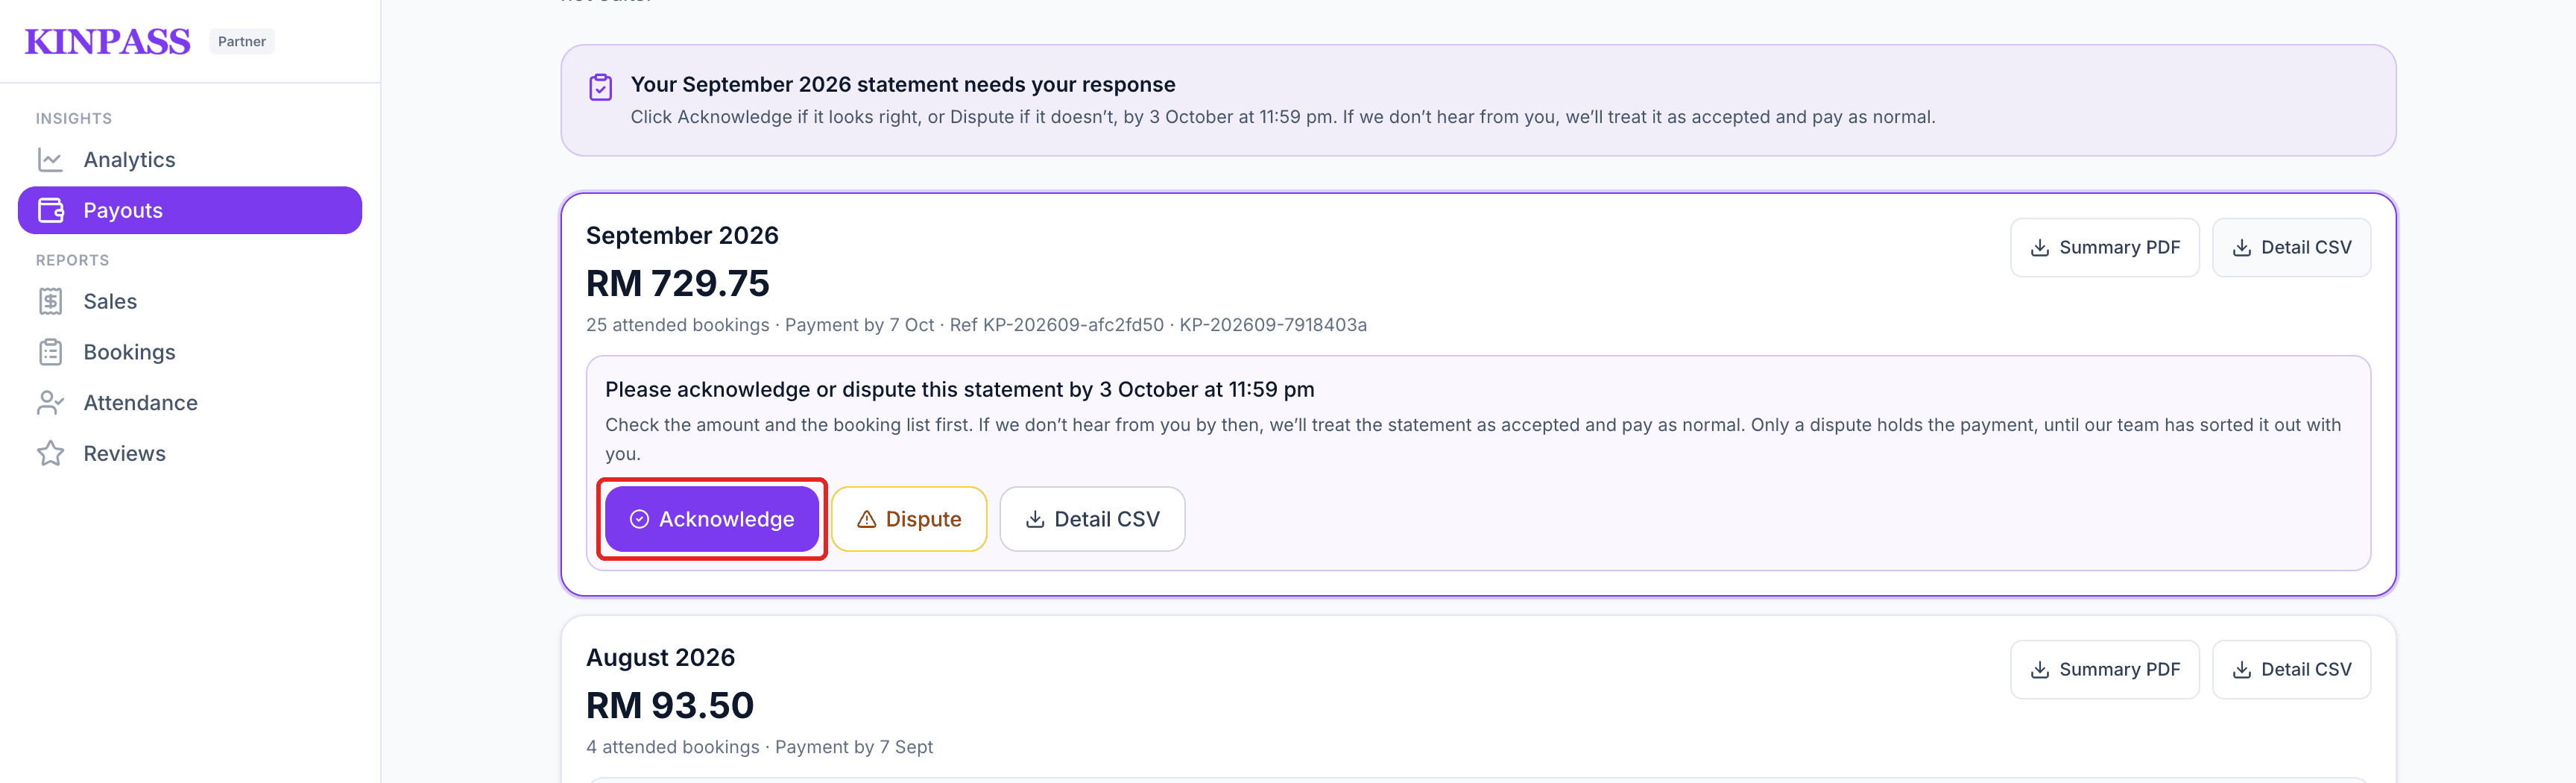
If everything looks right, tap Acknowledge.
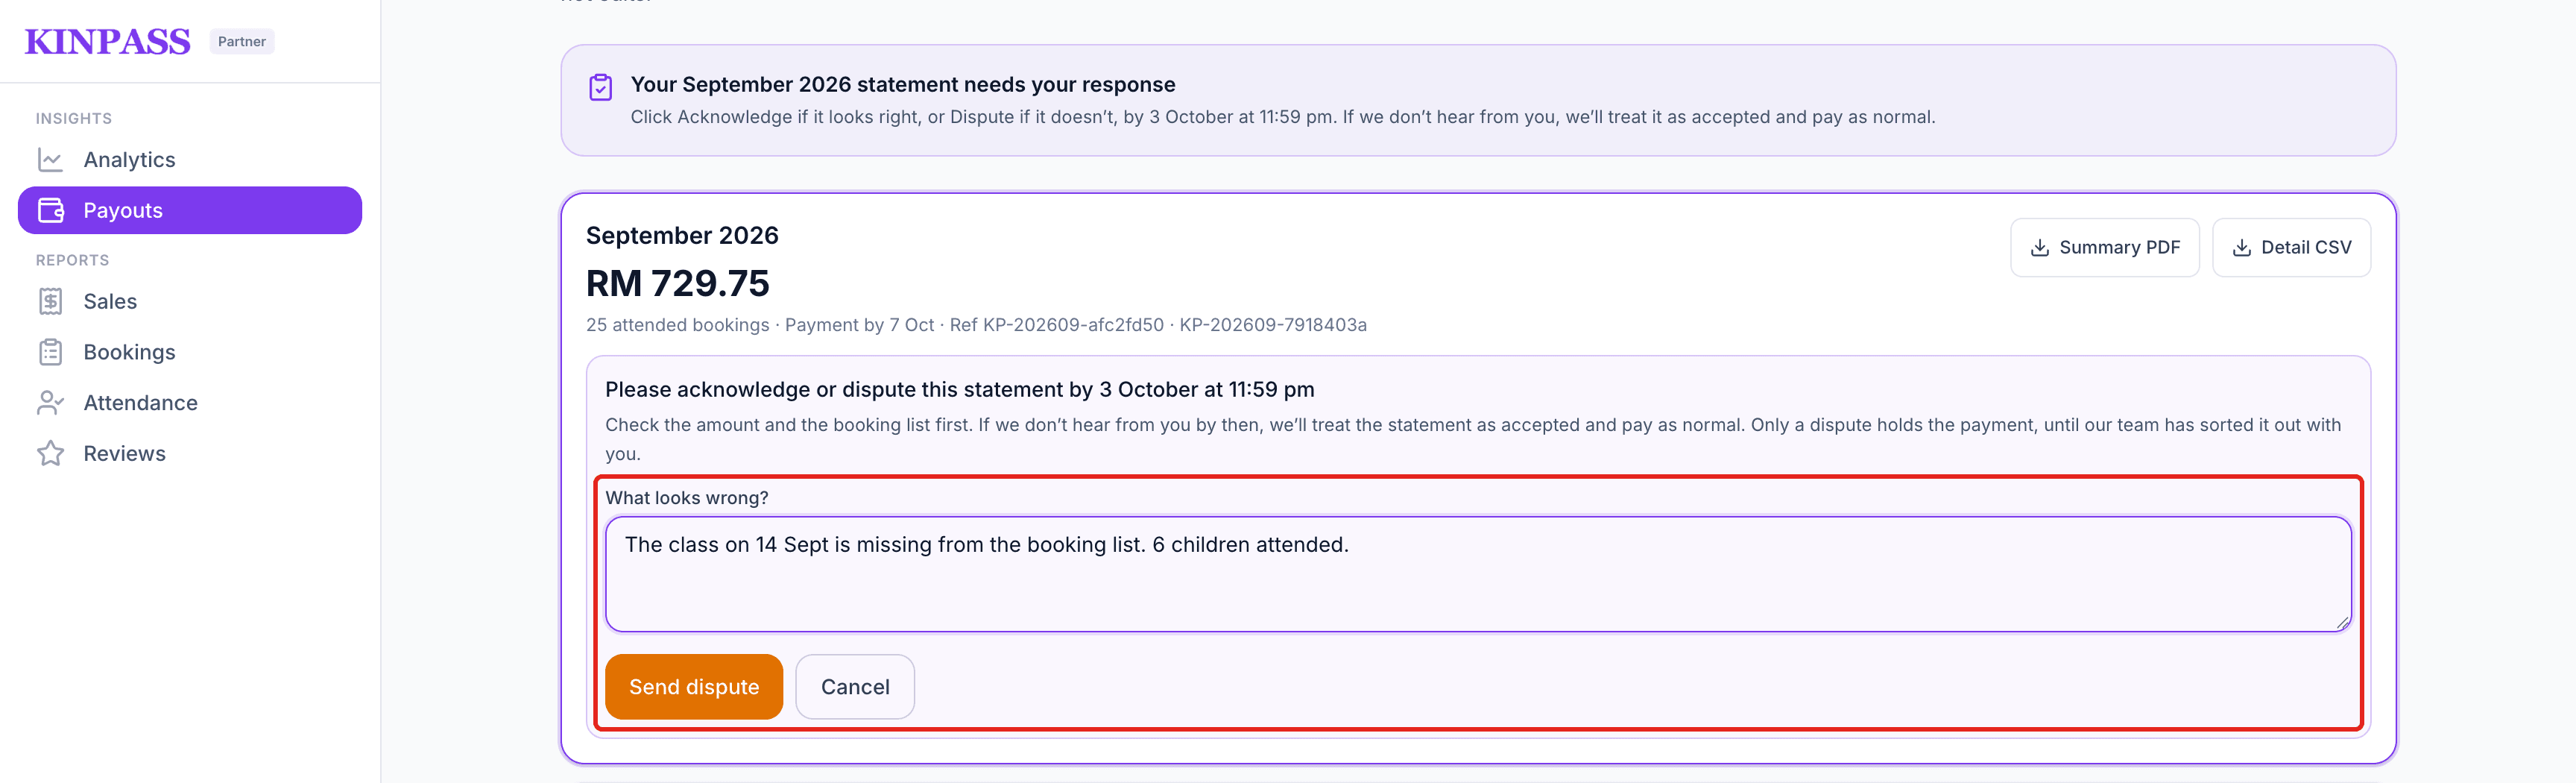
If something is wrong, tap Dispute instead, say what looks wrong, and tap Send dispute.
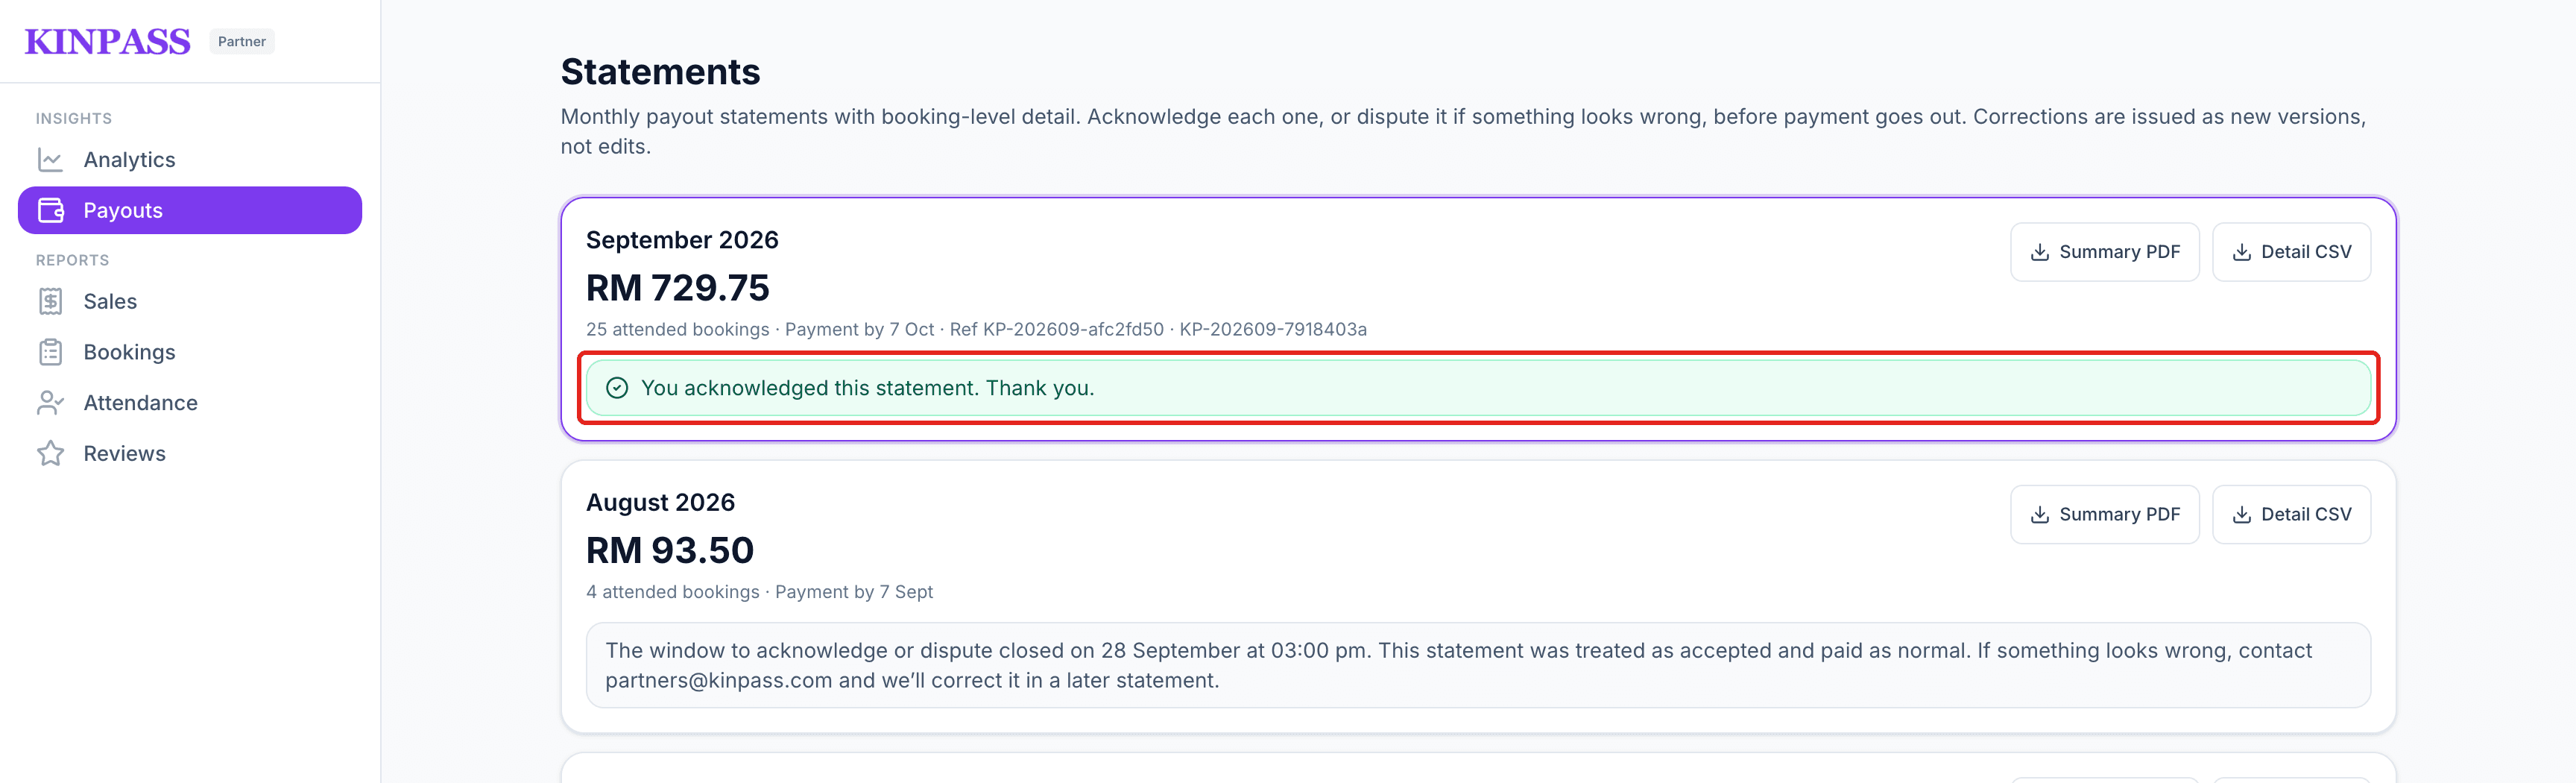
Done. The statement shows your answer.
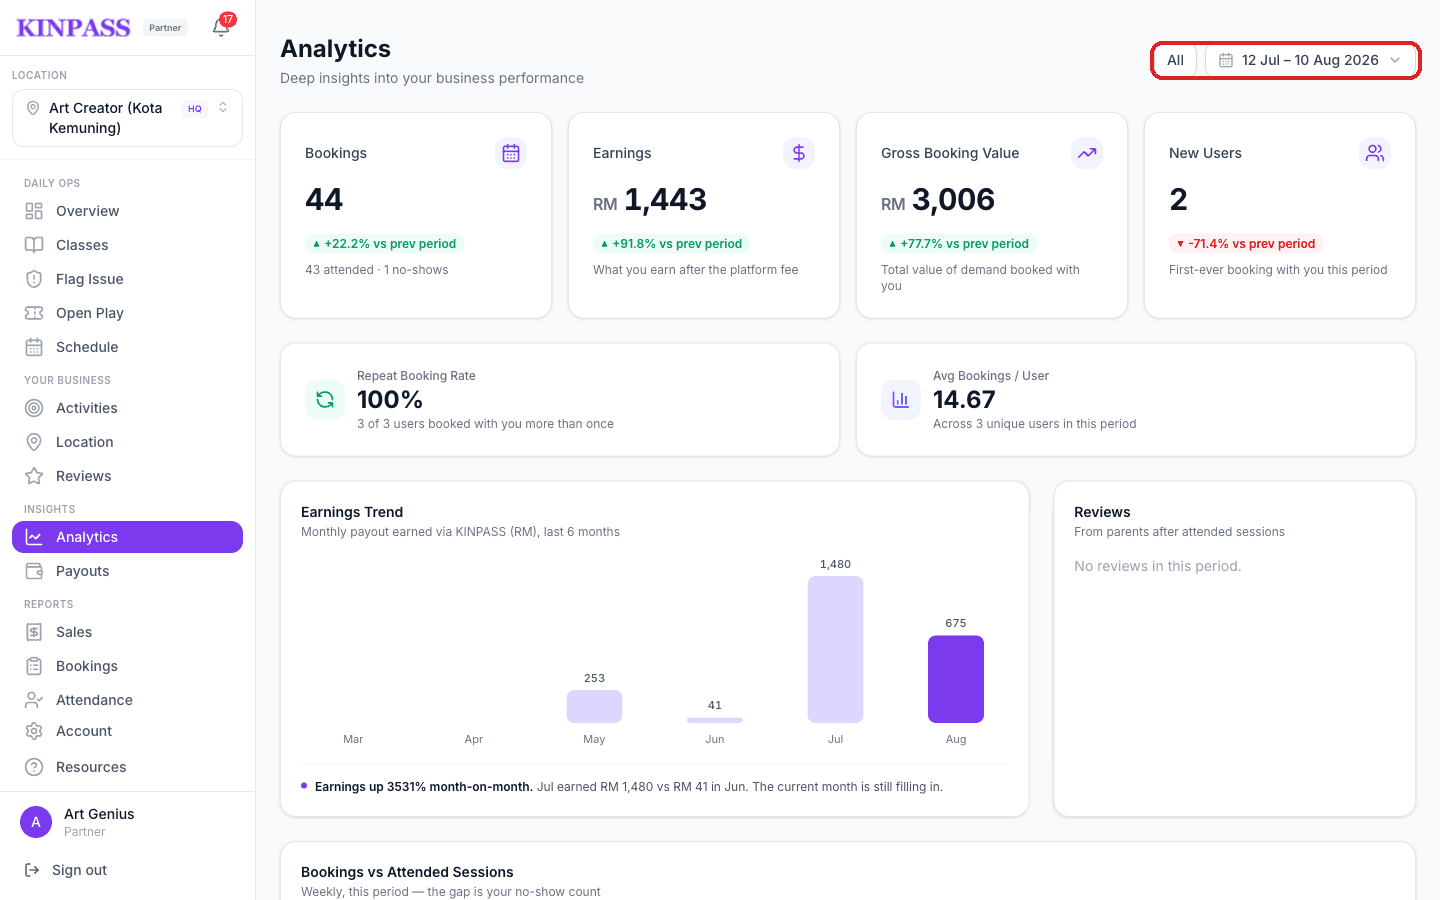
Bookings, earnings, and repeat rate over time
Tap Analytics for the health of your business: bookings, what you earned, repeat booking rate, and how many families booked with you for the first time.
The Bookings vs Attended Sessions chart is worth watching — the gap between the two lines is your no-show count.
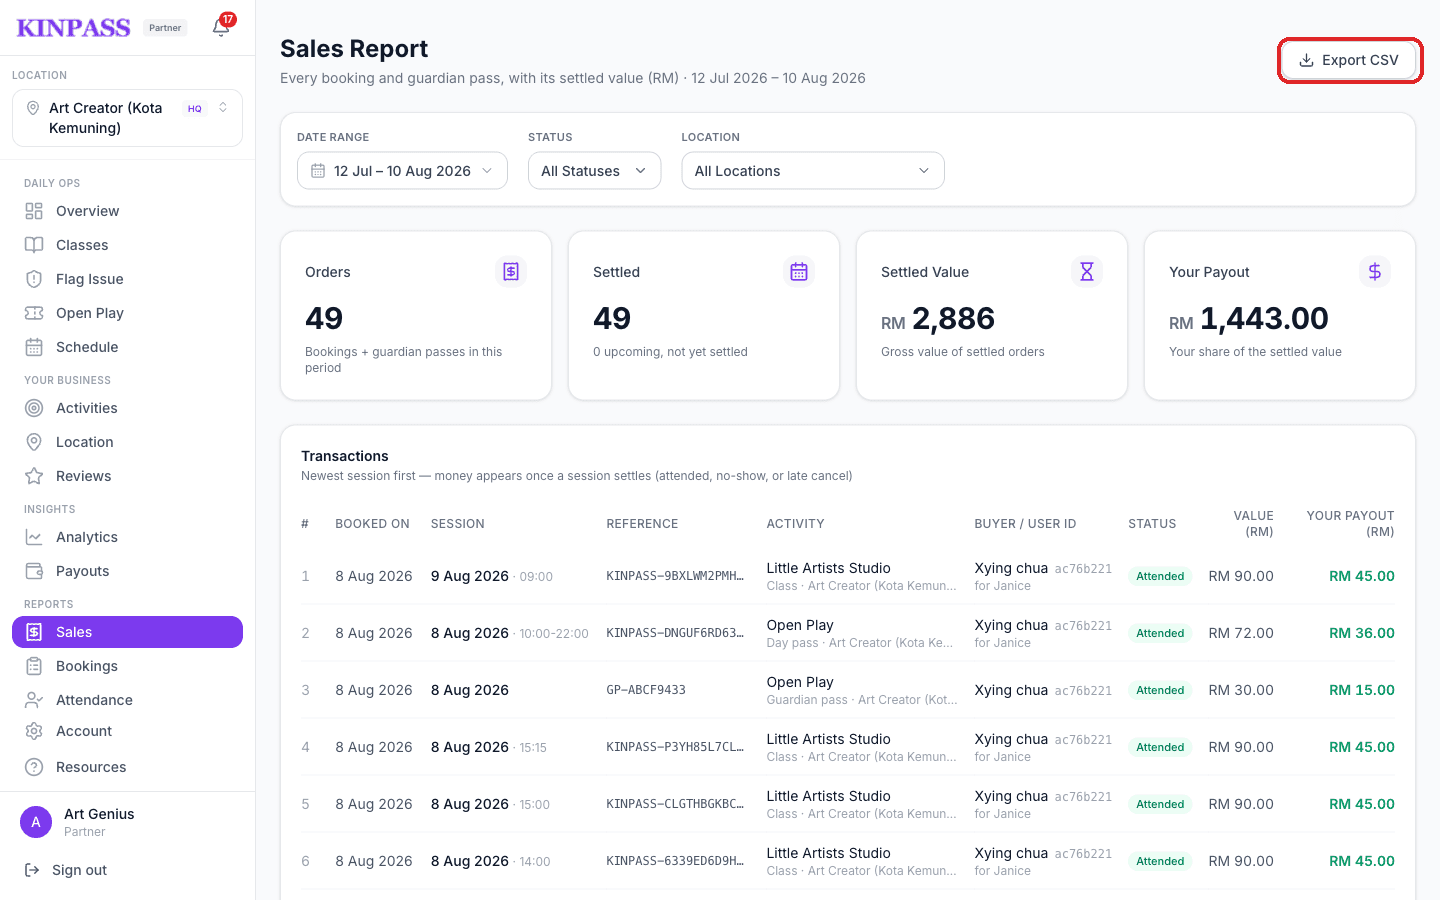
Every booking with what it paid you
Reports → Sales lists every booking and guardian pass with its reference, the activity, and your share of the money.
Money only appears once a session settles — after it's been attended, marked a no-show, or late-cancelled. Anything still upcoming shows in the “not yet settled” count.
Who booked, and how it turned out
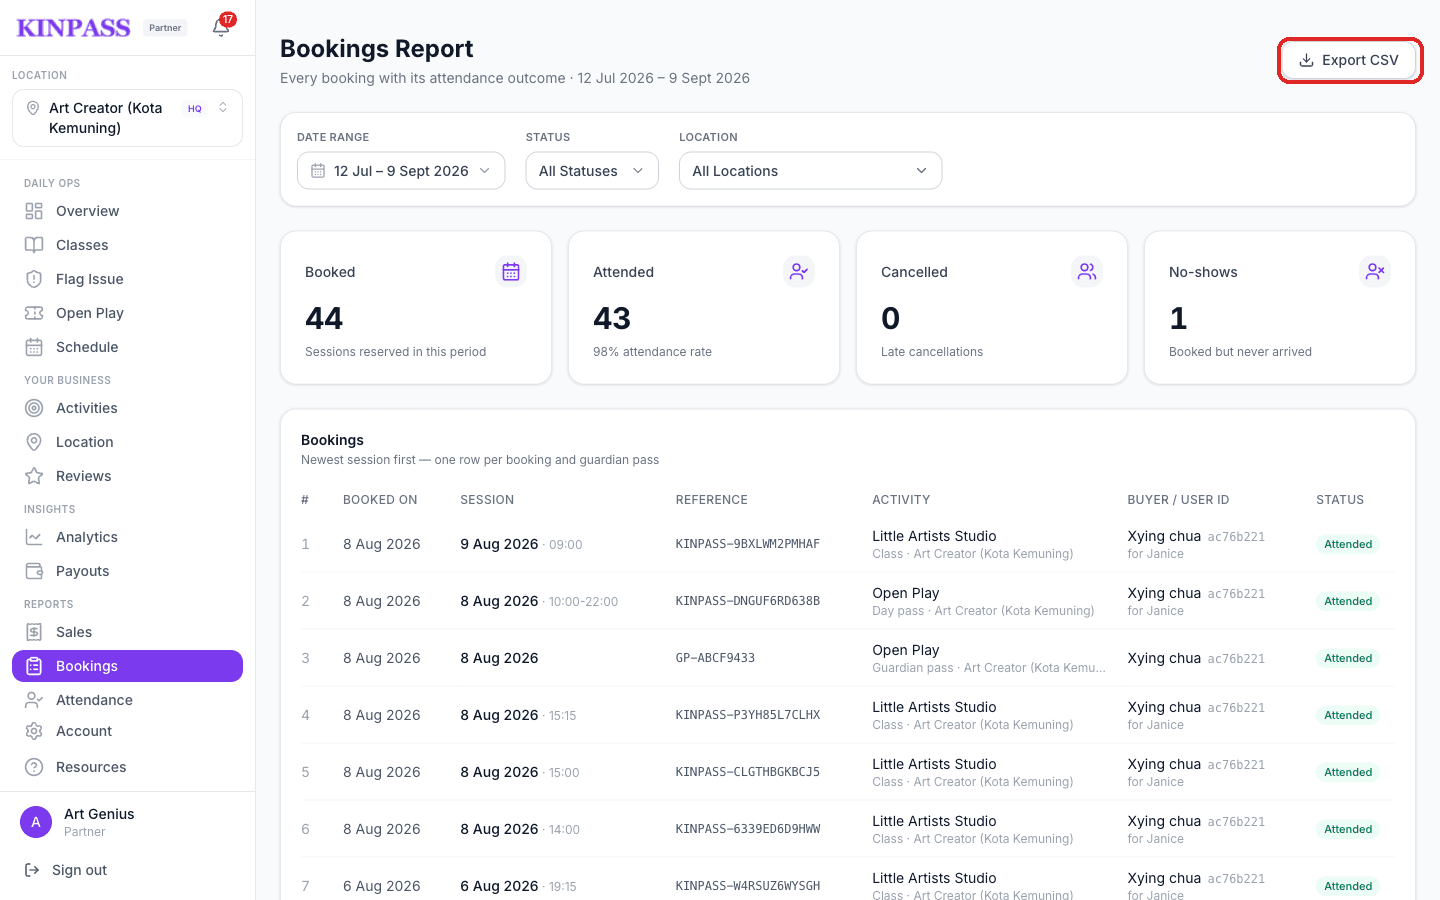
Reports → Bookings shows every session reserved in the period, split into attended, cancelled, and no-shows.
Use the filters at the top to narrow by date, status, or branch.
Your attendance rate and no-shows
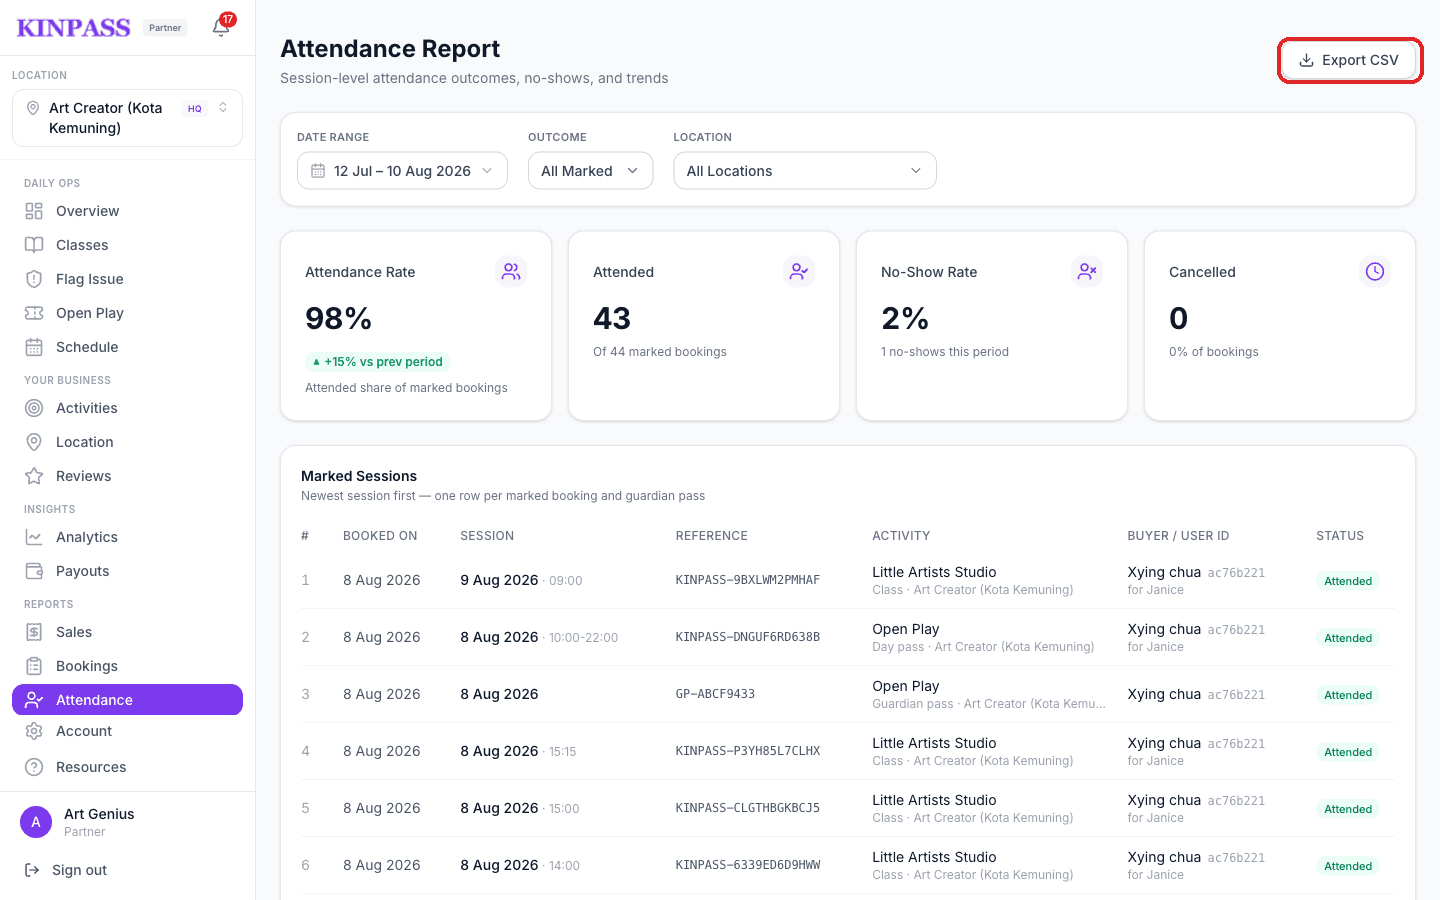
Reports → Attendance is one row per marked booking, with your overall attendance rate and how it compares to the previous period.
A rising no-show rate usually means class times need a look — or that reminders aren't reaching families.
Your team
Add staff and control what they can see
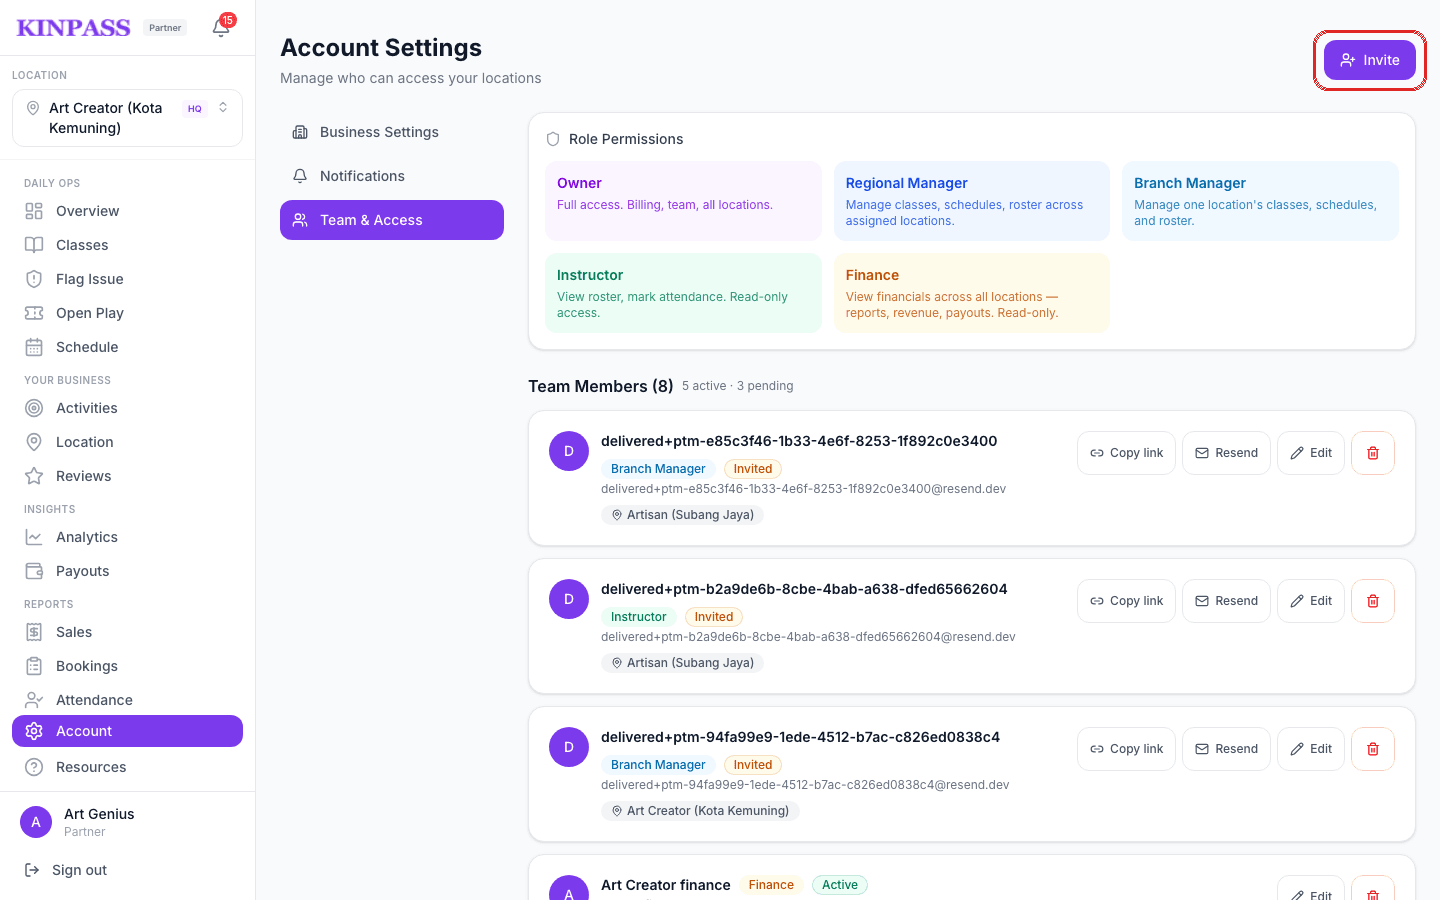
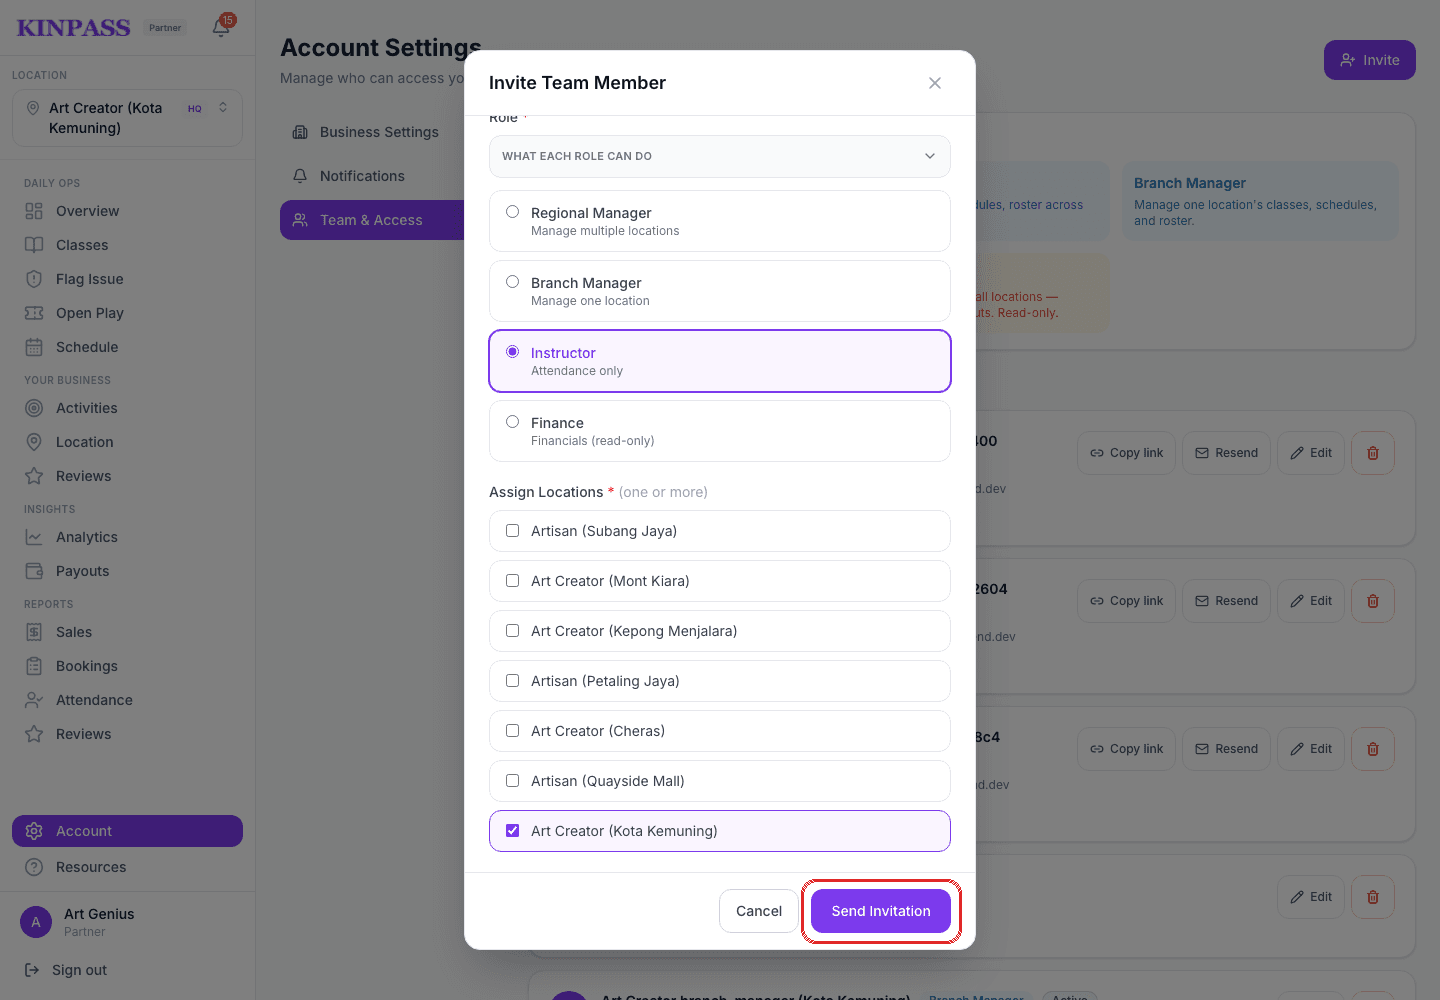
Roles control exactly what each teammate can do — hover What each role can do in the invite form for the full breakdown before you choose.
Tap Account → Team & Access, then click Invite.
Type their name and email.
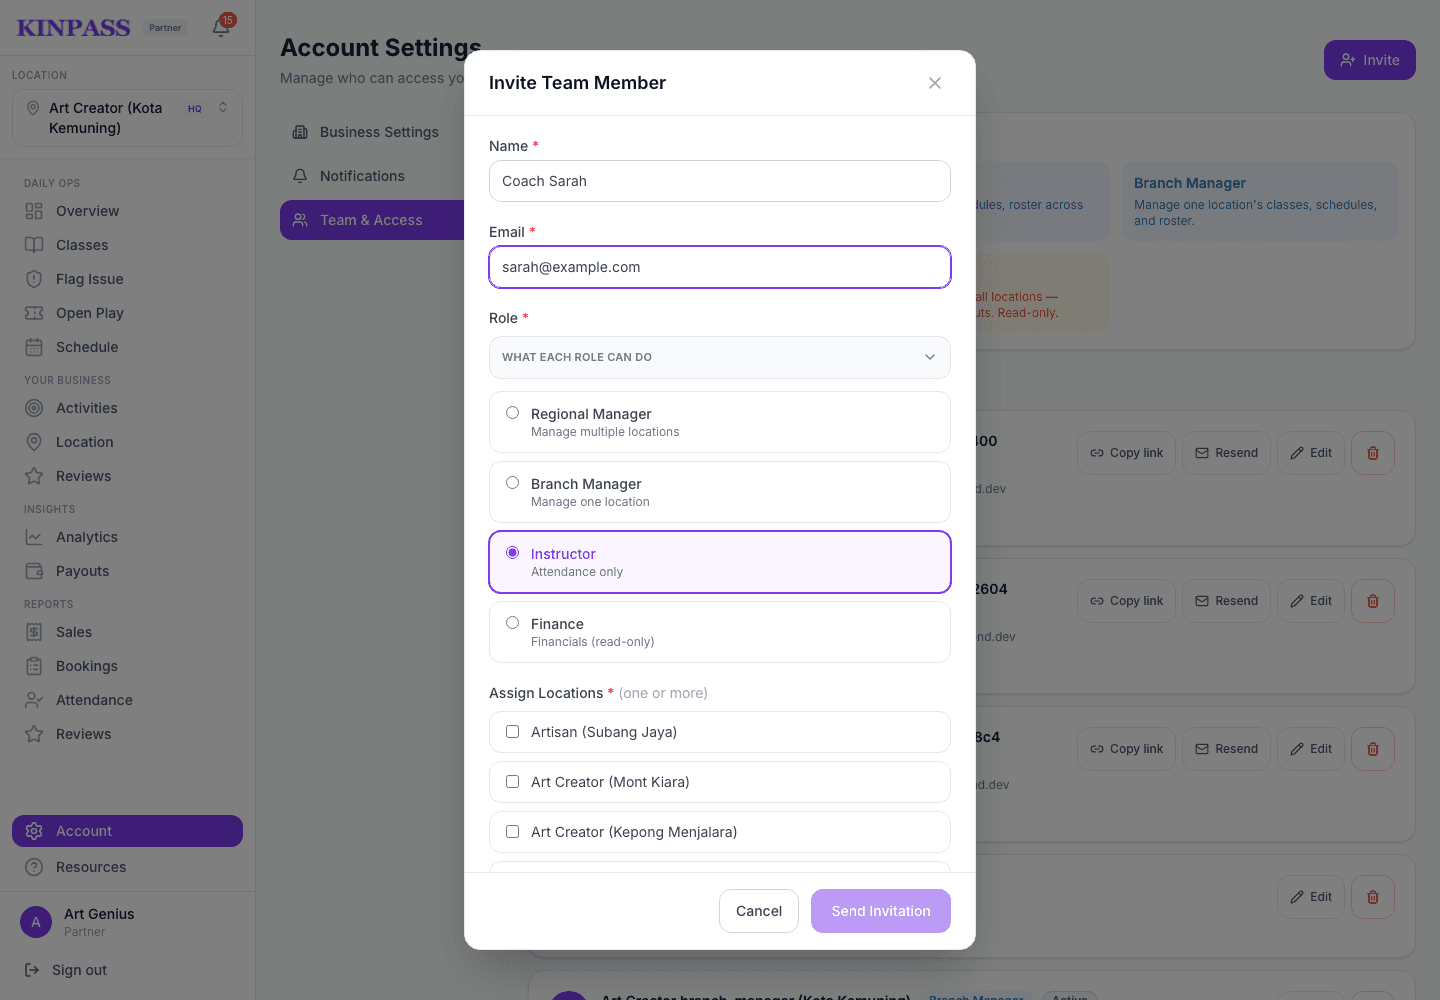
Choose a role, tick at least one location, then click Send Invitation.
Help
Tips, best practices, and FAQs
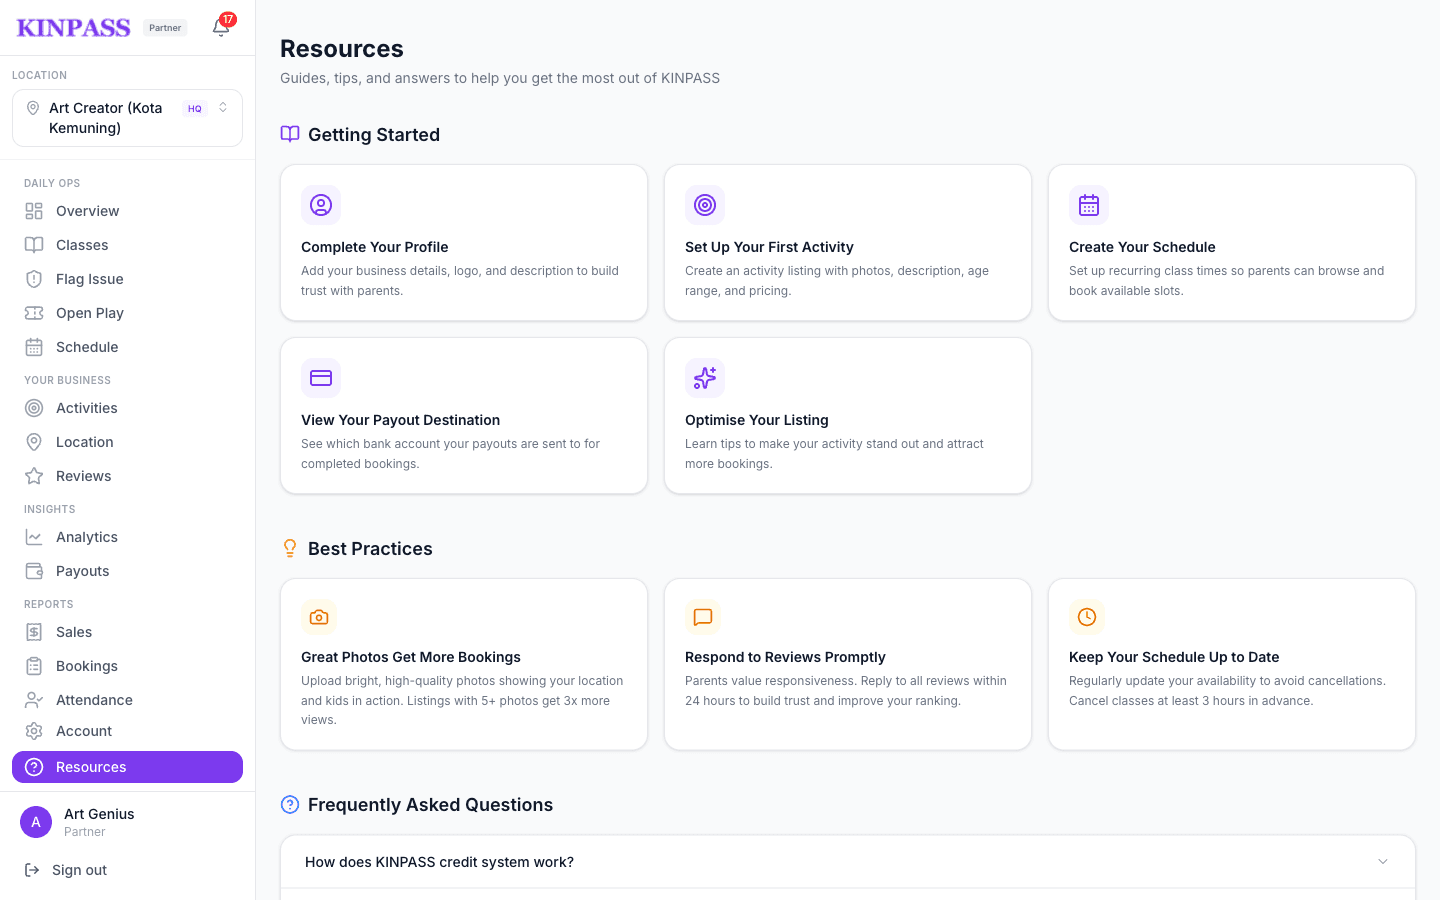
Resources collects short guides for setting up your profile, your first activity, and your schedule, plus answers to common questions about credits and payouts.
Still stuck? Email partners@kinpass.com and the KINPASS team will help.